Making falafel at home used to seem like a messy, complicated affair, but once I focused on balancing the spices and texture, everything changed. It’s about that perfect crispy shell with a tender, flavorful inside—something I chase every time I fry a batch. This recipe is my honest attempt to capture that elusive harmony, using fresh herbs and a touch of patience.
What keeps me coming back to this dish isn’t just the taste, but the process—the way the spices bloom as the falafel cooks, filling the kitchen with a smoky, herby aroma. I love how each bite can be both crunchy and moist, a contrast that takes a little finesse but pays off big. Homemade falafel became my ritual, a simple act of grounding and joy amidst busy days.
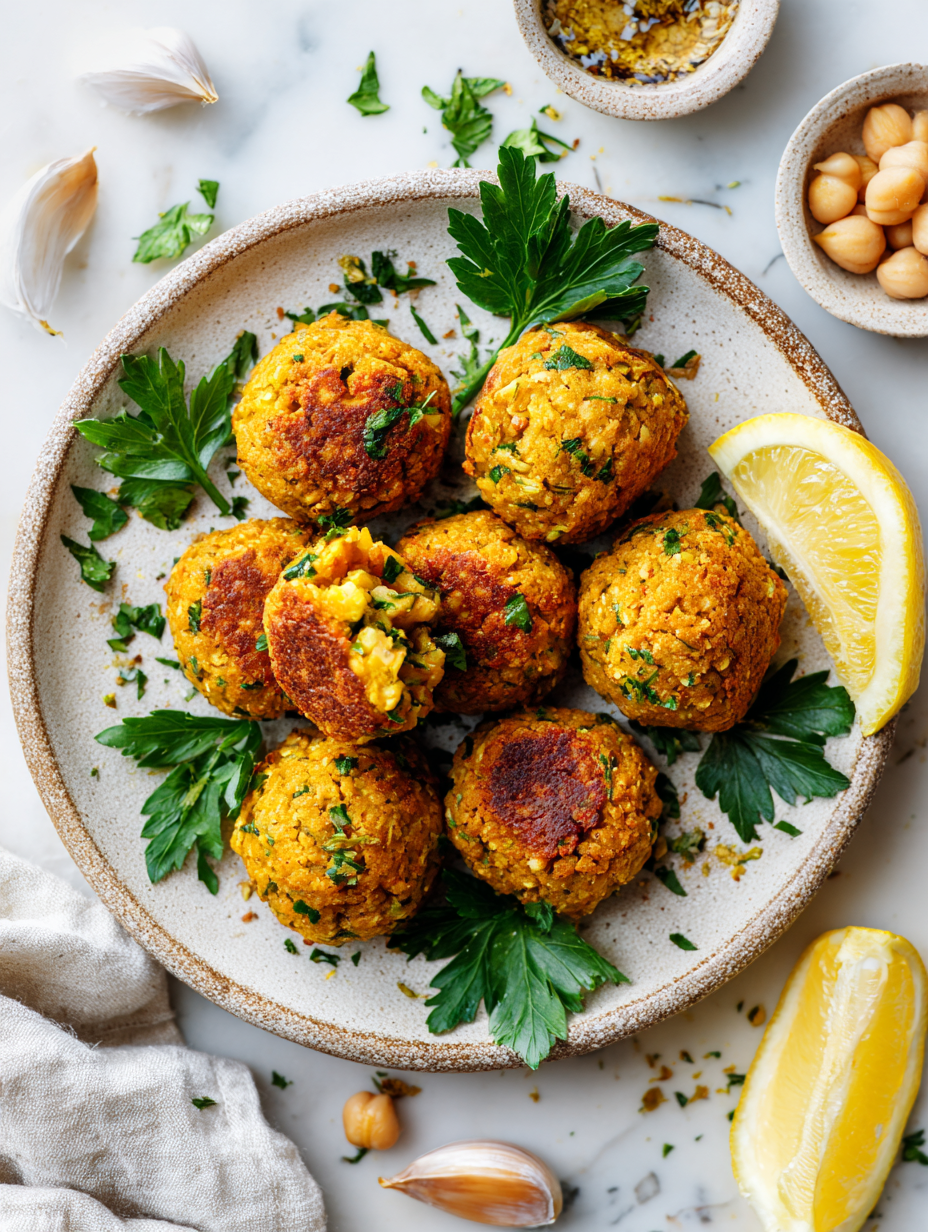
Focusing on the forgotten art of balancing spice and texture in homemade falafel, this recipe emphasizes the importance of fresh herbs and crispy exterior for an authentic bite.
Reviving the Art of Balancing Spice and Texture
- The first time I cracked open a can of chickpeas and realized I could make falafel that tasted just as good as takeout, I felt a small rush of pride.
- There’s a chaotic joy in frying falafel—watching them turn golden and crispy, smelling that smoky herb aroma fill the kitchen, always makes me smile.
- I remember my grandma’s hands working through the mixture, teaching me how to get that perfect texture—her touch still guides my hands today.
- Every batch feels like a little victory, especially when I nail that crunch on the outside while keeping the inside tender and flavorful.
- Falafel reminds me of lazy weekends in the sun, sharing pita sandwiches with friends, laughter bubbling over spicy, herby bites.
The story behind this recipe
- Making falafel from scratch always feels like reconnecting with a tradition I nearly forgot—those afternoons spent in my grandmother’s kitchen, pounding herbs and chickpeas, feeling the pulse of something ancient and nourishing. It’s a messy process, sure, but that’s part of the charm—each batch a little messy, a little imperfect, but full of love. I started experimenting with different herbs and spices, trying to recreate the vibrant, crispy falafel I grew up loving from street vendors, but with a personal, homemade touch.
- What keeps me hooked isn’t just the taste, but the act of making it—filling my kitchen with smoky, herby aromas that seem to slow down time. I love how the outside turns that perfect golden brown, crackling as I turn them, and the tender, moist insides that hold just enough spice. Every batch feels like a small victory, especially when I get that crunch and flavor just right, reminding me that sometimes, the messiest recipes are the most rewarding.
- heading
- story_type
Falafel’s Rich History and Trivia
- Falafel’s roots trace back over a thousand years, believed to have originated in the Middle East, with variations across North Africa and the Levant.
- Some historians think falafel was initially a street food for Egyptian Copts, offering a meatless protein option during Lent, which evolved into a beloved national dish.
- The spices and herbs used in traditional falafel vary regionally—think cumin and coriander in the Middle East, or parsley and cilantro in North Africa—each adding a unique flavor profile.
- In many Middle Eastern countries, falafel is more than just food; it’s a symbol of hospitality, community, and everyday life, often shared with friends over simple meals.
- Modern twists, like adding sweet potato or beetroot to the mixture, are recent innovations, but the core—crispy, herbaceous, filling—remains timeless.
Key Ingredients Breakdown
- Chickpeas: I prefer dried, soaked overnight for a nutty, oozing interior—skip the canned for a richer flavor.
- Fresh herbs: Parsley and cilantro brighten the mix with a vibrant, herby aroma—don’t skimp on them, even if you’re in a hurry.
- Garlic: I use freshly minced garlic, which adds a pungent kick that awakens every bite—if you want milder flavor, reduce the amount slightly.
- Cumin and coriander: Warm, smoky spices that give falafel its signature depth—toast them briefly before grinding for extra aroma.
- Onion: Finely chopped onion adds moisture and sweetness—caramelize it slightly for a richer, deeper flavor if you like.
- Flour or breadcrumbs: Helps bind everything together—use chickpea flour for authenticity or regular flour if that’s what you have.
- Oil for frying: I prefer a neutral oil like vegetable or sunflower—look for that gentle shimmer, not smoke, when heating.
Spotlight on key ingredients
Chickpeas:
- I prefer dried, soaked overnight for a nutty, oozing interior—skip the canned for a richer flavor.
- Fresh herbs: Parsley and cilantro brighten the mix with a vibrant, herby aroma—don’t skimp on them, even if you’re in a hurry.
- Cumin and coriander: Warm, smoky spices that give falafel its signature depth—toast them briefly before grinding for extra aroma.
Herbs (parsley & cilantro):
- Parsley: I love its bright, grassy scent that awakens the palate—use fresh, not dried, for maximum vibrancy.
- Cilantro: Adds a fresh, citrusy brightness and a slight peppery note—be generous, it’s key to the flavor.
Notes for ingredient swaps
- Dairy-Free: Skip yogurt or dairy-based binders, use extra herbs or a splash of olive oil for moisture.
- Gluten-Free: Replace regular flour with chickpea flour or gluten-free breadcrumbs for a similar binding effect.
- Low-Sodium: Use less salt or opt for salt-free seasoning blends to control saltiness without losing flavor.
- Herb Variations: Swap parsley with basil or mint for a different fresh note, keep in mind the flavor profile shifts.
- Spice Level: Adjust cumin and coriander to taste; add a pinch of cayenne for heat or omit for milder falafel.
- Oil Type: Use avocado or coconut oil for a different smoky or mild flavor, but keep an eye on smoke points.
- Chickpeas: If fresh dried aren’t available, use well-drained canned chickpeas, but expect a softer texture and less ooze.
Equipment & Tools
- Food processor: To finely chop herbs and pulse chickpeas for the right texture.
- Mixing bowl: To combine ingredients and hold the mixture before shaping.
- Frying pan or deep fryer: To cook falafel evenly and achieve crispy exterior.
- Slotted spoon: To carefully turn and remove falafel from hot oil.
- Paper towels: To drain excess oil and keep falafel crispy.
Step-by-step guide to falafel
- Equipment & Tools: Gather a food processor (for blending herbs and chickpeas), a mixing bowl (to combine ingredients), a frying pan or deep fryer (for crisping), a slotted spoon (for turning falafel), and paper towels (to drain excess oil).
- Soak 1 cup dried chickpeas overnight in plenty of cold water until doubled in size. Drain and pat dry thoroughly. This ensures a tender, oozy interior.
- In the food processor, pulse 1 cup fresh parsley, 1 cup cilantro, and 2 cloves garlic until finely chopped—don’t overblend into a paste. Scrape down sides.
- Add the soaked chickpeas, 1 small finely chopped onion, 1 teaspoon cumin, 1 teaspoon coriander, and 1 teaspoon salt to the processor. Pulse until mixture is coarse but holds together when pressed—about 10-12 pulses.
- Transfer to a bowl, stir in 2 tablespoons chickpea flour or breadcrumbs to help bind. Taste and adjust salt or spices if needed.
- Form the mixture into small, slightly flattened balls or patties, about the size of a walnut. Keep hands moist to prevent sticking.
- Heat 2-3 cm of neutral oil in the frying pan over medium-high heat (around 180°C/356°F). When shimmering, gently add falafel—don’t overcrowd.
- Fry for about 3-4 minutes per side, turning carefully, until golden brown and crispy. Crackle and smell should be smoky, herby, and inviting.
- Use the slotted spoon to transfer falafel to paper towels. Rest for 2 minutes to finish crisping.
- Resting & Finishing: Serve immediately with warm pita, fresh herbs, and a squeeze of lemon. Let sit for 1-2 minutes to settle before plating.
Serve fresh, letting falafel sit just a minute to settle. Pair with pita, herbs, and lemon for a complete bite. Enjoy the contrast of crisp shell and tender inside.
How to Know It’s Done
- Falafel should be golden and crispy on the outside.
- Inside texture should be moist but holding shape when pressed.
- A gentle crackle in the oil indicates proper frying temperature.
Homemade Falafel
Ingredients
Equipment
Method
- Start by soaking dried chickpeas overnight in plenty of cold water until they double in size. Drain well and pat dry to remove excess moisture.
- In a dry skillet, toast cumin and coriander briefly over medium heat until fragrant, then grind them into a powder using a mortar and pestle or spice grinder.
- In a food processor, pulse parsley, cilantro, and minced garlic until finely chopped but not pasty. Transfer to a mixing bowl.
- Add the soaked chickpeas, finely chopped onion, toasted spices, salt, and pepper to the processor. Pulse until the mixture is coarse but holds together when pressed, about 10-12 pulses.
- Transfer the mixture to a bowl and stir in chickpea flour or breadcrumbs to help bind everything together. Adjust seasoning as needed.
- Using damp hands, shape the mixture into small balls or patties, about the size of a walnut, pressing gently to flatten slightly.
- Heat enough neutral oil in a frying pan over medium-high heat until shimmering and bubbling slightly—about 180°C (356°F).
- Carefully add the shaped falafel to the hot oil, frying in batches to avoid overcrowding. Cook for 3-4 minutes per side until golden brown and crispy, with a smoky aroma filling the air.
- Use a slotted spoon to transfer the cooked falafel to paper towels, draining excess oil. Rest for a minute to finish crisping.
- Serve immediately with warm pita, fresh herbs, and a squeeze of lemon for a classic presentation. Enjoy the crunchy exterior paired with the tender, flavorful inside.
Falafel Cooking Tips
- Bolded mini-head: Keep the mixture cold → Chilling the falafel mixture prevents the oil from seeping in, keeping them crisp.
- Bolded mini-head: Use fresh herbs → Bright, fragrant herbs like parsley and cilantro add flavor and color that stay vibrant during frying.
- Bolded mini-head: Don’t overcrowd the pan → Fry in batches to maintain oil temperature and ensure even crisping.
- Bolded mini-head: Test oil temperature → A small piece of bread should sizzle and turn golden in 30 seconds; adjust heat accordingly.
- Bolded mini-head: Shape with moist hands → Keeps the mixture from sticking and helps achieve uniform falafel balls or patties.
- Bolded mini-head: Drain on paper towels → Absorbs excess oil, keeping falafel crispy and not greasy.
- Bolded mini-head: Rest briefly before serving → Letting them sit for a minute helps set their shape and enhances crunch.
Common falafel mistakes and fixes
- TOO DRY: Dried chickpeas need soaking; canned can cause a dense, greasy falafel—soak overnight for best texture.
- OVER-SPICED: Too much cumin or garlic overwhelms; start small, taste, then adjust gradually.
- UNDERRIPE HERBS: Use fresh, vibrant herbs; wilted or dry herbs dull the flavor and aroma.
- OIL TEMPERATURE: Fry at too low or high heat; too low leads to greasy falafel, too high burns outside—use a thermometer.
Falafel Quick Fixes
- If the falafel mixture feels too dry, splash in a little cold water and knead briefly.
- When the oil shimmers but doesn’t crackle, increase the heat slightly for a better sizzle.
- Splash a few drops of lemon juice into the mixture for a bright, fresh flavor boost.
- Patch cracked falafel by gently pressing the edges back together before frying again.
- Shield burnt falafel by lowering the heat immediately and removing the charred pieces.
Prep, store, and reheat tips
- Prepare the falafel mixture up to a day in advance; keep it covered in the fridge to let flavors meld and develop. The herbs and spices will become more vibrant after a rest.
- Shape the falafel into balls or patties ahead of time, then refrigerate on a tray lined with parchment. They can stay chilled for up to 24 hours without losing shape.
- Falafel can be stored in an airtight container in the fridge for 2-3 days. Reheat in a hot skillet or oven until crispy, about 5-7 minutes. The aroma will turn smoky and herby again.
- For longer storage, freeze shaped falafel on a tray until firm, then transfer to a zip-top bag. Freeze for up to 1 month. Reheat from frozen in hot oil or oven for best texture.
- Reheating will revive their crunch, but they won’t be quite as crisp as fresh. Expect a warm, fragrant interior with a slightly softer shell. Serve with a squeeze of lemon to freshen.
Top questions about falafel
1. Can I use canned chickpeas?
Using dried chickpeas soaked overnight gives a firmer, more authentic texture. Canned chickpeas make the mixture softer, so adjust with extra flour.
2. What temperature should the oil be?
Frying at around 180°C (356°F) ensures a crispy crust without burning. Use a thermometer for accuracy.
3. Why does my falafel fall apart?
To prevent falafel from falling apart, make sure the mixture is well combined and chilled, and don’t overmix.
4. How do I shape the falafel?
Shape the mixture into balls or patties with wet hands to prevent sticking, and fry in small batches for even cooking.
5. How do I store leftovers?
Falafel is best fresh, but can be stored in the fridge for up to 2 days or frozen for up to a month. Reheat in a hot oven or skillet.
6. What herbs and spices are essential?
Use fresh herbs like parsley and cilantro for vibrant flavor. Toast cumin and coriander briefly for a smoky aroma.
7. My mixture is too wet or dry, what now?
If the mixture feels too wet, add a little more flour or breadcrumbs. Too dry? A splash of water helps bind it.
8. How do I know when the oil is ready?
Make sure the oil is hot enough before frying. Drop a small piece of bread—if it sizzles and turns golden, it’s ready.
9. How can I keep falafel crispy?
For a crispy exterior, don’t overcrowd the pan and fry in small batches. Drain on paper towels afterward.
10. Should I add lemon during cooking or serving?
Adding a squeeze of lemon before serving brightens the flavors and enhances the fresh herbs.
Making falafel at home isn’t just about the crispy exterior, but the memories and small victories in each batch. The smoky aroma and vibrant herbs make the effort worth it, especially when paired with simple, fresh accompaniments. It’s a reminder that good food often comes from honest, unpolished moments in the kitchen.
In a world rushing towards convenience, these little fried orbs reconnect me with tradition and patience. They’re not perfect every time, but that’s part of the charm—each falafel a tiny, flavorful rebellion against the hurried pace of modern life.

Hi, I’m Oliver Stone, the writer, cook, and storyteller behind Crying Into the Onions. I’m so glad you found your way here. This blog was born from equal parts humor, heart, and a deep love for honest cooking. I started this blog to share more than just recipes — I wanted to capture the emotions, memories, and quirks that make food more than fuel. Because sometimes, cooking makes you laugh. Sometimes, it makes you cry (into the onions, naturally). And most of all, it brings people together.

