Getting that perfect crunch in vegetable pakoras isn’t just about the ingredients; it’s about mastering the technique. I’ve spent years tinkering with batter consistency and frying temperatures, and let me tell you, the difference is in the details. It’s a kind of unspoken art that separates a soggy snack from one that’s crispy and light.
There’s something incredibly satisfying about transforming humble vegetables into golden, crunchy bites. These pakoras aren’t just snack food—they’re a reminder of how simple, honest cooking can turn everyday ingredients into something quietly special. Plus, they’re a great way to use up odds and ends in your veggie drawer without fuss.
Focusing on the unspoken art of achieving the perfect crispness in vegetable pakoras, this recipe emphasizes technique over ingredients, sharing honest tips to transform simple vegetables into irresistibly crunchy bites that hold up even after sitting on the plate.
The unspoken art of crispness
- Frying these pakoras always takes me back to my grandmother’s kitchen, where the smell of cumin and turmeric filled the air.
- I’ve learned that the secret to crackling batter is all about the oil temperature—too hot and they burn, too cool and they turn soggy.
- There’s a quiet pride in watching these vegetables turn golden and crispy, knowing I got the batter just right after so many tries.
- Sometimes, I make a big batch just to have a snack ready for the week—freezing them keeps that crunch intact.
- I still get a little nervous when dropping the batter—hoping that each one sizzles perfectly without sticking.
The story behind this recipe
- Making vegetable pakoras has always been a family affair for me, especially on rainy weekends when the kitchen fills with the aroma of spices and fried batter. I remember my mother carefully balancing the oil temperature, telling me to watch for that perfect crackle as the batter hits the hot oil. Over the years, I’ve come to appreciate the quiet dance of technique and instinct that makes each batch just right.
- This recipe isn’t just about frying vegetables; it’s about capturing a moment of messy, joyful cooking where mistakes turn into lessons. When I first tried to make them on my own, I was frustrated by uneven crispness, but that taught me the importance of temperature control and batter consistency. Now, these pakoras remind me that sometimes, the best snacks come from a little patience and a lot of tasting along the way.
- heading: The art of crispy bites
Trivia and history of vegetable pakoras
- Vegetable pakoras have roots in Indian street food, where vendors fry up small batches on busy corners, their aromas drifting through the air.
- The word ‘pakora’ comes from the Hindi word ‘pakorā’, which itself is derived from Persian, reflecting centuries of culinary exchange along trade routes.
- Traditionally, pakoras were a way to use leftover vegetables, turning humble ingredients into crispy, satisfying snacks that helped stretch a meal.
- In some regions, a dash of carom seeds or ajwain is added to the batter—these tiny seeds add a smoky, pungent kick that wakes up the palate.
- During festivals and family gatherings, making a big batch of pakoras is more than a snack—it’s a communal act, a way to share warmth and good cheer.
Ingredient breakdown: key components
- Onion: I like slicing these thin for a crispier pakora; thicker slices stay soft—try thin for crunch.
- Chickpea flour: It’s the backbone of the batter—adds nuttiness and helps crisp up; swap with rice flour for a lighter bite, but expect less chew.
- Vegetables: I use grated zucchini and carrots—they add moisture and sweetness. Use what you have, but avoid watery veggies unless you drain them well.
- Spices: Cumin and coriander are my go-tos—they add warmth and depth. Adjust for more punch or go mild, depending on your mood.
- Water: Just enough to make a thick batter—think pancake consistency. Too runny, and they can fall apart; too thick, and they won’t coat well.
- Oil: I prefer neutral oil like sunflower or canola—hot enough at 180°C/356°F for that perfect crackle. If it smokes, it’s too hot—dial down slightly.
- Optional herbs: Fresh cilantro or mint brighten the flavor—chop fine, add just before frying for maximum freshness.
Spotlight on key ingredients
Onion:
- I like slicing these thin for a crisper bite; thicker slices stay softer—try thin for crunch.
- Chickpea flour: It’s the backbone of the batter—adds nuttiness and crispness; swap with rice flour for a lighter bite, but expect less chew.
- Vegetables: I use grated zucchini and carrots—they add moisture and a touch of sweetness. Use what you have, but drain watery veggies well.
Vegetables:
- Chickpea flour: I rely on this for that golden crust—adds flavor and helps crisp; if you don’t have it, try rice flour, but it won’t be quite the same.
- Grated zucchini and carrots are my favorites—they bring moisture and a gentle sweetness. Drain excess water to keep batter thick.
Notes for ingredient swaps
- Dairy-Free: Use chickpea or rice flour exclusively, which keeps the batter gluten-free and adds a nutty flavor, but might be slightly less tender.
- Gluten-Free: Replace regular wheat flour with chickpea or rice flour for a crispier texture, though it may be a bit more brittle.
- Vegan: Skip any egg or dairy additives; stick to plant-based flours and vegetables for a light, crispy bite.
- Low-Sodium: Reduce salt and choose unsalted or low-sodium spices; the flavor will be more delicate but still vibrant.
- Extra Veggies: Incorporate spinach, kale, or bell peppers for more color and nutrients—just chop finely to keep batter manageable.
- Herb Variations: Swap cilantro for mint or parsley for a different fresh note—experiment with what’s in your garden.
- Spice Level: Add cayenne or chili powder if you like heat; start small and adjust to taste for a fiery kick.
Equipment & Tools
- Mixing bowl: For combining batter ingredients.
- Whisk: To thoroughly mix dry and wet ingredients.
- Deep-fry thermometer: To monitor accurate oil temperature.
- Slotted spoon: To carefully lower and lift pakoras from hot oil.
- Paper towels: To drain excess oil from fried pakoras.
- Heavy-bottomed pan or wok: To ensure even heat distribution during frying.
Step-by-step guide to vegetable pakoras
- Equipment & Tools: Gather a mixing bowl (for batter), whisk (to combine ingredients), deep-fry thermometer (to monitor oil), slotted spoon (for frying), paper towels (to drain), and a large, heavy-bottomed pan or wok (for frying).
- Prepare vegetables: Finely grate 1 cup zucchini and 1 cup carrots. Squeeze out excess moisture with a paper towel. Set aside.
- Mix dry ingredients: In the bowl, combine 1 cup chickpea flour, 1 teaspoon cumin, ½ teaspoon turmeric, and a pinch of salt. Whisk together.
- Add vegetables: Toss grated zucchini and carrots into the dry mixture until evenly coated. This helps prevent sogginess.
- Make batter: Slowly add ½ cup water (adjust as needed) while stirring, until you get a thick, spoonable batter that coats the vegetables well. It should be similar to pancake batter — not runny.
- Heat oil: Fill the pan with about 2 inches of oil. Heat over medium-high (around 180°C / 356°F). Use the thermometer to check temperature. When hot, a small drop of batter sizzles immediately.
- Fry pakoras: Drop spoonfuls of batter into the hot oil, gently pressing down if needed. Fry in batches, turning occasionally. Cook for about 3-4 minutes per batch, until golden and crispy.
- Check doneness: Pakoras should be deep golden, crackle when moved, and feel firm. If they turn dark too quickly, lower the heat. If pale and soft, increase heat slightly.
- Drain and rest: Remove with a slotted spoon, drain on paper towels. Let rest for 2 minutes to crisp up further.
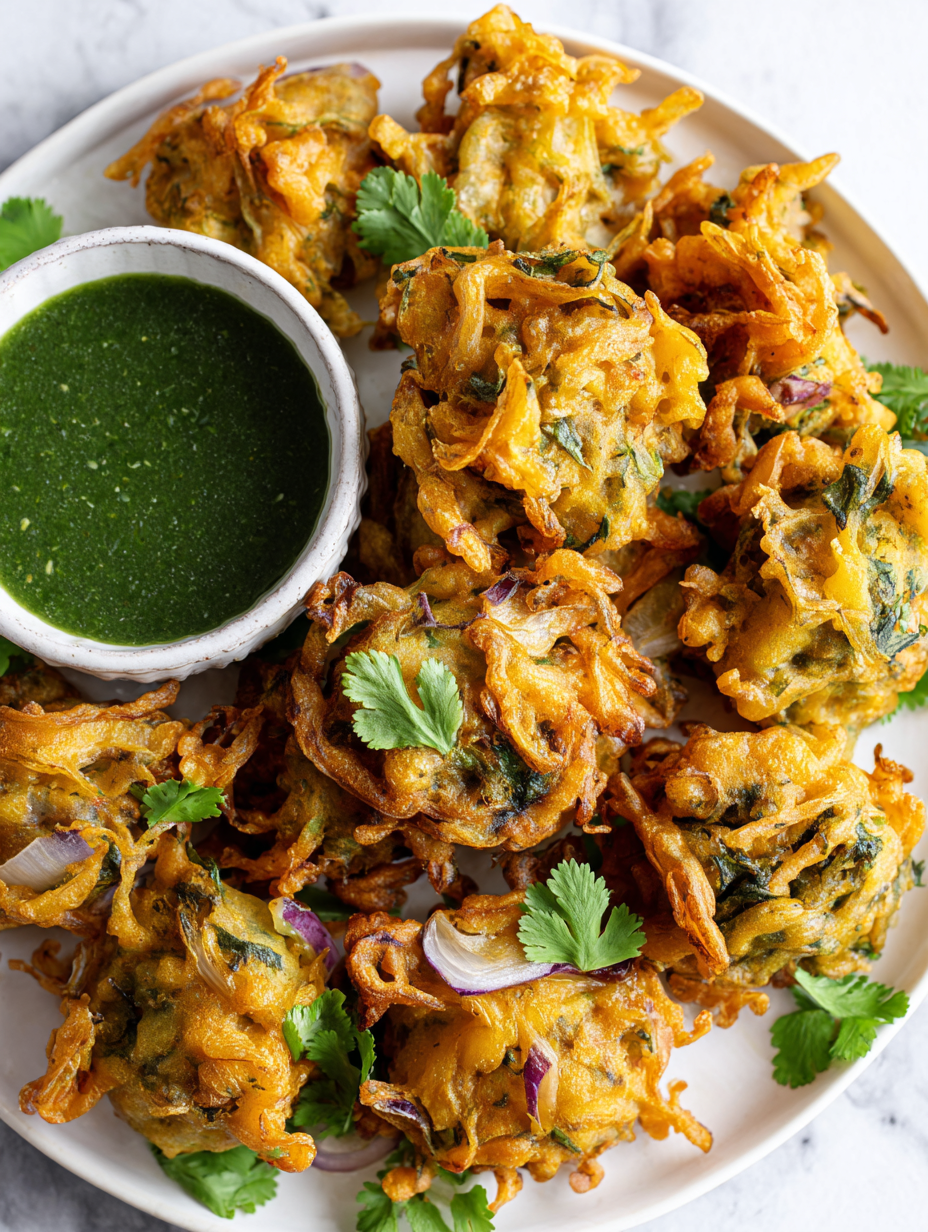
- Serve: Plate warm, with chutney or yogurt if desired. Enjoy the crunch and spicy warmth.
Let the fried pakoras rest on paper towels for a couple of minutes. Serve hot with chutney or yogurt, and enjoy that irresistible crispness with every bite.
How to Know It’s Done
- Color: Deep golden brown and crispy surface.
- Texture: Firm and crunchy, not soggy or greasy.
- Appearance: Even frying without burnt or undercooked spots.
Vegetable Pakoras
Ingredients
Equipment
Method
- Gather all ingredients: grate the zucchini and carrots, squeezing out any excess moisture with a paper towel.
- In a mixing bowl, combine chickpea flour, cumin seeds, turmeric, and salt. Whisk to evenly distribute the spices.
- Add the grated vegetables to the dry mixture, tossing to coat evenly. This helps prevent sogginess during frying.
- Gradually pour in water, stirring gently to form a thick batter that coats the vegetables well—similar to pancake batter consistency.
- Heat about two inches of oil in a heavy-bottomed pan or wok over medium-high heat, checking the temperature with a deep-fry thermometer; aim for 180°C (356°F).
- Once the oil reaches temperature, gently drop spoonfuls of batter into the hot oil, pressing lightly to flatten slightly. You should hear a lively sizzle and see bubbles forming immediately.
- Fry the pakoras in small batches, turning occasionally with a slotted spoon, until they are deep golden brown and crispy—about 3 to 4 minutes per batch.
- Use a slotted spoon to remove the fried pakoras, draining excess oil, and place them on paper towels to finish crisping up.
- Repeat frying with remaining batter, maintaining oil temperature, until all pakoras are cooked.
- Serve the crispy vegetable pakoras hot, garnished with chopped cilantro or mint if desired, alongside chutney or yogurt for dipping.
Pro tips for crispy vegetable pakoras
- Use a thermometer to keep oil at 180°C (356°F); it’s key for crispness and even cooking.
- Mix your batter quickly but don’t overwork it—this keeps the pakoras light and airy.
- Drop the batter gently into hot oil—avoid splashes that cause uneven frying or burns.
- Fry in small batches—crowding the pan drops oil temperature and results in soggy pakoras.
- Use a slotted spoon to turn pakoras carefully—this prevents breaking and keeps the coating intact.
- Rest fried pakoras on paper towels for a minute—this drains excess oil and preserves crispness.
- Adjust frying time if they darken too quickly—lower heat slightly to avoid burnt edges.
Common mistakes and how to fix them
- TOO MUCH OIL: Use less oil to prevent greasy pakoras and ensure crispness.
- UNDERCOOKED: Fry until deep golden and crispy, not just pale; test with a crackle sound.
- OVER-TORCHED: Keep an eye on heat; burnt batter tastes bitter, fix by lowering heat immediately.
- NOT ENOUGH REST: Let fried pakoras rest on paper towels to drain excess oil and crisp up.
Quick fixes and pantry swaps
- If batter is too thick → splash in a little water and stir until just combined.
- When oil shimmers but doesn’t crackle → increase heat slightly for better frying.
- Splash of burnt oil smell → lower heat immediately and add fresh oil if needed.
- DUMPED batter too runny → add more chickpea flour to thicken before frying.
- When pakoras stick together → gently separate with a fork or spoon during frying.
Prep, store, and reheat tips
- Prepare the vegetable mixture and batter ahead—store in an airtight container in the fridge for up to 24 hours to maintain freshness and prevent spoilage.
- Fried pakoras can be kept in a single layer on a wire rack lined with paper towels, then refrigerated for up to 2 days. Reheat in a 180°C (356°F) oven until crispy, about 8-10 minutes, for the best crunch.
- For longer storage, freeze uncooked batter in portions—wrap tightly and freeze for up to 1 month. Fry directly from frozen, adding an extra minute or two to cooking time.
- Reheated pakoras tend to lose some crispness but can be revived by a quick re-fry in hot oil or oven. Expect a softer texture, but still flavorful warmth and spice. Sensory note: smell of reheated spices and a gentle crackle.
Top Questions About Vegetable Pakoras
1. How do I know when the oil is hot enough?
Use a thermometer to keep oil at 180°C (356°F). It ensures crispness and even cooking.
2. How should I handle the batter when frying?
Drop batter gently into hot oil to avoid splashes and uneven frying. Use a spoon for control.
3. Can I fry all pakoras at once?
Fry in small batches to maintain temperature. Overcrowding makes pakoras soggy and greasy.
4. How do I know when the pakoras are done?
Check for deep golden color and crackling sound. They should feel firm and crispy when touched.
5. Should I drain the fried pakoras?
Rest fried pakoras on paper towels for a minute to drain excess oil and keep them crispy.
6. Can I make the batter ahead of time?
Uncooked batter can be stored in the fridge for up to 24 hours. Reheat or fry from cold.
7. How do I reheat leftover pakoras?
Reheat fried pakoras in a 180°C (356°F) oven for 8-10 minutes until crispy again.
8. What if my batter is too runny?
To keep batter thick, add water gradually and aim for pancake-like consistency. Too runny, fix with more flour.
9. How should I handle the pakoras during frying?
Use a slotted spoon to turn and remove pakoras, preventing breakage and ensuring even crispness.
10. What if my pakoras stick together?
If batter sticks or clumps, gently separate with a spoon or fork during frying to prevent sticking.
These vegetable pakoras are more than just a snack—they’re a reminder of how simple ingredients can come alive with a little care and attention. The crackle of the batter and the warm spices evoke cozy memories, making each bite feel special. In today’s busy world, they offer a moment of honest, satisfying cooking that’s rooted in tradition.
Whenever I fry a batch, I’m reminded of the joy in small, messy victories—perfectly crispy bites that make everyone smile. They’re easy to adapt and perfect for sharing, whether you’re craving comfort or just something crispy and fresh. Sometimes, the best recipes are the ones that bring us back to the kitchen, one crunchy bite at a time.

Hi, I’m Oliver Stone, the writer, cook, and storyteller behind Crying Into the Onions. I’m so glad you found your way here. This blog was born from equal parts humor, heart, and a deep love for honest cooking. I started this blog to share more than just recipes — I wanted to capture the emotions, memories, and quirks that make food more than fuel. Because sometimes, cooking makes you laugh. Sometimes, it makes you cry (into the onions, naturally). And most of all, it brings people together.

