There’s something oddly satisfying about turning random odds and ends from the fridge into veggie balls. It’s like a little kitchen chaos that ends in something warm and hearty, perfect for when you don’t want to waste but still crave comfort. I’ve learned to embrace the mess, trusting that a pinch of this and a dash of that can become something unexpectedly good.
This recipe is all about improvisation—using what you have on hand, whether that’s limp carrots, wilting greens, or leftover grains. The magic happens when you blend those odd bits into a cohesive mix, then bake or fry them until crispy on the outside. It’s imperfect, unpolished, but honest food that makes you feel a little creative and a little proud.
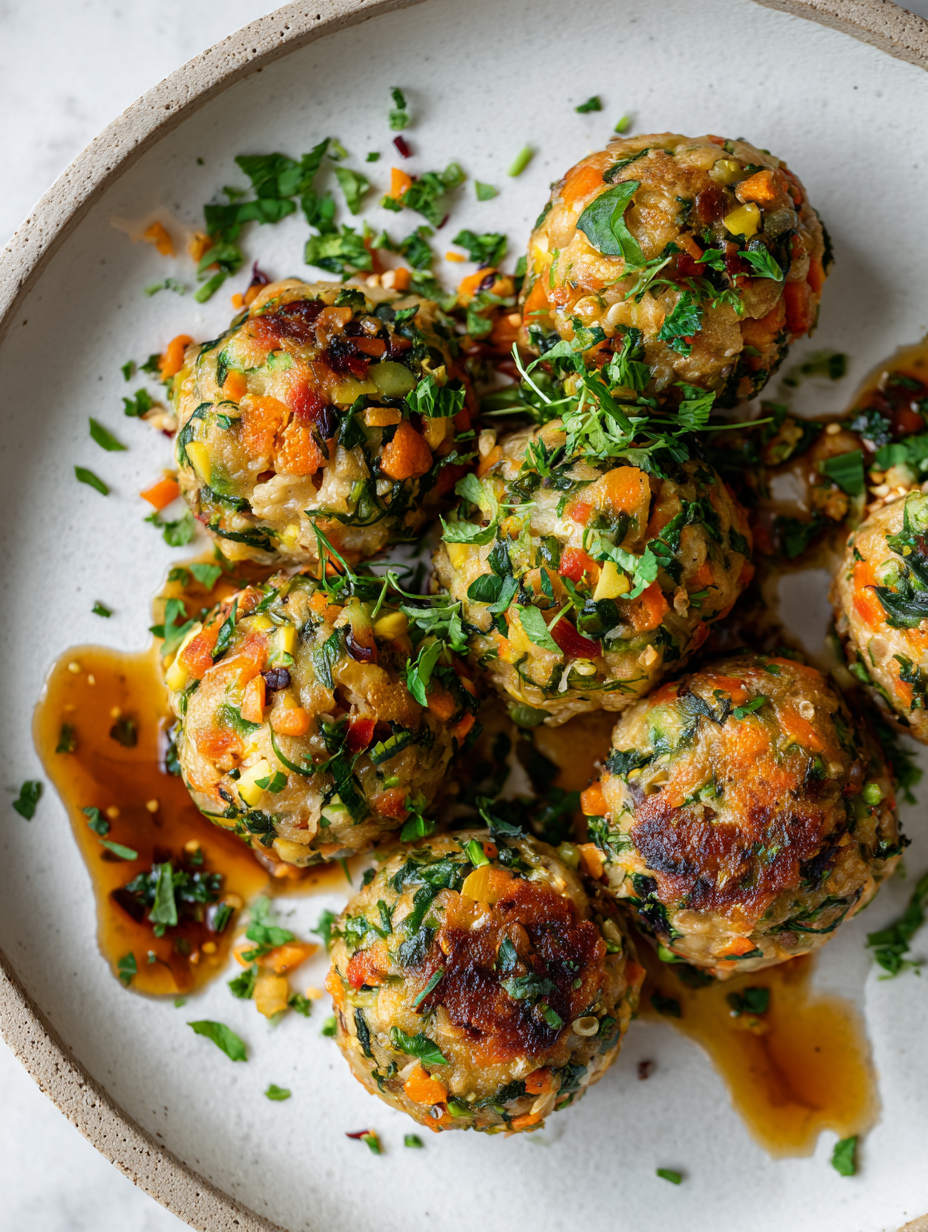
Focusing on the comforting chaos of blending odd leftovers into veggie balls, turning kitchen mishaps into a satisfying, improvisational feast.
The art of improvising veggie balls
- I love how these veggie balls turn out unexpectedly savory, even when I’m just throwing bits together.
- There’s a strange joy in turning leftovers into something crispy and warm, like a little kitchen win.
- Sometimes I feel proud when I see kids eagerly grabbing these veggie bites, proof that simple can be delicious.
- It’s chaotic, but I’ve learned to trust the process — that imperfect mix often tastes the best.
The art of improvising veggie balls
- This recipe came about during a cluttered weekend, when I was eyeing a fridge full of odds and ends and thinking, ‘What can I do with all this?’ I wanted something that felt unpolished but satisfying, a bit of kitchen chaos turned into comfort food. The first batch was a happy accident—an accidental mix of leftover grains, veggies, and a splash of desperation turned into crispy, tender bites.
- Over the years, I’ve tweaked the process, adding my favorite herbs and experimenting with different textures. It’s become my go-to for using up whatever’s lingering, transforming chaos into something warm and inviting. These veggie balls aren’t just food—they’re a reminder that improvisation often makes the tastiest dishes, especially when you let go of perfection.
- heading: “The story behind this recipe”
Historical & Cultural Roots
- Veggie balls have roots in many traditional cuisines, from Italian polpette to Middle Eastern falafel, all emphasizing plant-based, adaptable comfort food.
- This dish gained popularity in modern kitchens as a flexible way to incorporate more vegetables and reduce meat reliance, especially among vegetarians and flexitarians.
- Historically, turning odds and ends into a savory snack was a practical, resourceful approach—kitchen scraps transformed into nourishing bites.
- The concept of veggie balls aligns with the global movement towards plant-forward eating, making it both nostalgic and forward-thinking.
Key ingredients at a glance
- Carrots: I find grated carrots add a subtle sweetness and moisture, but if yours are too wet, squeeze out excess liquid before mixing. Swap with zucchini if you want a milder flavor.
- Chickpeas: Canned chickpeas are my go-to—they mash easily and give a hearty texture, but cooked lentils work just as well if you prefer a different legume or want to skip the can.
- Breadcrumbs: They hold everything together and add a bit of crunch. Use gluten-free if needed, or crushed nuts for a nutty twist—just watch the texture stay cohesive.
- Herbs & Spices: Fresh parsley and cumin are my favorites—they brighten and warm the flavor. Dried herbs work, but reduce the quantity slightly since they’re more concentrated.
- Binding Agents: Eggs help everything stick, but for a vegan option, try flaxseed meal mixed with water—watch for a slightly denser bite, but it works as a good binder.
- Oil & Fat: A splash of olive oil adds richness, especially when frying. If baking, skip it or use a light spray—your veggie balls will be just as crispy.
- Optional Add-ins: A pinch of smoked paprika or a handful of chopped greens can make each batch unique. Trust your nose—if it smells good, it probably is!
Spotlight on key ingredients
Carrots & Chickpeas:
- Carrots: I find grated carrots add a subtle sweetness and moisture, but if yours are too wet, squeeze out excess liquid before mixing. Swap with zucchini if you want a milder flavor.
- Chickpeas: Canned chickpeas are my go-to—they mash easily and give a hearty texture, but cooked lentils work just as well if you prefer a different legume or want to skip the can.
Notes for ingredient swaps
- Dairy-Free: Use mashed avocado or tahini instead of cheese or creamy binders for a rich, nutty flavor without dairy.
- Gluten-Free: Swap regular breadcrumbs for almond flour or crushed gluten-free cereal to keep these veggie balls friendly for gluten sensitivities.
- Legume Variations: Replace chickpeas with cooked lentils or black beans for a different texture and flavor, still hearty and satisfying.
- Herb Swaps: Use cilantro or basil instead of parsley to introduce fresh, bright notes that change the dish’s vibe.
- Oil & Fat: Opt for coconut oil or avocado oil to add subtle flavor differences and handle higher cooking temperatures without fuss.
- Add-ins: Mix in chopped nuts or seeds for extra crunch, or a splash of soy sauce instead of salt for umami depth, depending on your pantry.
- Vegetable Choices: Incorporate grated zucchini, sweet potato, or beetroot for color, moisture, and a slightly different sweetness.
Equipment & Tools
- Mixing bowl: Combine all ingredients thoroughly.
- Baking sheet or skillet: Cook the veggie balls, either by baking or frying.
- Parchment paper: Prevent sticking and easy cleanup when baking.
- Spatula or tongs: Shape and turn the veggie balls safely.
- Measuring cups/spoons: Ensure accurate ingredient proportions.
Step-by-step guide to veggie balls
- Gather all ingredients: cooked grains, grated vegetables, chickpeas, breadcrumbs, herbs, eggs, and oil.
- Preheat your oven to 200°C (390°F) if baking, or heat a skillet with a splash of oil over medium heat.
- In a large mixing bowl, mash the chickpeas until chunky but mostly broken down. Add grated vegetables and mix.
- Stir in breadcrumbs, herbs, spices, and eggs (or flaxseed mixture). Combine until the mixture holds together when pressed.
- If the mixture feels too wet, add a little more breadcrumbs; if too dry, a splash of water or oil helps. Adjust to get a firm but pliable texture.
- Shape the mixture into small, round balls about 2 inches in diameter. Place on a parchment-lined baking sheet or ready your skillet.
- For baking: bake for 20–25 minutes, turning halfway, until golden and crispy around the edges. For frying: cook for 3–4 minutes per side, until crisp and brown.
- Check for doneness: the veggie balls should be firm outside, with a crackly crust, and tender inside. The smell should be savory and inviting.
- Let rest for 5 minutes on a wire rack. Serve warm, with your favorite dipping sauce or atop salads and grains.
Let the veggie balls rest for 5 minutes on a wire rack to settle. Serve warm with a drizzle of sauce or atop grains and salads. They’re best enjoyed fresh but keep in an airtight container in the fridge for up to 3 days; reheat in the oven or skillet until crispy again.
How to Know It’s Done
- Golden-brown crust with slight crackle on the outside.
- Inside texture should be tender but hold shape when pressed.
- Aromatic, savory smell indicating proper cooking and seasoning.
Improvisational Veggie Balls
Ingredients
Equipment
Method
- Start by mashing the chickpeas in a large mixing bowl until chunky but mostly broken down, creating a hearty base with some texture.
- Add the grated vegetables to the mashed chickpeas, mixing thoroughly so they’re evenly distributed and coated.
- Stir in the cooked grains (if using), breadcrumbs, chopped herbs, cumin, and the egg (or flaxseed mixture). Mix everything until the ingredients come together into a cohesive, slightly sticky mass.
- If the mixture feels too wet, sprinkle in a little more breadcrumbs; if too dry, add a splash of water or a drizzle of oil to help everything stick together.
- Shape the mixture into small, round balls about 2 inches in diameter, pressing gently to compact them without cracking.
- Preheat your oven to 200°C (390°F) and line a baking sheet with parchment paper, or heat a skillet with a splash of oil over medium heat.
- If baking, place the veggie balls on the parchment-lined sheet and bake for 20–25 minutes, turning halfway, until they’re golden and crispy around the edges.
- For frying, cook the veggie balls in the hot skillet for 3–4 minutes per side, until they’re crispy, browned, and fragrant.
- Once cooked, let the veggie balls rest for 5 minutes on a wire rack to settle and enhance their texture.
- Serve warm, perhaps with a dipping sauce, atop salads, or mixed into grains for a hearty bite.
Notes
Pro tips for perfect veggie balls
- Bolden the mixture: Use a pinch more herbs or spices to enhance the flavor and mask any dullness from leftovers.
- Chill before shaping: Rest the mixture in the fridge for 15 minutes; it firms up, making shaping easier and neater.
- Sear for texture: Start with a hot pan to get a crispy exterior quickly; don’t move the balls around too much at first.
- Adjust moisture carefully: If the mixture feels too wet, add a spoonful more breadcrumbs; if too dry, a splash of water or oil helps.
- Bake or fry crispy: For a crunchier crust, bake at 200°C (390°F) for 20–25 minutes or fry until golden, crackling, and fragrant.
- Rest after cooking: Let the veggie balls sit for 5 minutes before serving—this helps set the shape and enhances flavor.
- Use your nose: Trust the aroma—if it smells savory and inviting, the veggie balls are likely done and ready to enjoy.
Common mistakes and how to fix them
- FORGOT to preheat? Do so early to avoid soggy veggie balls.
- DUMPED ingredients too quickly? Mix gently to keep texture light.
- OVER-TORCHED? Lower heat and cook longer for even browning.
- MISSED the resting step? Rest for 5 minutes to let flavors meld and firm up.
Quick Fixes and Pantry Swaps
- If mixture feels too wet, add a pinch more breadcrumbs to firm it up.
- When veggie balls stick to the pan, splash a little oil and gently loosen them.
- Splash water if the mixture is crumbly; it helps everything come together.
- Patch cracks by pressing gently; a quick chill helps set the shape if they fall apart.
- Shield from direct heat to prevent over-torched outsides—lower the heat slightly.
Prep, store, and reheat tips
- Prep the mixture ahead by combining all ingredients; it can be kept in the fridge for up to 24 hours, which helps the flavors meld and makes shaping easier later.
- Shape the veggie balls and store on a plate covered tightly with plastic wrap. They can be refrigerated for up to 2 days before cooking, but expect a slight loss in crispness.
- Cooked veggie balls can be stored in an airtight container in the fridge for up to 3 days. Reheat in a 180°C (350°F) oven for 10 minutes until warmed and crispy, or briefly pan-fry for texture.
- For longer storage, freeze uncooked veggie balls on a baking sheet until solid, then transfer to a zip-top bag. They keep well for up to 3 months. Bake straight from frozen, adding a few extra minutes to cooking time.
- Reheating will intensify the aroma and soften the texture slightly. Look for a crackly exterior and a warm, savory smell before serving. Avoid microwaving if you want them crispy—best in oven or skillet.
Top questions about veggie balls
1. How do I keep the veggie balls tender?
Use a gentle touch when mixing to prevent mashing the veggies too much, which can make the balls dense and tough.
2. Why are my veggie balls falling apart?
If they fall apart while cooking, add a bit more binding agent like an extra egg or flaxseed mixture to help hold everything together.
3. How do I make them crispy?
To get a crispy exterior, bake at a high heat (around 200°C or 390°F) and turn them halfway through to evenly brown all sides.
4. Can I substitute chickpeas?
Use canned chickpeas for convenience, but cooked lentils or even mashed beans work well if you want a different flavor or texture.
5. Can I freeze veggie balls?
Yes, you can freeze unshaped or shaped veggie balls for up to 3 months. Bake directly from frozen, adding a few extra minutes.
6. My mixture is too wet or dry, what do I do?
If the mixture feels too wet, sprinkle in a little more breadcrumbs or oats; if too dry, add a splash of water or oil gradually.
7. Can I use dried herbs?
Use fresh herbs like parsley or cilantro for a bright flavor, or dried herbs if you’re out—just cut back on quantity.
8. Bake or fry—what’s better?
Cooking in a hot skillet with a little oil gives a crispy crust, but baking is a hands-off way to get evenly cooked veggie balls.
9. Should I rest the veggie balls before serving?
Rest the cooked veggie balls for 5 minutes after cooking to let the flavors settle and the texture firm up.
10. How can I make them crispier in the oven?
Use a light spray of oil on the balls before baking to enhance crispiness without making them greasy.
These veggie balls are a reminder that the best comfort food often comes from improvising with what’s at hand. They’re imperfect, a little chaotic, but always satisfying, especially when you get that crispy bite and warm inside. It’s a dish that celebrates the messy, unpredictable joy of cooking.
In a world that values perfection, these veggie balls keep me grounded—an honest, practical way to turn leftovers into something worth savoring. They’re perfect for a quick weeknight dinner or a lazy weekend experiment. And honestly, they make my kitchen smell like a cozy, veggie-filled haven.

Hi, I’m Oliver Stone, the writer, cook, and storyteller behind Crying Into the Onions. I’m so glad you found your way here. This blog was born from equal parts humor, heart, and a deep love for honest cooking. I started this blog to share more than just recipes — I wanted to capture the emotions, memories, and quirks that make food more than fuel. Because sometimes, cooking makes you laugh. Sometimes, it makes you cry (into the onions, naturally). And most of all, it brings people together.

