These peanut butter bars are more than just a treat; they’re a slice of childhood wrapped in a chewy, nutty bite. I grew up sneaking spoonfuls of peanut butter straight from the jar, so these bars feel like a warm hug from the past, with a little extra sweetness to match. There’s something honest about how simple ingredients—peanut butter, butter, sugar—meld together into something so satisfying, especially when I need comfort that’s quick to throw together.
Baking these bars is like a little act of nostalgia, a reminder of lazy weekend afternoons spent in my grandma’s kitchen. The smell of melting butter and roasted peanuts fills the air, pulling me back to those carefree moments. They’re perfect for sharing, and honestly, they taste better when you’re sitting on the couch, a glass of cold milk in hand, feeling a bit of that childhood magic again.
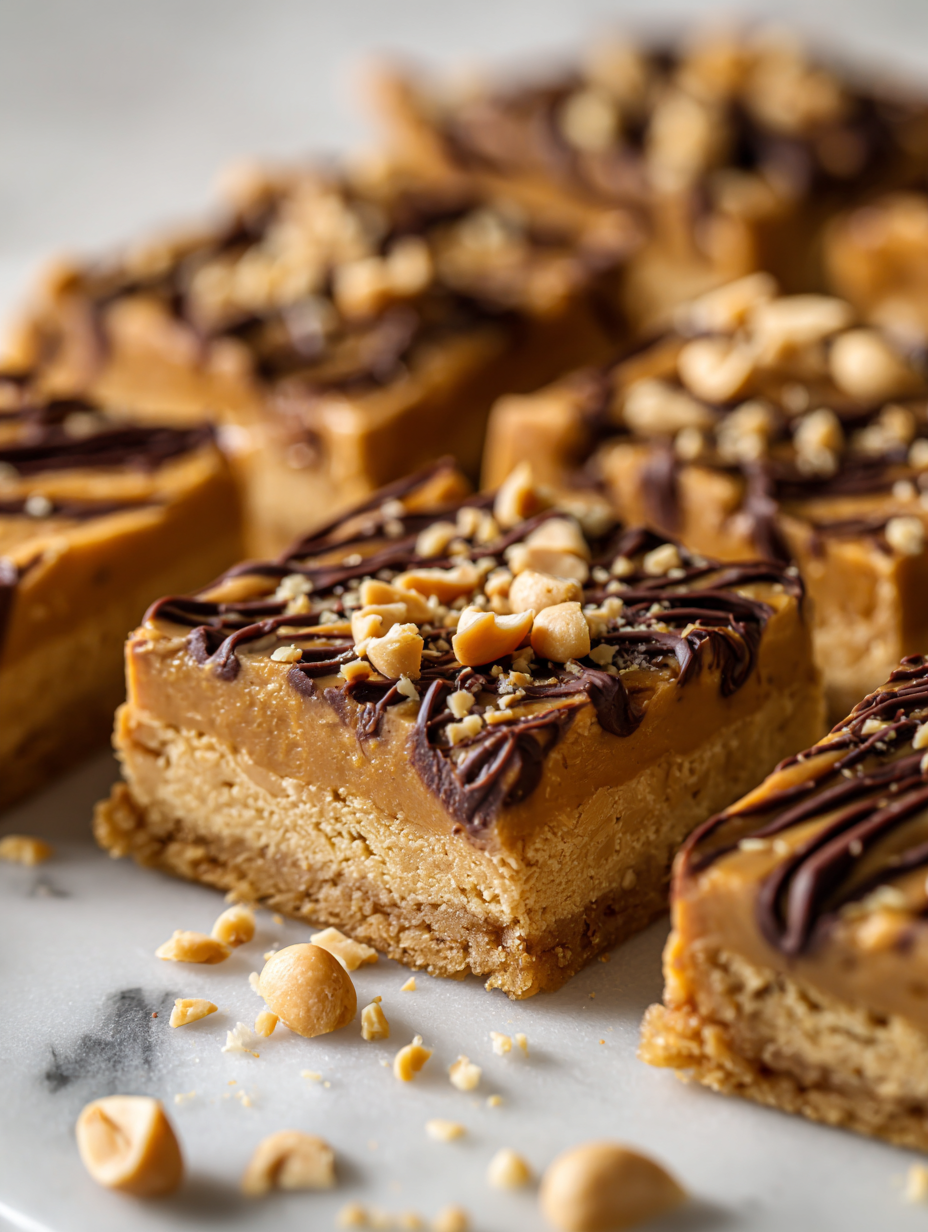
Focusing on how these peanut butter bars serve as a nostalgic comfort, reminding me of childhood afternoons spent in my grandma’s kitchen, where simple ingredients came together into something rich, chewy, and deeply satisfying.
The story behind this recipe
- This recipe sprouted from a lazy weekend spent rummaging through my childhood snack stash. I remember helping my mom in the kitchen, peanut butter sticky on my fingers, as she melted chocolate and pressed it into a pan. Those simple, no-fuss moments stuck with me—turning into these bars, a little piece of nostalgia now portable enough to share.
- Baking these is my way of reconnecting to those carefree afternoons. The smell of roasted peanuts and melting chocolate wafting through the kitchen always pulls me back, flooding the room with warmth and memories. They’re a treat I turn to when I need a quick, honest pick-me-up, especially when life feels a little chaotic.
- heading: The story behind this recipe
Ingredient breakdown: key components
- Creamy peanut butter: I use natural, crunchy peanut butter for texture and that roasted, smoky nutty flavor. Swap with almond butter if you prefer a different nutty punch.
- Unsalted butter: Melts into the mixture smoothly, adding richness. If you only have salted butter, reduce the added salt slightly to balance the flavor.
- Granulated sugar: I prefer white sugar for a clean sweetness that doesn’t overpower. Brown sugar adds a caramel note if you want a deeper, molasses undertone.
- Vanilla extract: A splash lifts everything—makes the peanut butter flavor pop more vividly. Skip if you want a more straightforward, nutty taste.
- Chocolate chips: I love semi-sweet for balance, but dark chocolate gives a deeper, more intense cocoa hit. Melted chocolate can be swapped for a drizzle if you like a thinner finish.
- Optional: Sea salt: Just a pinch on top enhances the sweetness and brings out the peanut flavor. Use flaky sea salt for that satisfying crunch and burst of saltiness.
Spotlight on key ingredients
Peanut Butter:
- Creamy peanut butter: I use natural, crunchy peanut butter for texture and that roasted, smoky nutty flavor. Swap with almond butter if you prefer a different nutty punch.
- Unsalted butter: Melts into the mixture smoothly, adding richness. If you only have salted butter, reduce the added salt slightly to balance the flavor.
- Chocolate chips: I love semi-sweet for balance, but dark chocolate gives a deeper, more intense cocoa hit. Melted chocolate can be swapped for a drizzle if you like a thinner finish.
Chocolate:
- The melt-in-your-mouth smoothness of good-quality chocolate chips is key. Watch for shiny, fully melted consistency—this makes or breaks the topping.
- Granulated sugar: I prefer white sugar for a clean sweetness that doesn’t overpower. Brown sugar adds a caramel note if you want a deeper, molasses undertone.
- Vanilla extract: A splash lifts everything—makes the peanut butter flavor pop more vividly. Skip if you want a more straightforward, nutty taste.
Notes for ingredient swaps
- Dairy-Free: Swap butter for coconut oil or a dairy-free margarine. Expect a slightly different richness and a coconut aroma.
- Nut Butters: Almond or cashew butter can replace peanut butter for a milder or different nutty flavor. Crunchy vs. creamy affects texture.
- Sweeteners: Use honey or maple syrup instead of sugar. These add moisture and a subtle flavor change; honey makes the bars a bit stickier.
- Chocolate: Swap semi-sweet chips with dark or milk chocolate. Dark for a more intense cocoa hit, milk for sweeter, creamier finish.
- Add-ins: Mix in chopped nuts, dried fruits, or even a sprinkle of sea salt on top for extra texture and flavor contrast.
- Flour: For a gluten-free version, try almond flour or oat flour. They change the crumb and moisture, so adjust the amount slightly.
- Vanilla: Use vanilla bean paste for a more intense vanilla flavor or omit for a more straightforward nutty taste.
Equipment & Tools
- 8×8 inch baking pan: Holds the mixture for easy setting and slicing.
- Spatula: Spreads and presses the mixture evenly into the pan.
- Microwave-safe bowl: Melts butter, peanut butter, and chocolate efficiently.
- Whisk: Ensures smooth mixing of ingredients.
- Parchment paper: Prevents sticking and makes removal clean.
Step-by-step guide to peanut butter bars
- Gather your equipment: an 8×8 inch baking pan, a sturdy spatula, a microwave-safe bowl, a whisk, and parchment paper. Line the pan with parchment for easy removal.
- In a microwave-safe bowl, melt 1 cup (226g) of unsalted butter on medium power (about 600W) for 30-40 seconds until just melted. Watch for a gentle bubbling around the edges—don’t overheat.
- Add 1 cup (250g) of creamy peanut butter to the melted butter. Stir with a whisk until smooth and glossy, about 1 minute. The mixture should be oozy but not greasy.
- Stir in 1 cup (200g) of granulated sugar and 1 teaspoon of vanilla extract. Mix until fully combined and the sugar starts to dissolve — smell that sweet, nutty aroma.
- Pour in 2 cups (180g) of graham cracker crumbs or crushed digestive biscuits. Fold gently until evenly coated, the mixture should be thick but still pliable.
- Press the mixture evenly into the prepared pan using a spatula or your fingers, smoothing the top. Chill in the fridge for at least 2 hours or until firm and set.
- Once chilled, melt 1 cup (180g) of semi-sweet chocolate chips in 30-second bursts in the microwave, stirring well after each. The chocolate should be shiny and smooth.
- Pour melted chocolate over the cooled peanut butter layer. Use a spatula to spread it into an even layer, creating a glossy top. Chill again for 30 minutes to set the chocolate.
- Remove from the fridge, let sit at room temperature for 5 minutes, then cut into bars with a sharp knife. Wipe the knife clean between cuts for neat edges.
- Serve immediately or store in an airtight container in the fridge for up to a week. Let sit at room temp for 10 minutes before serving for optimal softness.
Chill the assembled bars in the fridge for at least 2 hours until firm. Slice into squares with a sharp knife, then let sit at room temp for 5 minutes before serving to enhance softness and flavor.
How to Know It’s Done
- Chocolate is fully melted and glossy before pouring.
- Mixture presses evenly into the pan without cracks or gaps.
- Bars are firm and set when chilled, with a clean cut appearance.
Peanut Butter Bars
Ingredients
Equipment
Method
- Line your 8x8 inch pan with parchment paper, leaving some overhang for easy lifting.
- In a microwave-safe bowl, melt the butter in short 30-40 second bursts until just bubbling around the edges, then stir until smooth.
- Add the peanut butter to the melted butter and whisk together until the mixture is glossy and fully combined, about 1 minute.
- Stir in the sugar and vanilla extract until the sugar starts to dissolve and the mixture becomes thick and fragrant.
- Fold in the graham cracker crumbs until the mixture is thick, sticky, and easy to press.
- Press the mixture evenly into the prepared pan with a spatula or your fingers, smoothing the top for an even surface.
- Chill in the fridge for at least 2 hours, or until firm and set.
- Meanwhile, melt the chocolate chips in short bursts in the microwave, stirring until shiny and smooth.
- Pour the melted chocolate over the chilled peanut butter layer, spreading it evenly with a spatula for a glossy top.
- Return to the fridge for about 30 minutes until the chocolate is set and shiny.
- Once chilled, lift the bars out of the pan using the parchment overhang and cut into squares with a sharp knife. Wipe the knife between cuts for clean edges.
- Enjoy the chewy, nutty bars immediately, or store in an airtight container in the fridge for up to a week. Serve slightly softened at room temperature for the best texture.
Pro tips for perfect peanut butter bars
- Bolded mini-head: Use room temperature peanut butter for easier mixing and a smoother texture.
- Bolded mini-head: Warm the chocolate slightly before pouring to prevent cracking and ensure glossy coverage.
- Bolded mini-head: Press mixture firmly into the pan to avoid air pockets and create an even surface.
- Bolded mini-head: Chill the bars thoroughly, at least 2 hours, for clean cuts and a firm bite.
- Bolded mini-head: Wipe your knife between cuts for sharp, neat edges and less sticking.
- Bolded mini-head: Use parchment paper to lift the bars easily without sticking or breaking.
Common mistakes and how to fix them
- FORGOT to level ingredients → Use a spoon to level for accuracy.
- DUMPED too much salt → Reduce salt or taste before adding extra.
- OVER-TORCHED chocolate → Remove early and stir until smooth.
- MISSED resting time → Chill thoroughly for clean cuts and proper set.
Quick fixes and pantry swaps
- When mixture is too thick, splash in a tablespoon of milk to loosen it.
- If chocolate is too thick, microwave for 10 seconds and stir until glossy.
- Dumped too much salt? Rinse the mixture gently and add a pinch less next time.
- Overbaked? Patch cracks with a bit of melted chocolate for a smooth look.
- Shield edges with foil if they start over-torching during melting or setting.
Prep, store, and reheat tips
- Prepare the mixture and press into the pan a day ahead—this allows flavors to meld and makes assembly quicker.
- Store the uncut bars in an airtight container in the fridge for up to a week; the cold keeps them firm and fresh.
- Chocolate topping can be melted and poured over the chilled base just before serving; it sets quickly and adds that glossy finish.
- Reheat slightly in the microwave for 5-10 seconds if you prefer a softer, melt-in-your-mouth texture—watch for just a shimmer, not a crackle.
- For longer storage, freeze the bars wrapped tightly in plastic wrap and foil for up to a month—thaw at room temp until soft.
FAQs about Peanut Butter Bars
1. Can I use crunchy peanut butter instead of creamy?
Use natural, crunchy peanut butter for added texture and a smoky flavor. You can swap it for almond butter if you prefer a different nutty taste.
2. How do I know when the chocolate is melted enough?
Yes, melted chocolate chips should be glossy and smooth. If they seize or look dull, gently reheat and stir until shiny.
3. Why are my bars too soft after chilling?
Chill the bars for at least 2 hours until firm enough to cut cleanly. If they’re still soft, put them back in the fridge for more setting time.
4. Can I use brown sugar instead of white?
You can substitute brown sugar for white sugar for a caramel undertone, but expect slightly softer, chewier bars.
5. Is there a dairy-free option?
Using coconut oil instead of butter makes the bars dairy-free, but the flavor will be a bit more coconutty and less rich.
6. How do I get the bars to hold together better?
Ensure your mixture is pressed firmly into the pan to avoid gaps. Using a spatula or your fingers helps compact it evenly.
7. My chocolate layer cracks when I cut the bars. What to do?
If the chocolate cracks when cutting, warm your knife slightly and wipe it clean for a smooth, clean slice.
8. How long do peanut butter bars stay fresh?
Store leftover bars in an airtight container in the fridge for up to a week, or freeze for longer storage.
9. The mixture is too stiff to spread. How can I fix it?
If the mixture is too thick to spread, splash a tiny bit of milk or warm it slightly to loosen it up.
10. How should I melt the chocolate without burning it?
When melting chocolate, do so in short bursts and stir well to prevent burning and ensure a glossy finish.
These peanut butter bars are a quick trip back to childhood, where simple ingredients created something deeply comforting. Sharing them now feels like passing along a little piece of that warmth, especially when life gets busy or a craving hits hard.
They’re imperfect, honest, and built for moments when you need something familiar and satisfying. A little messy, a little sweet—just like a good memory, ready to be enjoyed with no fuss and plenty of flavor.

Hi, I’m Oliver Stone, the writer, cook, and storyteller behind Crying Into the Onions. I’m so glad you found your way here. This blog was born from equal parts humor, heart, and a deep love for honest cooking. I started this blog to share more than just recipes — I wanted to capture the emotions, memories, and quirks that make food more than fuel. Because sometimes, cooking makes you laugh. Sometimes, it makes you cry (into the onions, naturally). And most of all, it brings people together.

