Paneer cutlets might seem simple, but getting that perfect crispy crust while keeping the inside tender is an art. It’s a balance I’ve tinkered with for years, especially when I want a snack that’s satisfying yet light. This recipe is my go-to for those moments when I crave something familiar but with a little twist of crunch and spice.
Growing up, I remember my mom frying up these golden gems on lazy weekends, the smell filling the whole house. It’s not just about taste; it’s about that nostalgic crunch and the way the paneer melts softly inside each bite. I’ve tweaked her method over the years, trying to make it easier without losing that signature texture.
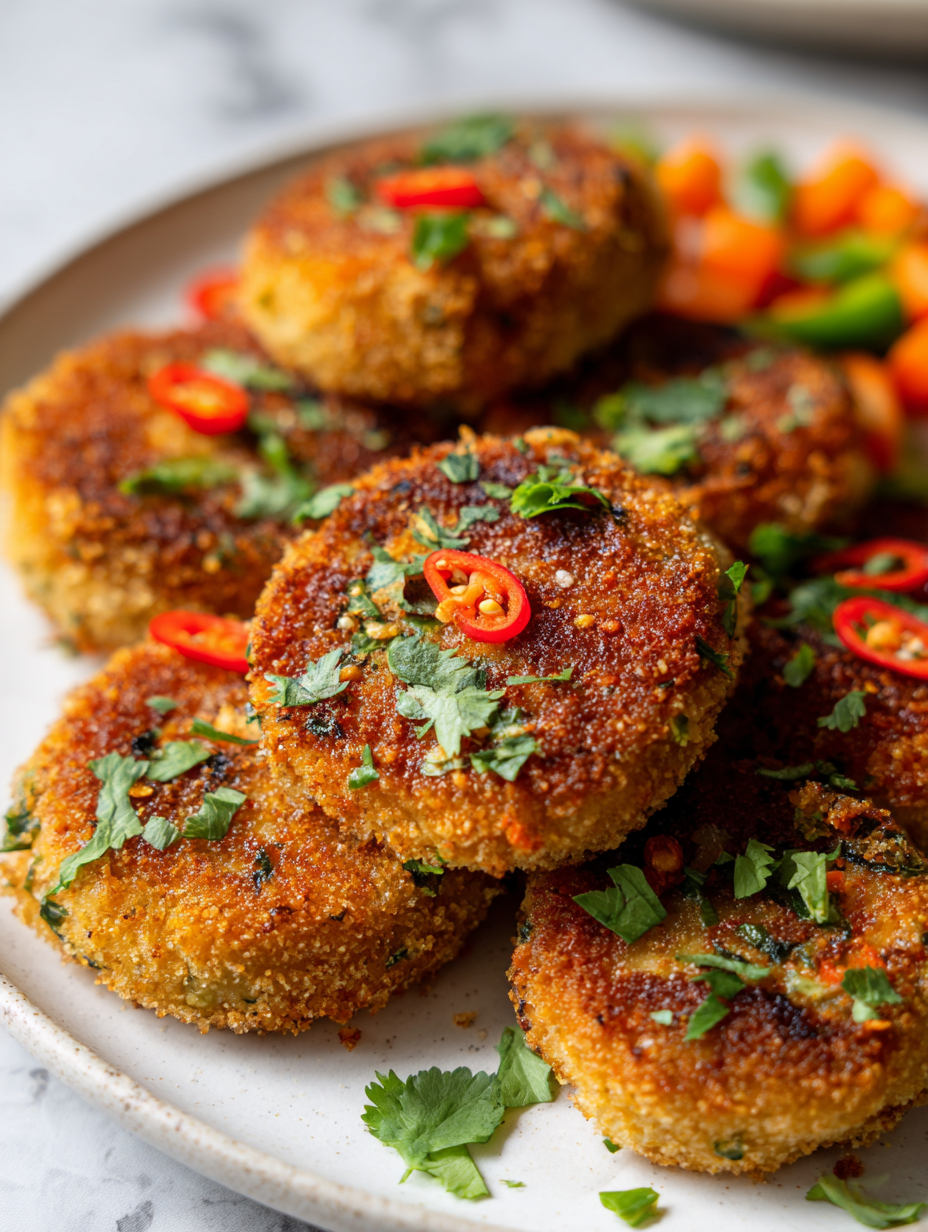
For me, mastering this dish isn’t just about the recipe—it’s about capturing that perfect bite. Crispy on the outside, soft and creamy inside, with just enough spice to keep you coming back for more. It’s a humble snack, but one that’s close to my heart, especially when I want comfort in every mouthful.
Focusing on how to achieve the perfect crispy exterior while keeping the paneer soft inside, this recipe emphasizes the balance between texture and flavor, making it a standout in vegetarian snack options.
Crispy Perfection in Every Bite
- Frying these reminds me of lazy Sunday mornings at my grandma’s—crisp edges and warm, soft inside.
- I love how the paneer melts just enough, creating that perfect gooey contrast with the crunchy exterior.
- There’s a quiet pride in mastering a dish that’s so simple yet demands attention to detail.
- Sometimes, I crave these at midnight—they’re my little secret to comfort when I need a quick fix.
- Sharing these with friends always sparks nostalgic stories about childhood snack times.
The story behind this recipe
- This recipe was born out of a lazy weekend craving for something crispy and comforting, but with a twist of spice. I wanted a snack that wasn’t just fried junk, but had that satisfying crunch and melt-in-your-mouth paneer inside. Over the years, I’ve tweaked my method, balancing spice, texture, and ease of prep, trying to make it foolproof for those hectic days.
- Cooking these reminds me of childhood afternoons, where my mom would fry up a batch while I’d sneak in a few warm bites. The smell of hot oil, spices, and melting paneer still takes me back. It’s funny how a simple snack can carry so much nostalgia—each bite a little taste of home, with that perfect crisp exterior hiding tender, flavorful paneer inside.
- heading: ‘The story behind this recipe’
Historical & Cultural Tidbits
- Paneer, originating from the Indian subcontinent, has been a vegetarian protein staple for centuries, especially in regions where meat was less accessible.
- This cutlet style became popular during the mid-20th century as a street snack, offering a crunchy, satisfying bite that could be made quickly and in large batches.
- The idea of coating and frying paneer dates back to traditional Indian snack recipes like tikki, but the cutlet variation is a more recent, Western-inspired adaptation.
- In many Indian households, making paneer cutlets was a way to reinvent leftover paneer, turning it into a crispy, new dish that kids loved.
Key Ingredients & Tips
- Paneer: I prefer fresh, squeaky paneer that’s soft yet holds its shape; opt for a mild, milky flavor to keep the cutlets tender. You can substitute with firm tofu if you want a vegan version, but it’ll be less rich and melt-in-your-mouth.
- Potatoes: I mash boiled potatoes until smooth but still fluffy—this helps create a cohesive, tender interior. Sweet potatoes add a subtle sweetness and vibrant color if you’re feeling adventurous.
- Breadcrumbs: Use panko for an extra crispy crust, or regular breadcrumbs if that’s what you have. Toast them lightly before mixing for a nuttier flavor that complements the spices.
- Spices: A pinch of garam masala, turmeric, and chili powder—these are my secret to a warm, layered flavor. Adjust according to your heat tolerance, but don’t skip the cumin for that earthy aroma.
- Binding agent: I mix in a little cornstarch or chickpea flour to help the cutlets hold together and get crispier when fried. If you want gluten-free, rice flour works, but expect a slightly lighter crust.
- Herbs: Finely chopped cilantro or mint leaves add a fresh burst. Sometimes I toss in a bit of chopped green chili for extra zing—depends on the mood of the day.
- Oil: I fry in neutral oil with a high smoke point—mustard oil or vegetable oil—until it shimmers and crackles. The oil’s temperature is key for that perfect, golden crust without greasiness.
Spotlight on key ingredients
Paneer:
- I look for fresh, squeaky paneer that’s soft yet firm enough to hold shape; it melts just right. Skip pre-packaged for better texture.
- Its mild, milky flavor makes it perfect for absorbing spices and herbs, creating a tender, flavorful bite every time.
Breadcrumbs:
- I prefer panko for that extra crunch, but regular will do in a pinch. Toast them lightly beforehand for nutty aroma.
- They crisp up beautifully during frying, giving that satisfying crunch that contrasts the soft paneer inside.
Notes for ingredient swaps
- Dairy-Free: Swap paneer with firm tofu; it won’t be as rich but still holds shape well.
- Gluten-Free: Use rice flour or chickpea flour instead of breadcrumbs for a lighter, gluten-free crust.
- Vegan: Replace paneer with seasoned, pressed tempeh or more tofu for plant-based options.
- Low-Carb: Substitute potatoes with grated zucchini or cauliflower mash to reduce carbs.
- Spice Level: Adjust chili powder or add fresh green chilies for milder or hotter flavor profiles.
- Herbs & Aromatics: Use basil or parsley instead of cilantro for a different fresh note.
- Oil: Fry in sesame or avocado oil for a distinct flavor and higher smoke point.
Equipment & Tools
- Mixing bowl: Combine and knead the ingredients.
- Frying pan: Cook the cutlets until crispy and golden.
- Spatula: Flip and handle the cutlets safely.
- Slotted spoon: Remove fried cutlets from oil without excess oil.
Step-by-step guide to paneer cutlets
- Equipment & Tools: Gather a mixing bowl (for binding), a frying pan (for crispy frying), a spatula (to flip), and a slotted spoon (for removing).
- Mash the paneer: Crumble 250g of fresh paneer into a bowl. Mash with a fork until crumbly but uniform.
- Prepare the mixture: Add 1 boiled, mashed potato, 2 tbsp chopped cilantro, 1 tsp garam masala, 1/2 tsp turmeric, 1/2 tsp chili powder, 1 tbsp breadcrumbs, and salt to taste. Mix well.
- Bind it together: Sprinkle in 1 tbsp chickpea flour or cornstarch. Mix thoroughly until the mixture holds together when pressed.
- Shape the cutlets: Divide into 4-6 portions. Form into flat, round patties about 1.5 cm thick, roughly 8 cm diameter.
- Heat the oil: Pour about 1 cm of oil into the pan. Heat over medium-high heat (~180°C / 356°F) until shimmering and crackling.
- Fry the cutlets: Carefully place the patties into the hot oil. Fry for 3-4 minutes per side, until golden brown and crispy. Flip once, ensuring even crispiness.
- Check doneness: The exterior should be uniformly golden, and the paneer inside should be soft and slightly oozy. The oil should crackle around each cutlet.
- Drain & rest: Remove with a slotted spoon. Rest on paper towels for 1-2 minutes to absorb excess oil. Serve hot with chutney or yogurt.
Let the cutlets rest on paper towels for 1-2 minutes. Serve warm with your favorite chutney or yogurt-based dip. For extra crunch, reheat briefly in a hot skillet before serving.
How to Know It’s Done
- Golden brown exterior with a crackling sound during frying.
- Paneer inside remains soft, not rubbery or dry, when pressed gently.
- Oil temperature maintained around 180°C / 356°F to prevent burning or sogginess.
Crispy Paneer Cutlets
Ingredients
Equipment
Method
- Crumble the fresh paneer into a large mixing bowl, breaking it apart with your fingers or a fork until it resembles coarse crumbs.
- Add the mashed potato, chopped cilantro, garam masala, turmeric, chili powder, toasted breadcrumbs, chickpea flour, and salt to the bowl. Mix everything together thoroughly until well combined and the mixture feels cohesive but still soft.
- Divide the mixture into 4 to 6 equal portions, then gently shape each into flat, round patties about 1.5 cm thick and approximately 8 cm in diameter. Rest the shaped cutlets on a plate or tray.
- Heat about 1 centimeter of oil in a frying pan over medium-high heat until shimmering and hot, around 180°C (356°F). You can test the temperature by dropping a small piece of bread—if it sizzles immediately, the oil is ready.
- Carefully place the patties into the hot oil, ensuring not to overcrowd the pan. Fry for about 3-4 minutes on each side, until they turn golden brown and crispy, with a gentle crackling sound.
- Use a slotted spoon to remove the cooked cutlets from the oil and place them on paper towels to drain excess oil. Let them rest for a minute or two to crisp up further.
- Serve the hot, crispy paneer cutlets immediately with your favorite chutney or yogurt dip for a satisfying snack or appetizer.
Pro tips for perfect paneer cutlets
- Bolded Mini-Head: Use panko breadcrumbs for an airier, crunchier crust that stays crispy longer.
- Bolded Mini-Head: Keep the oil at a consistent 180°C / 356°F to avoid sogginess or burning.
- Bolded Mini-Head: Chill the shaped cutlets for 15 minutes before frying—this helps them hold their shape.
- Bolded Mini-Head: When frying, don’t overcrowd the pan—work in batches for even crispiness.
- Bolded Mini-Head: Flip the cutlets gently once the edges turn golden; resist the urge to poke too early.
- Bolded Mini-Head: Drain on paper towels immediately after frying to keep them crispy and grease-free.
- Bolded Mini-Head: For an extra crispy finish, give the cutlets a quick second fry for 30 seconds.
Common mistakes and how to fix them
- FORGOT to check oil temperature → Use a thermometer for consistent crispness.
- DUMPED mixture too early → Chill for 15 minutes to firm up before shaping.
- OVER-TORCHED the first batch → Turn heat down slightly to prevent burning.
- MISSED the resting step → Rest cutlets on paper towels to avoid greasiness.
Quick fixes and pantry swaps
- When mixture feels too soft, splash in a bit more breadcrumbs to firm it up quickly.
- If oil shimmers unevenly, patch with a little more oil to maintain consistent frying temperature.
- Splash cold water on a crackling hot pan to tame any splatters and reduce smoke.
- When cutlets stick, shield with a little more oil or gently loosen edges with a spatula.
- If oil smells burnt, rescue by removing burnt bits and heating fresh oil for a cleaner fry.
Prep, store, and reheat tips
- Prepare the paneer mixture and shape the cutlets up to 2 hours in advance; keep covered in the fridge to prevent drying out. The flavors meld and the shape firms up slightly, making frying easier.
- Store fried cutlets in an airtight container in the fridge for up to 24 hours. Reheat in a hot skillet or oven until crispy again, noticing the aroma intensify and the exterior regain crunch.
- Raw or assembled cutlets freeze well for up to 1 month. Wrap tightly in plastic, then foil. Thaw in the fridge overnight before frying; the texture might be slightly softer but still delicious.
- Reheating in a skillet over medium heat (about 180°C / 356°F) helps restore crispness. Expect a warm, fragrant crunch with a soft, tender interior. Avoid microwave reheats, which make them soggy and limp.
Top questions about paneer cutlets
1. Can I use store-bought paneer?
Use fresh paneer that squeaks when pressed for the best melt-in-your-mouth texture. Store-bought works fine, but homemade is ideal.
2. Can I swap paneer with tofu?
Yes, firm tofu can replace paneer for a vegan version, but it will be less creamy and melt slightly less.
3. How do I know when they are crispy enough?
Fry the cutlets over medium-high heat until they turn golden and crispy, about 3-4 minutes per side. Look for a crackling sound and even color.
4. What if the mixture is too soft?
If the mixture feels too soft, chill it in the fridge for 15 minutes to help it firm up before shaping.
5. Can I use different breadcrumbs?
Use panko breadcrumbs for extra crunch, or regular breadcrumbs if that’s what you have. Toast them lightly for a nuttier flavor.
6. Can I make these in advance?
You can prepare the shaped cutlets up to 2 hours ahead. Keep them covered in the fridge and fry just before serving.
7. How do I reheat leftovers?
Reheat fried cutlets in a hot skillet or oven at around 180°C (356°F) until crispy again, about 5-7 minutes.
8. How do I get the perfect crust?
Keep the oil temperature at 180°C (356°F) to avoid greasy or burnt cutlets. Use a thermometer for accuracy.
9. How many cutlets at once?
When frying, don’t overcrowd the pan. Cook in batches to ensure even crispiness and avoid sogginess.
10. What if the oil smokes?
If the oil smokes or smells burnt, remove the pan from heat, discard the oil, and start with fresh oil to avoid bad flavors.
These paneer cutlets are more than just a snack; they’re a reminder that simple ingredients, when treated right, can deliver real comfort. The crispy exterior paired with that tender, slightly oozy inside makes every bite worth the effort. They’re perfect for when you want a quick, satisfying bite that feels homemade and honest.
In a world full of quick fixes, taking the time to fry these up fresh and hot keeps the process special. They’re a little nostalgic, a little chaotic, but always reliably delicious. Just the thing to brighten a busy day or bring a touch of warmth to an ordinary evening.

Hi, I’m Oliver Stone, the writer, cook, and storyteller behind Crying Into the Onions. I’m so glad you found your way here. This blog was born from equal parts humor, heart, and a deep love for honest cooking. I started this blog to share more than just recipes — I wanted to capture the emotions, memories, and quirks that make food more than fuel. Because sometimes, cooking makes you laugh. Sometimes, it makes you cry (into the onions, naturally). And most of all, it brings people together.

