
This recipe is a nod to the beauty of using slightly overripe corn. It’s not about perfection but about embracing what’s ready a bit too long—those sweet, smoky kernels that have lost a bit of their brightness but gained depth. It’s surprising how much flavor gets concentrated, almost like corn’s secret gift to your muffin batter.
I’ve always loved how corn muffins can be both humble and complex, especially when you let the imperfect corn shine through. Baking these feels like a small act of celebration for what’s at the back of the fridge or the corner of the market stall—those kernels that might not look perfect but carry all the richness and sweetness you need. It’s a reminder that sometimes, the best results come from leaning into what’s not pristine.
The magic here is in the details—the slight caramelization, the smoky undertone—that turns a simple muffin into something memorable. It’s about capturing that imperfect, soulful flavor and making it the star. No fuss, just honest, deeply flavored corn muffins that taste like they’ve been kissed by a summer sunset.
Focusing on the overlooked charm of slightly overripe corn, this recipe emphasizes how it intensifies sweetness and adds a subtle, smoky depth to the muffins. It’s about embracing imperfections in the ingredient to create a more soulful, flavorful bite.
Celebrating Imperfect Corn
- Using slightly overripe corn gives these muffins a richer, sweeter flavor I can’t get from fresh kernels.
- I love how the smoky undertone from caramelized edges makes each bite more memorable.
- Baking these feels like a small act of celebration for what’s at the back of the fridge or the corner of the market stall—those kernels that might not look perfect but carry all the richness and sweetness you need.
- Seeing the batter turn golden and smelling that toasty aroma always reminds me of summer evenings in the garden.
- There’s a quiet pride in turning humble ingredients into something deeply flavorful, especially when the corn’s imperfections shine through.
The story behind this recipe
- This recipe was born out of a moment in my kitchen when I realized how often I overlook the depth of flavor in slightly overripe corn. That soft, sweet kernel, with its smoky undertone, has a richness that fresh corn just can’t match. It’s like giving the corn a second act, a last hurrah that elevates the humble muffin into something more soulful.
- Baking these muffins is a quiet celebration of imperfection—embracing the sweet, smoky, slightly caramelized notes that overripe corn brings. It’s about finding joy in the small things, like the golden edges that crackle or the aroma that fills the kitchen, hinting at summer’s end and the bounty that’s just past peak but still bursting with flavor.
- heading: ‘The story behind this recipe’
Corn Muffins’ Surprising Roots
- Corn muffins date back to Native American cuisine, where corn was a staple and used in many baked goods.
- Early settlers adapted Native recipes, blending indigenous ingredients with European baking techniques to create what we now call corn muffins.
- The use of slightly overripe corn in muffins highlights a tradition of resourcefulness—using what’s available and letting flavors deepen over time.
Ingredient breakdown
- Sweet corn: I prefer using slightly overripe corn for a deeper, honeyed sweetness. If your corn is too fresh, add a touch of honey or sugar to mimic that richness.
- All-purpose flour: I stick with plain flour for a tender crumb. Swap with whole wheat if you want a nuttier flavor, but reduce the liquid slightly.
- Buttermilk: It adds tang and moisture that keeps these muffins tender. If you’re out, a mix of milk and a splash of lemon juice works—just don’t skip the acidity!
- Butter: I love the richness it brings, especially if melted and slightly browned for a toasty flavor. Use a neutral oil if you want a lighter muffin, but skip the butter and you’ll lose some depth.
- Baking powder: It’s the magic that makes these muffins rise and turn golden. Make sure it’s fresh—if it’s old, your muffins might be flat or dense.
- Salt: Just a pinch enhances all the sweet and smoky elements. Too much, and it’s overwhelming—trust me, I’ve overdone it and regretted it.
- Optional add-ins: A handful of shredded cheese or chopped jalapeños can turn these into a savory snack. Just keep the balance—these muffins are best with a hint of simplicity.
Spotlight on key ingredients
Sweet corn:
- I prefer using slightly overripe corn for a deeper, honeyed sweetness. If your corn is too fresh, add a touch of honey or sugar to mimic that richness.
- All-purpose flour: I stick with plain flour for a tender crumb. Swap with whole wheat if you want a nuttier flavor, but reduce the liquid slightly.
- Butter: I love the richness it brings, especially if melted and slightly browned for a toasty flavor. Use a neutral oil if you want a lighter muffin, but skip the butter and you’ll lose some depth.
Baking powder:
- It’s the magic that makes these muffins rise and turn golden. Make sure it’s fresh—if it’s old, your muffins might be flat or dense.
- Salt: Just a pinch enhances all the sweet and smoky elements. Too much, and it’s overwhelming—trust me, I’ve overdone it and regretted.
Notes for ingredient swaps
- Dairy-Free: Swap buttermilk for almond milk mixed with 1 tablespoon lemon juice. Slightly less tangy, but still tender.
- Gluten-Free: Use a 1:1 gluten-free flour blend. Muffins may be a bit denser, but still flavorful.
- Vegan: Replace eggs with flaxseed meal (1 tablespoon flaxseed + 3 tablespoons water). Keeps moisture, adds slight nuttiness.
- Sweetener: Add a tablespoon of honey or maple syrup for more sweetness; it also enhances the smoky notes.
- Corn: Use fresh or frozen corn kernels instead of cooked, cooled corn for a fresher, juicier bite.
- Butter: Substitute with coconut oil for a subtle coconut aroma and richer texture. Keep in mind, it adds a slight tropical note.
- Baking Powder: Use half baking soda and half cream of tartar for a more natural leavening. Be cautious with amounts to avoid metallic taste.
Equipment & Tools
- Oven: To bake the muffins evenly and thoroughly.
- Muffin tin or cupcake liners: To shape and contain the batter during baking.
- Skillet: To brown butter for added flavor.
- Mixing bowls: To combine wet and dry ingredients separately.
- Whisk and spatula: To gently mix ingredients without overworking the batter.
- Toothpick or cake tester: To check doneness of muffins.
Step-by-step guide to Corn Muffins
- Preheat your oven to 200°C (390°F). Grease a 12-cup muffin tin or line with paper liners. Have a mixing bowl, whisk, and spatula ready.
- In a small skillet over medium heat, melt 2 tbsp butter until it starts to brown and smell toasty—about 2 minutes. Set aside to cool slightly.
- In a large bowl, whisk together 1 cup all-purpose flour, 1 cup cornmeal, 1 tbsp baking powder, and 1/2 tsp salt. The dry mix should look slightly coarse.
- In another bowl, combine 1 cup buttermilk, 2 eggs, and the browned butter. Whisk until smooth. If using regular milk, add 1 tsp lemon juice or vinegar first.
- Pour the wet ingredients into the dry ingredients. Mix gently just until combined. Do not overmix; lumps are fine, and overmixing can make muffins tough.
- Fold in 1 cup of cooked, cooled corn kernels, especially if you’re using overripe corn for extra sweetness and smoky notes.
- Spoon the batter into the prepared muffin cups, filling each about 2/3 full. The batter will be thick but scoopable.
- Bake in the preheated oven for 20–25 minutes. The muffins should turn golden brown and a toothpick inserted in the center comes out clean.
- Check for doneness: the tops should crackle slightly, smell nutty and sweet, and the edges will be crisp. The muffins should feel firm yet tender.
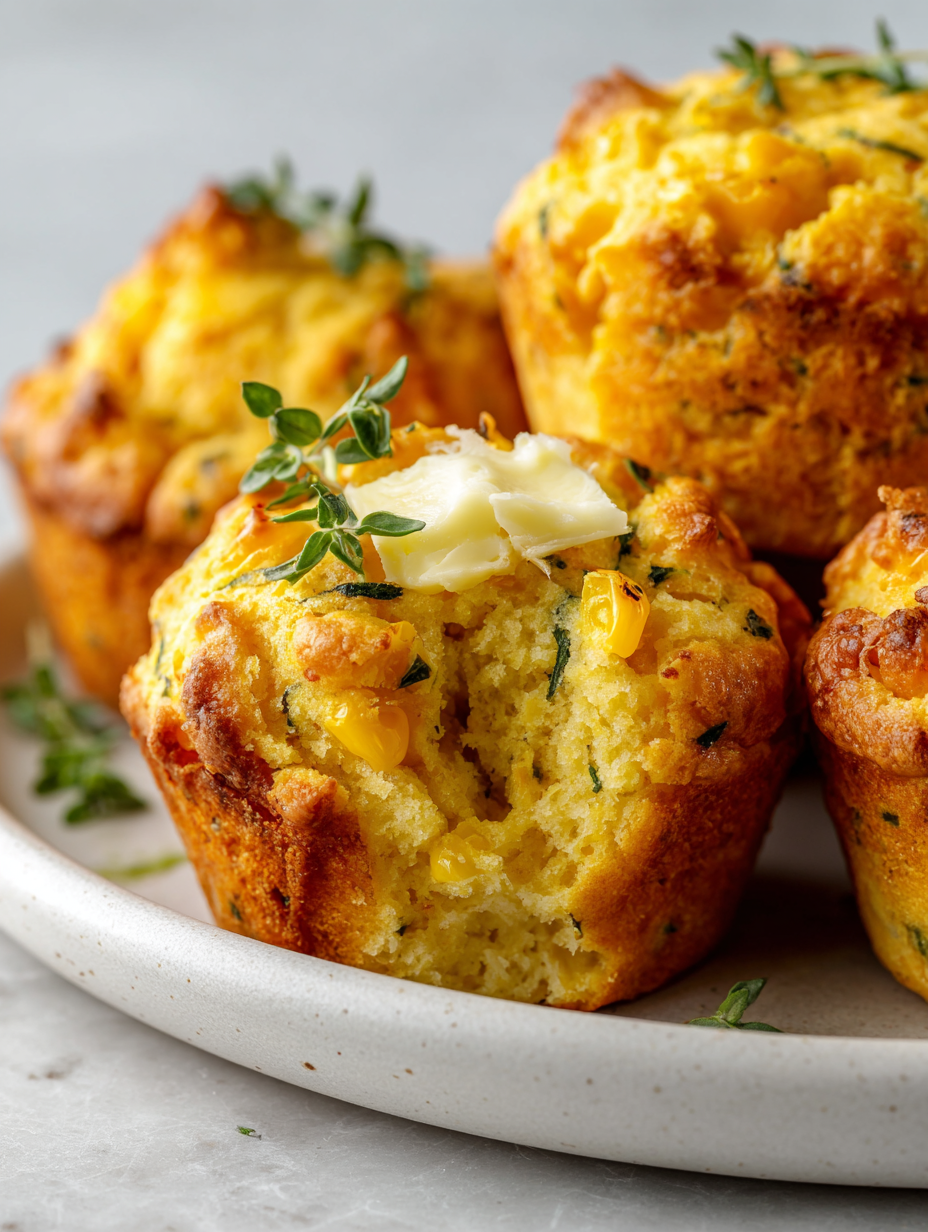
- Remove from oven and let rest in the pan for 5 minutes. Then transfer to a wire rack to cool slightly before serving. These are best warm with a smear of butter.
Let the muffins rest for 5 minutes in the pan, then transfer to a wire rack. Serve warm or at room temperature, with butter or honey if you like. For best flavor, enjoy within the first day, but they keep well wrapped for a day or two.
How to Know It’s Done
- Golden brown tops with crackled surface.
- Toothpick inserted in center comes out clean.
- Muffins feel firm but spring back when gently pressed.
Imperfect Corn Muffins
Ingredients
Equipment
Method
- Preheat your oven to 200°C (390°F). Grease a muffin tin or line with paper liners, and set aside.
- In a small skillet over medium heat, melt the butter until it starts to brown and releases a toasty aroma, about 2 minutes. Set aside to cool slightly.
- In a large bowl, whisk together the flour, cornmeal, baking powder, and salt until well combined and the mixture looks slightly coarse.
- In another bowl, whisk together the buttermilk, eggs, and the browned butter until smooth and slightly frothy.
- Pour the wet mixture into the dry ingredients and gently fold with a spatula until just combined. Be careful not to overmix—the batter should be lumpy and tender.
- Fold in the cooked corn kernels, distributing them evenly throughout the batter.
- Spoon the batter into the prepared muffin cups, filling each about two-thirds full. The batter will be thick but scoopable.
- Bake in the preheated oven for 20–25 minutes, until the tops are golden and crackly, and a toothpick inserted in the center comes out clean.
- Remove the muffins from the oven and let them rest in the tin for 5 minutes, allowing the crust to set and smell to deepen.
- Transfer the muffins to a wire rack to cool slightly. Serve warm, ideally with a pat of butter or honey to enhance their smoky, sweet flavor.
Notes
Tips for Perfect Corn Muffins
- Bolded mini-head: Use a hot skillet to brown butter, releasing nutty aromas that deepen flavor.
- Bolded mini-head: Don’t overmix the batter; gentle folding keeps muffins tender and light.
- Bolded mini-head: Fill muffin cups just two-thirds full for a domed, crackling top.
- Bolded mini-head: Check for doneness by inserting a toothpick—if it comes out clean, they’re ready.
- Bolded mini-head: For extra smoky flavor, lightly char some corn kernels before mixing.
- Bolded mini-head: Use fresh corn if possible—frozen works, but overripe adds richer sweetness.
- Bolded mini-head: Rest muffins 5 minutes after baking to allow steam to settle and improve crumb.
Common mistakes and how to fix them
- FORGOT to check oven temperature → Always calibrate oven first.
- DUMPED in all ingredients at once → Mix dry and wet separately, then combine gently.
- OVER-TORCHED the muffins → Bake at correct temp, and check for golden tops at 20 minutes.
- UNDER-mixed batter → Gently fold to avoid dense muffins and ensure even distribution.
Quick Fixes and Pantry Swaps
- If muffins turn out dense, check your baking powder freshness.
- When batter is too thick, splash in a little milk to loosen it.
- Dumped in all ingredients at once? Mix dry and wet separately first.
- Over-torched edges? Reduce oven temperature slightly and keep an eye after 15 minutes.
- Splash a little extra butter on top before baking for a richer, shimmery crust.
Prep, store, and reheat tips
- Prepare the dry and wet ingredients separately the day before; store in airtight containers in the fridge to save time in the morning. The flavors will meld better after a night’s rest.
- You can assemble the batter up to 24 hours in advance and keep it refrigerated. Just give it a gentle stir before filling the muffin tin—batter may thicken slightly overnight.
- Corn muffins are best enjoyed fresh, but they keep well wrapped at room temperature for up to 24 hours. Reheat gently in the oven at 180°C (350°F) until warm—smells sweet and toasty again.
- Stored in an airtight container, muffins last 2-3 days in the fridge. Reheat in the oven or toaster for a crispy, warm crust—smell and texture will tell you when they’re ready.
- For longer storage, freeze muffins for up to 2 months. Wrap tightly in plastic wrap then foil. To reheat, thaw at room temp and warm in the oven until golden and fragrant, about 10 minutes at 180°C (350°F).
Top questions about Corn Muffins
1. Can I use fresh corn instead of overripe?
Use slightly overripe corn for a sweeter, smoky flavor that enhances the muffin’s depth. If your corn is fresh, consider adding a teaspoon of honey to boost sweetness.
2. Does overripe corn really make a difference?
Yes, but the flavor will be milder. Overripe corn adds a honeyed sweetness and smoky undertone that fresh corn lacks.
3. How do I know when the muffins are done?
Bake until the tops are golden, crackly, and a toothpick inserted in the center comes out clean. The muffins should feel firm but springy.
4. My muffins are dense, what went wrong?
If muffins turn out dense, check your baking powder is fresh. Also, don’t overmix the batter—gently fold to keep them light.
5. How should I store and reheat leftover muffins?
Store leftovers wrapped in foil at room temperature for up to a day. Reheat in the oven at 180°C (350°F) until fragrant and warm, about 10 minutes.
6. Can I make these dairy-free?
Yes, you can swap buttermilk for a mix of milk and lemon juice or vinegar. It adds acidity and moisture, keeping the muffins tender.
7. Are these muffins gluten-free?
Yes, use a gluten-free flour blend in place of regular flour. The texture might be slightly denser, but the flavor stays rich.
8. My batter is too thick, what can I do?
If the batter is too thick, splash in a tablespoon of milk to loosen it. For a thinner batter, add a little more liquid gradually.
9. How can I prevent burning on top?
When baking, ensure your oven is calibrated correctly. Too hot and the muffins will burn on top before cooking through.
10. How can I add more smoky flavor?
For an extra smoky flavor, lightly char some corn kernels in a dry skillet before mixing them into the batter.
These corn muffins hold a quiet magic—celebrating the imperfect, the smoky, the sweet. They’re a reminder that flavor often lives in what’s just past peak, waiting to be embraced.
Sharing a batch with friends or family feels like passing along a little piece of summer’s fading glow—rough edges and all. There’s comfort in knowing that simple ingredients, treated with patience, can deliver something truly memorable.
Hey there — I’m Olivia “Liv” Carter, founder, recipe crafter, and storyteller behind Crying Into The Onions. I live somewhere in the heartland of the United States, where seasons change boldly, the smell of onions sizzling in a pan is a love language, and the kitchen is my favorite place to get messy and find magic.
I started this blog to share more than just recipes — I wanted to capture the emotions, memories, and quirks that make food more than fuel. Because sometimes, cooking makes you laugh. Sometimes, it makes you cry (into the onions, naturally). And most of all, it brings people together.