Baking these cinnamon oat bars is about embracing the imperfect, the rustic, the cozy warmth of a homemade treat. No fancy tools or perfect edges required—just a sturdy spoon, some trusty oats, and a good pinch of cinnamon. They’re forgiving enough for a beginner, yet satisfying enough to make you feel like you’ve really done something special in the kitchen.
There’s something about the smell of toasted oats and cinnamon wafting through the house that always feels like a warm hug. I love how flexible this recipe is—you can swap in different nuts or dried fruits, or just stick with the simple, honest combo of oats and cinnamon. It’s the kind of thing that’s perfect for a lazy weekend morning or an easy snack to stash in the freezer.
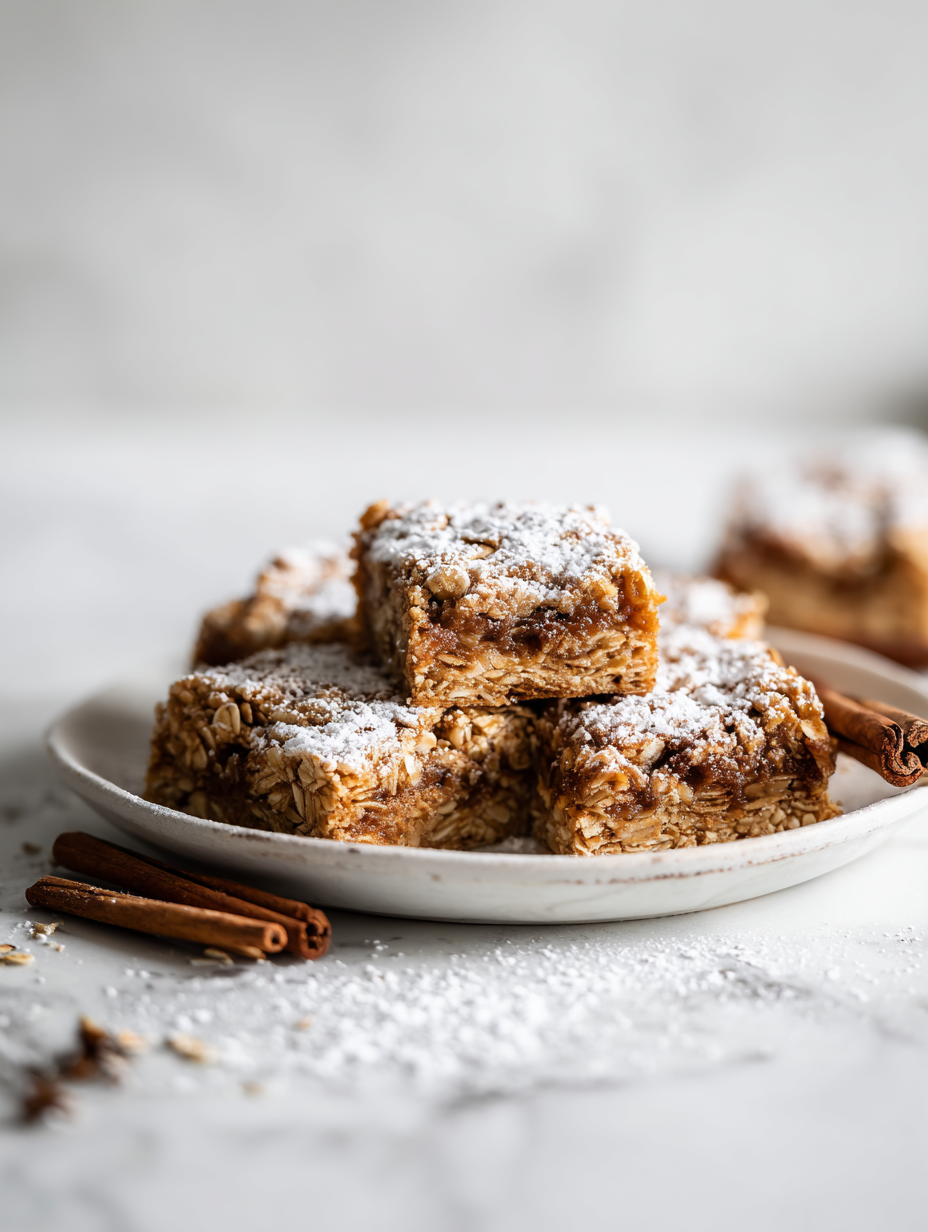
Focusing on how this recipe can be a forgiving, no-fuss baking project for beginners who struggle with perfect crusts but still crave that warm cinnamon aroma and hearty texture.
The story behind this recipe
Making these cinnamon oat bars always takes me back to my grandmother’s kitchen, where the scent of toasted oats and cinnamon would fill the air on lazy Sunday mornings. I remember sneaking bites of the warm, crumbly mixture straight from the pan, feeling like I’d discovered some secret recipe for comfort. Over the years, I’ve tweaked her simple method, adding a little more cinnamon and a handful of nuts, but that cozy, homespun feeling remains the same. It’s a recipe born from memories and a desire for something honest, hearty, and easy to pull together when I need a sweet, no-fuss fix.
Ingredient breakdown: key components
- Rolled oats: I love the hearty chew and nutty aroma they bring; toast them lightly for extra flavor, or skip if you’re pressed for time.
- Cinnamon: The warm, spicy scent is irresistible—don’t skimp on it, but if you like a milder touch, reduce slightly.
- Brown sugar: Adds a rich sweetness and helps with caramelization; for a healthier vibe, swap half with maple syrup, but expect a softer crust.
- Butter: Creates that tender, crumbly texture—use melted butter, or try coconut oil for dairy-free, with a slightly different crunch.
- Nuts (optional): I toss in chopped walnuts for crunch and richness; almonds work too, just toast them first for deeper flavor.
- Honey or maple syrup: I prefer honey for a sticky, sweet glue—swap with agave for a vegan option, but watch the sweetness.
- Salt: Just a pinch enhances everything—don’t skip it, even if it feels counterintuitive, to balance the sweet and spice.
Spotlight on key ingredients
Rolled oats:
- I love how they toast up golden and release a nutty aroma. They give the bars their hearty chew and rustic texture. Toast them lightly to deepen flavor or skip if you’re in a rush.
- Cinnamon: The scent is warm and spicy, filling the kitchen with cozy notes. It behaves predictably, but the more you use, the more pronounced that sweet-spicy punch becomes. Freshly ground really makes a difference.
Cinnamon:
- The scent is warm and spicy, filling the kitchen with cozy notes. It behaves predictably, but the more you use, the more pronounced that sweet-spicy punch becomes. Freshly ground really makes a difference.
- Brown sugar: It melts into the butter, creating a caramelized, sticky sweetness. During baking, it turns into a golden crust with a slight crunch. For a richer flavor, use dark brown sugar, which adds deeper molasses notes.
Notes for ingredient swaps
- Dairy-Free: Swap butter with coconut oil or vegan margarine. Expect a slightly softer, less crumbly texture but still deliciously rich.
- Sweetener Variations: Use maple syrup or agave instead of brown sugar for a more floral or neutral sweetness. Adjust quantity to taste for moisture.
- Oats: Choose gluten-free rolled oats if needed. They behave the same and give that hearty bite we love.
- Nuts: Almonds or pecans can replace walnuts. Toast them first to boost flavor and crunch, or skip for a nut-free version.
- Cinnamon: Double the amount for a more intense spice hit, or reduce if you prefer a subtler warmth. Freshly ground makes a noticeable difference.
- Binding Agents: For a vegan or allergy-friendly version, try applesauce or mashed banana instead of butter. Expect a softer, chewier bar.
- Add-ins: Dried fruits like cranberries or apricots can be stirred in for extra chew and sweetness, just keep an eye on moisture levels.
Equipment & Tools
- Baking pan: Holds the mixture for baking into bars.
- Mixing bowl: Combines dry and wet ingredients evenly.
- Spatula: Mixes ingredients and presses mixture into pan.
- Parchment paper: Prevents sticking and makes removal easy.
- Saucepan: Melts butter or coconut oil.
- Wire rack: Allows bars to cool evenly and prevents sogginess.
Step-by-step guide to cinnamon oat bars
- Gather all equipment: 20 cm (8-inch) square baking pan, mixing bowl, spatula, and parchment paper. Preheat oven to 180°C (350°F).
- Line the baking pan with parchment paper, leaving overhang for easy lifting. This prevents sticking and makes cleanup simpler.
- In a large mixing bowl, combine 1 ½ cups rolled oats, ½ cup packed brown sugar, 1 teaspoon cinnamon, and a pinch of salt. Mix well.
- Melt ½ cup unsalted butter (or coconut oil for dairy-free) in a small saucepan over low heat until just melted. Remove from heat.
- Pour melted butter over dry ingredients. Use a spatula to mix until all oats are coated and the mixture feels crumbly but holds together slightly.
- Transfer the mixture to the prepared pan. Use the back of a spatula or your fingers to press it evenly into the pan, compacting slightly.
- Bake in the preheated oven for 20–25 minutes. The top should turn golden brown and smell toasted. Keep an eye on it around 20 minutes to prevent overbaking.
- Remove from the oven and let it cool in the pan for about 10 minutes. The mixture will firm up as it cools. Don’t try to cut too early, or it’ll crumble.
- Lift the bars out of the pan using the parchment overhang. Transfer to a wire rack and let cool completely before cutting for cleaner edges.
- Cut into squares or rectangles. Serve immediately or store for later.
Let the bars cool completely on a wire rack before slicing. Use the parchment to lift and cut into squares. Serve right away or store in an airtight container for up to a week.
How to Know It’s Done
- Golden brown top with toasted aroma indicates proper baking.
- Pressing the mixture shows it holds shape but isn’t too dense or dry.
- Cooling time ensures bars are firm enough to cut cleanly without crumbling.
Rustic Cinnamon Oat Bars
Ingredients
Equipment
Method
- Preheat your oven to 180°C (350°F) and line an 8-inch square baking pan with parchment paper, leaving some overhang for easy removal.
- In a mixing bowl, combine the oats, brown sugar, cinnamon, and salt. Stir well until evenly mixed, creating a fragrant, speckled dry mixture.
- In a small saucepan, melt the butter over low heat until just bubbling and smooth. Remove from heat.
- Pour the melted butter over the dry mixture. Use a spatula to fold and stir until all oats are coated and the mixture is crumbly but starts to stick together.
- Transfer the mixture to your prepared baking pan and press down firmly with the back of a spatula or your fingers, creating an even, compact layer. This helps the bars hold together when baked.
- Bake in the preheated oven for 20–25 minutes, until the top is golden brown and fragrant with toasted oats and cinnamon. Keep an eye on it around 20 minutes to prevent over-browning.
- Remove the pan from the oven and let it cool in the pan for about 10 minutes. The mixture will firm up as it cools and become easier to cut.
- Use the parchment overhang to lift the cooled block out of the pan. Place it on a wire rack and let it cool completely before slicing into squares or rectangles.
- Once cooled, cut into 12 bars with a sharp knife, using a gentle sawing motion for clean edges. Serve immediately or store in an airtight container for later.
Pro tips for perfect cinnamon oat bars
- Toast the oats lightly before mixing to enhance their nutty aroma and add depth to the bars.
- Use room temperature butter for easier mixing and more even coating of the dry ingredients.
- Press the mixture firmly into the pan to ensure the bars hold together when baked and cut cleanly.
- Keep an eye on the edges during baking; they should turn a deep golden brown, signaling readiness.
- Let the bars cool completely before slicing to prevent crumbles and achieve clean, sharp edges.
- For extra flavor, sprinkle a pinch of sea salt on top before baking to heighten the cinnamon and sweetness.
- Use a sharp knife and a gentle sawing motion for clean cuts, especially if the bars are still slightly warm.
Common mistakes and how to fix them
- FORGOT to check oven temperature → Use an oven thermometer for accuracy.
- DUMPED in all oats at once → Mix oats gradually for even coating and to prevent clumping.
- OVER-TORCHED the edges → Rotate pan halfway through baking to avoid uneven browning.
- SKIPPED resting time → Let bars cool fully to prevent crumbling when cutting.
Quick fixes and pantry swaps
- When dough is crumbly, splash in a teaspoon of water to help it come together.
- If bars are too soft, patch with a sprinkle of oats and bake 5 more minutes.
- Over-torched edges? Shield with foil and lower oven temp immediately.
- Dumped too much cinnamon? Dusted with powdered sugar to mellow the spice.
- When bars stick, rescue with a quick run under warm water to loosen edges.
Prep, store, and reheat tips
- Pre-bake the bars and store them in an airtight container for up to 3 days; they soften slightly but stay flavorful.
- Wrap individually cooled bars in plastic wrap before storing in a zip-top bag to keep them fresh and prevent staleness.
- Freeze the bars for up to 1 month; wrap tightly in foil and then place in a freezer bag for best preservation.
- Reheat in a 150°C (300°F) oven for 10 minutes until warm and fragrant, or microwave in short bursts for a quick snack, watching for softening.
Top questions about cinnamon oat bars
1. How do I know when the bars are baked?
Look for a golden-brown top and a toasted cinnamon smell. The bars should feel firm but not hard when pressed gently.
2. Why do my bars fall apart when I cut them?
Use a sharp knife and let the bars cool completely before cutting. Warm bars tend to crumble easily.
3. How should I store leftover bars?
Store in an airtight container at room temperature for up to 3 days. For longer storage, freeze them well wrapped for up to a month.
4. Can I make these dairy-free?
You can swap coconut oil for butter, which gives a softer, slightly different texture but still tasty. Use the same amount.
5. Can I use a different sweetener?
Replace brown sugar with maple syrup or honey, but reduce liquid slightly to keep the mixture firm enough to bake.
6. Can I add other ingredients like nuts or dried fruits?
Adding chopped nuts like walnuts or almonds enhances crunch and flavor. Toast them first for extra aroma.
7. Should I toast the oats before mixing?
To toast oats, spread them on a baking sheet and bake at 180°C (350°F) for 8–10 minutes until golden and fragrant.
8. My mixture is too crumbly, what can I do?
If the mixture seems dry, add a teaspoon of water or honey to help it hold together better before baking.
9. How do I get the bars to stick together better?
Use a silicone spatula to press the mixture evenly into the pan. This helps create uniform bars.
10. Can I reheat the bars?
They are best enjoyed fresh but can be reheated in a 150°C (300°F) oven for 10 minutes. The aroma will warm up and the texture will soften slightly.
These cinnamon oat bars are more than just a sweet treat; they carry a sense of comfort that sneaks in with each warm bite. Baking them feels like a small act of kindness—simple, honest, and wrapped in aroma. Sometimes, that’s exactly what I need to keep the day moving.
And in the end, they’re forgiving enough to make even the most hesitant baker feel successful. That imperfect crumb, the faintly sticky edges—those small quirks remind me that good things come from a little mess and a lot of heart.

Hi, I’m Oliver Stone, the writer, cook, and storyteller behind Crying Into the Onions. I’m so glad you found your way here. This blog was born from equal parts humor, heart, and a deep love for honest cooking. I started this blog to share more than just recipes — I wanted to capture the emotions, memories, and quirks that make food more than fuel. Because sometimes, cooking makes you laugh. Sometimes, it makes you cry (into the onions, naturally). And most of all, it brings people together.

