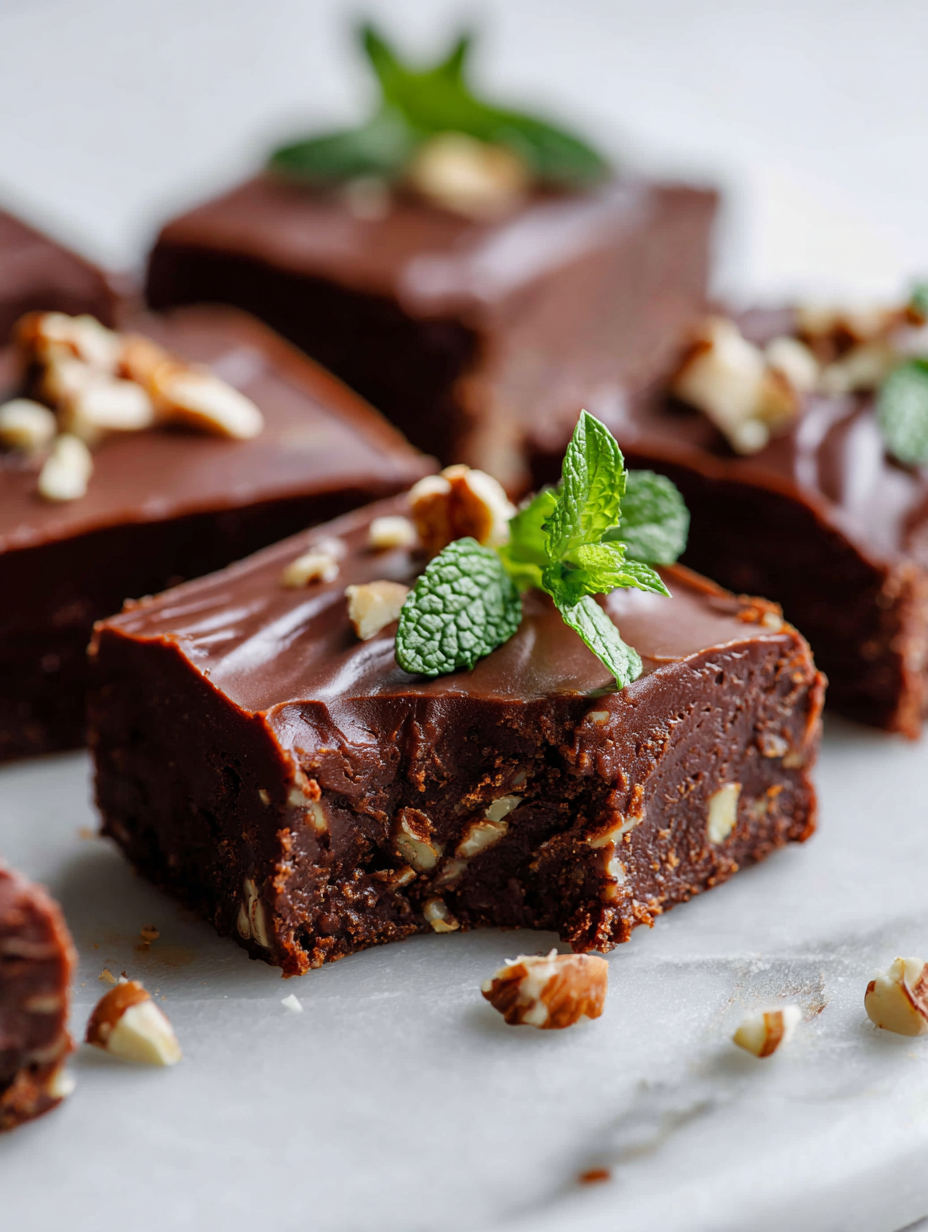
These chocolate fudge bars are my go-to when I want a treat that changes texture as it sits. The first bite is still gooey and rich, but after a day or two, they turn firm and almost chewy, like a brownie but more decadent. It’s funny how something simple can evolve so much, making each nibble a different experience.
I stumbled upon this recipe years ago during a busy weekend, and it’s stuck with me ever since. The magic lies in the way the fudge layer slowly firms up, giving you that perfect balance of melt-in-your-mouth softness and a satisfying density. It’s like a little science experiment in dessert form, and I love watching it happen each time I bake these.
Focusing on how the texture of the fudge layer evolves over time, creating different eating experiences from gooey to firm with age.
The story behind this recipe
- This recipe came about one rainy afternoon when I needed something rich but also a bit nostalgic. I remember my grandmother’s kitchen, the smell of melting chocolate, and how she’d always have a batch of fudge tucked away for special occasions. I wanted to capture that feeling—something simple, unpretentious, yet deeply comforting.
- Over the years, I’ve tweaked her basic fudge bars into something that holds up better over time, changing textures as they sit. Sometimes I think of these bars as a quiet nod to childhood, a little piece of chaos in a busy life, wrapped in chocolate.
- They’re not fancy, just honest. But each batch reminds me that the best treats are often the simplest, made with a bit of love and patience.
Ingredient breakdown: key components
- Unsweetened cocoa powder: I love the deep, bitter aroma it brings—use a good Dutch-processed kind for richness, but if you want a brighter chocolate punch, try natural cocoa. Swap in carob for a milder, slightly sweeter flavor.
- Sweetened condensed milk: It’s the glue that keeps everything fudgy and smooth, with an almost caramel-y sweetness—if you’re out, a thick honey or syrup can work, but expect a different texture and a subtler flavor.
- Butter: I stick with unsalted, real butter for that creamy mouthfeel and to balance the bitterness—cream cheese can add a tang if you’re feeling fancy, but it’ll change the classic fudge vibe.
- Chocolate: Semisweet chips are my go-to—melt smoothly and add that familiar chocolate depth. Dark chocolate chunks will make it richer, but milk chocolate can soften the overall flavor. Skip the nuts if you prefer a smoother bite.
- Vanilla extract: Just a splash brightens everything up—use pure vanilla for best flavor, or a tiny bit of vanilla bean paste for a more intense aroma. No vanilla? A pinch of almond extract can add a nice twist.
- Salt: I always add a pinch here—brings out the chocolate’s complexity. Sea salt flakes on top before chilling add a lovely crunch and contrast. If you’re avoiding salt, just omit, but don’t skip it entirely.
- Optional add-ins: Nuts, dried fruit, or sea salt flakes—these can add texture or a burst of flavor but keep in mind, they can also make the bars more crumbly or chewy, so add sparingly and fold in gently.
Spotlight on key ingredients
Cocoa Powder & Sweetened Condensed Milk:
- Unsweetened cocoa powder: I love its rich, bitter aroma that deepens the chocolate flavor—use Dutch-processed for smoothness, or natural for a brighter punch. Swap in carob for a milder, sweeter note.
- Sweetened condensed milk: It’s the glue that keeps the fudge creamy and smooth—its caramel-y sweetness adds depth. If out, try a thick honey or syrup, but expect a different texture and slightly subtler flavor.
Notes for ingredient swaps
- Dairy-Free: Swap regular butter for coconut oil or vegan butter. Expect slightly different richness and a hint of coconut aroma.
- Sugar Alternatives: Use maple syrup or agave nectar instead of sweetened condensed milk. Resulting texture will be a touch softer and less creamy.
- Chocolate Types: Replace semisweet chips with dark or milk chocolate for varied intensity. White chocolate can add a sweeter, creamier note.
- Cocoa Powder: Dutch-processed cocoa offers a smoother, less tangy flavor, while natural cocoa gives a brighter, fruitier punch. Adjust sweetness accordingly.
- Add-ins: Nuts, dried fruit, or sea salt flakes can be customized or omitted. Nuts add crunch, while salt enhances chocolate depth.
- Flour or Oats: For a different chew, fold in a tablespoon of oat flour or crushed graham crackers before baking. Adds texture but changes the fudgy feel.
- Extracts: Vanilla is classic, but almond or peppermint extracts lend a different aroma and flavor profile—use sparingly for subtlety.
Equipment & Tools
- Baking pan: Holds the fudge and shapes it into bars.
- Parchment paper: Prevents sticking and makes removal easy.
- Saucepan: Melts butter and combines ingredients gently.
- Mixing spoon/spatula: Stirs ingredients and evenly distributes chocolate.
- Knife: Cuts the set fudge into bars.
Step-by-step guide to fudge bars
- Equipment & Tools: Line a 20x20cm (8×8 inch) baking pan with parchment paper, leaving some overhang for easy removal. Have a saucepan, mixing spoon, spatula, and a microwave-safe bowl ready.
- Melt butter: In a medium saucepan over low heat, melt 1/2 cup (115g) butter. Stir until smooth and just starting to bubble, about 2-3 minutes. Keep an eye to prevent burning.
- Combine dry ingredients: Sift 1 cup (85g) cocoa powder and 1/4 teaspoon salt into a bowl. This keeps the fudge smooth and prevents clumps.
- Mix wet and dry: Off the heat, add the dry mixture into the melted butter, stirring constantly. The mixture will be thick and fragrant, about 1 minute.
- Add sweetened condensed milk: Pour in 1 can (14 oz) of sweetened condensed milk. Stir vigorously until combined, glossy, and smooth, about 2 minutes. If it’s too thick, warm it slightly in the microwave for 15 seconds.
- Incorporate chocolate: Fold in 1 cup (175g) of semisweet chocolate chips or chunks. Stir until melted and evenly distributed. The mixture should be shiny and thick.
- Pour into pan: Transfer the fudgy batter into your prepared pan. Use a spatula to spread evenly and press down gently to smooth the surface. Tap the pan on the counter to settle any air bubbles.
- Chill: Place in the fridge for at least 2 hours, or until firm. For best texture, leave it overnight. The fudge will set and become easier to cut.
- Cut and serve: Use the overhang to lift the block out of the pan. Slice into squares with a sharp knife. For cleaner cuts, wipe the knife with warm water between slices.
- Resting & Finishing: Let the cut bars sit at room temperature for 10 minutes before serving. Dust with a little cocoa or sea salt flakes if desired. Store in an airtight container in the fridge for up to a week.
Allow the fudge to sit at room temperature briefly before slicing. Store leftovers in an airtight container in the fridge, letting them come to room temp for a softer bite before serving.
How to Know It’s Done
- Fudge is firm but still slightly soft when pressed, indicating proper setting.
- Chocolate chips are fully melted and glossy, with no graininess.
- Edges are clean and smooth when cut, with no crumbling or cracking.
Chocolate Fudge Bars
Ingredients
Equipment
Method
- Line your baking pan with parchment paper, leaving some overhang for easy removal, and set aside.
- In a saucepan over low heat, melt the butter gently, stirring occasionally until it’s just bubbling and fragrant, about 2-3 minutes.
- Sift the cocoa powder and salt into a bowl to prevent lumps, then add this dry mixture to the melted butter, stirring constantly until well combined and fragrant, about 1 minute.
- Pour in the sweetened condensed milk and stir vigorously until the mixture becomes glossy, thick, and smooth, about 2 minutes. It will turn velvety and dark in color.
- Fold in the chocolate chips until fully melted and evenly distributed, creating a shiny, thick batter that holds its shape.
- Pour the fudge mixture into your prepared pan, using a spatula to spread it evenly and pressing down gently to smooth the surface. Tap the pan lightly on the counter to settle the mixture and release any air bubbles.
- Place the pan in the fridge and chill for at least 2 hours, or until the fudge is firm and set. For best results, leave it overnight to develop a richer texture.
- Once set, lift the fudge out of the pan using the parchment overhang and transfer to a cutting board.
- Use a sharp knife warmed slightly with hot water to cut the fudge into neat squares or rectangles, wiping the blade clean between slices for clean cuts.
- Optional: sprinkle sea salt flakes on top of the bars for a contrasting crunch and flavor burst.
- Serve immediately or store in an airtight container in the fridge for up to a week. For softer, melt-in-your-mouth texture, let the bars sit at room temperature for 10 minutes before enjoying.
Notes
Tips to Perfect Your Fudge
- Bolded mini-head: Use high-quality cocoa powder for a deeper, more chocolatey smell and taste.
- Bolded mini-head: Sift cocoa and dry ingredients to avoid lumps and ensure a smooth fudge.
- Bolded mini-head: Melt butter slowly over low heat to prevent burning and develop a rich aroma.
- Bolded mini-head: Mix in chocolate chips off the heat until glossy and fully melted, for a luscious texture.
- Bolded mini-head: Tap the pan on the counter after pouring to release air bubbles and even out the surface.
- Bolded mini-head: Chill the fudge until completely firm; don’t rush the setting process for the best texture.
- Bolded mini-head: Use a warm, sharp knife to cut cleanly through the fudge, wiping it between slices for neat bars.
Common mistakes and how to fix them
- FORGOT to double-check your pan size → Use a 20x20cm (8×8 inch) pan for even setting.
- DUMPED too much salt → Add just a pinch; too much makes fudge overly salty and masks chocolate.
- OVER-TORCHED the chocolate → Melt gently over low heat; burnt chocolate ruins flavor and texture.
- FAILED to let fudge set fully → Chill for at least 2 hours, or it won’t hold its shape properly.
Quick fixes and pantry swaps
- When fudge is too soft → Splash cold water on the bottom of the pan to cool it quickly.
- If fudge is crumbly → Patch with a drizzle of warm condensed milk and stir until smooth.
- When chocolate shimmers or separates → Shield from direct heat, gently warm and stir to re-emulsify.
- Dumped too much salt on top → Brush off excess salt before slicing for a cleaner look.
- When bars crack or crumble → Rescue by pressing gently into a new, slightly softer layer and refrigerate again.
Prep, store, and reheat tips
- Prepare the fudge mixture and pour into the pan a day ahead. It will set better and develop richer flavors overnight in the fridge.
- Store the finished bars in an airtight container in the fridge for up to a week. The texture will firm up, making them easier to cut.
- For longer storage, wrap bars individually in plastic wrap and freeze for up to a month. Thaw at room temperature before serving.
- Reheat slices briefly in the microwave (10-15 seconds) until just softened and warm, with a glossy, melt-in-your-mouth texture returning.
- Allow chilled fudge to sit at room temp for 10 minutes before serving for optimal softness and flavor release.
Top questions about fudge bars
1. How do I tell if the fudge is done?
Look for a shiny, firm surface that holds its shape, not sticky or overly soft.
2. When should I stop chilling the fudge?
The edges will be set and slightly pulling away from the pan, with a firm but tender texture inside.
3. How do I get neat slices?
Use a sharp knife warmed slightly with hot water for clean cuts, avoiding crumbling.
4. Fudge is too hard to slice, what now?
If the fudge is too hard to cut, let it sit at room temp for 10 minutes first.
5. How long can I keep fudge bars?
Store in an airtight container in the fridge for up to a week, or freeze for longer.
6. Can I make these dairy-free?
Yes, you can swap in dairy-free butter or coconut oil, but expect a slightly different texture.
7. Can I substitute the cocoa powder?
Use natural cocoa for a brighter flavor or Dutch-processed for richness; adjust sweetness accordingly.
8. What are good add-ins?
Add a pinch of sea salt flakes on top for extra contrast or fold in nuts or dried fruit for texture.
9. My fudge is too soft, what now?
If the fudge is too soft after chilling, leave it longer or increase the chilling time to firm up.
10. How should I melt the chocolate?
When melting chocolate, do so gently over low heat to prevent burning and preserve flavor.
These fudge bars aren’t just a sweet treat; they’re a little project that reveals itself over time. Watching the texture change from gooey to firm makes each bite a new experience, and I love how simple ingredients create such depth.
In times when I need comfort or a quick fix, these bars remind me that sometimes, the simplest pleasures are the best. They’re imperfect, a bit messy, but always satisfy that craving for something rich and chocolatey.

Hi, I’m Oliver Stone, the writer, cook, and storyteller behind Crying Into the Onions. I’m so glad you found your way here. This blog was born from equal parts humor, heart, and a deep love for honest cooking. I started this blog to share more than just recipes — I wanted to capture the emotions, memories, and quirks that make food more than fuel. Because sometimes, cooking makes you laugh. Sometimes, it makes you cry (into the onions, naturally). And most of all, it brings people together.

