Growing up, those small snack stalls with sizzling chickpea fritters were my little universe. The aroma of cumin, the crispy edges, and that warm, comforting bite—nothing else quite matched it. Now, even in a busy week, I find myself craving that nostalgia, that simple joy packed into each fritter.
Making these at home isn’t about perfect technique; it’s about capturing that childhood spirit, the chaotic joy of street food, in your own kitchen. They’re quick, forgiving, and wildly satisfying—especially when you dip them in a squeeze of lemon or a dollop of yogurt. It’s a little ritual of bringing back those carefree afternoons, one crispy bite at a time.
These chickpea fritters remind me that sometimes, the best comfort comes from the most humble ingredients. They’re a reminder that good food doesn’t need to be fancy—just honest, flavorful, and made with a bit of heart. And honestly, they’re just perfect for those moments when you want a snack that’s both nostalgic and totally satisfying.
Focusing on the nostalgic charm of childhood snack stalls, these chickpea fritters are my go-to for a quick, satisfying bite that transports me back to simpler times, even amidst a busy week.
Nostalgic street food comfort
- These fritters remind me of childhood street stalls, the sizzling sound and spicy aroma still vivid in my memory.
- I feel a rush of pride every time I get that perfect crispy edge—it’s like a small victory in my kitchen.
- Sometimes, I make a batch just to have that warm, savory snack during a hectic afternoon, a little moment of calm.
- There’s a nostalgic joy in flipping these fritters, watching them turn golden, like reliving a simple, carefree lunch with friends.
The story behind this recipe
- These chickpea fritters harken back to my days helping my grandmother in her tiny kitchen. She’d always toss in a pinch of this and that, making each batch feel like a little secret. The smell of cumin and warm chickpeas would fill the air, always promising comfort and a bit of mischief.
- One rainy afternoon, I watched her fry a batch while stories of her childhood street food adventures spilled out. That moment, the sizzling sound and the golden edges—something about it stuck with me. Now, I whip these up whenever I need a quick dose of that old, familiar joy.
- heading: Nostalgic street food comfort
Historical and Cultural Roots
- These chickpea fritters trace their roots to Middle Eastern and Mediterranean street foods, where fried chickpea balls are a common snack.
- Historically, they served as a hearty, portable protein source for farmers and traders, often flavored with local herbs and spices.
- In many cultures, fritters like these are linked to communal gatherings, serving as a symbol of shared meals and festive occasions.
Key ingredients and tips
- Canned chickpeas: I mash these until smooth but leave a few bits for texture; you want a paste that feels hearty, not gluey. Swap for cooked dried chickpeas if you prefer a more rustic bite.
- Fresh herbs: Parsley and cilantro brighten the fritters with their grassy, slightly peppery notes. Use dried herbs for convenience, but expect a milder flavor and less vibrancy.
- Spices: Cumin and a pinch of cayenne add warmth and a gentle smoky kick. Switch to smoked paprika if you want a deeper, charred aroma that lingers.
- Flour: Regular all-purpose helps bind everything together with a neutral flavor. For a gluten-free version, try chickpea flour—adds a nuttier taste and denser crumb.
- Lemon juice: Brightens the mixture with a zing that cuts through the richness. If you’re out, a splash of vinegar works but won’t have quite the same fresh impact.
- Oil: Neutral oil like canola or sunflower for frying, ensuring crispy edges without extra flavor. For a healthier twist, bake the fritters, but expect less crunch.
- Onions: Finely chopped for a sweet, mellow punch that balances the spices. Red onion adds a gentle sharpness, but any onion works—just adjust the chopping fine enough to mix in smoothly.
Spotlight on key ingredients
Chickpeas:
- I mash these until smooth but leave a few bits for texture; you want a hearty paste. Swap for cooked dried chickpeas for a rustic bite.
- Fresh herbs: Parsley and cilantro add brightness and a grassy note. Use dried herbs if fresh aren’t available, but expect a milder flavor.
Spices & citrus:
- Cumin: I toast the seeds briefly to enhance their smoky, warm aroma before grinding. Use ground cumin directly for convenience, but toast for deeper flavor.
- Lemon juice: I squeeze fresh lemon for a bright, zesty kick that cuts through the richness. Bottled lemon works in a pinch but lacks the vibrant zing.
Notes for ingredient swaps
- Canned chickpeas: I mash these until smooth but leave a few bits for texture; you want a paste that feels hearty, not gluey. Swap for cooked dried chickpeas if you prefer a more rustic bite.
- Fresh herbs: Parsley and cilantro brighten the fritters with their grassy, slightly peppery notes. Use dried herbs for convenience, but expect a milder flavor and less vibrancy.
- Spices: Cumin and a pinch of cayenne add warmth and a gentle smoky kick. Switch to smoked paprika if you want a deeper, charred aroma that lingers.
- Flour: Regular all-purpose helps bind everything together with a neutral flavor. For a gluten-free version, try chickpea flour—adds a nuttier taste and denser crumb.
- Lemon juice: Brightens the mixture with a zing that cuts through the richness. If you’re out, a splash of vinegar works but won’t have quite the same fresh impact.
- Oil: Neutral oil like canola or sunflower for frying, ensuring crispy edges without extra flavor. For a healthier twist, bake the fritters, but expect less crunch.
- Onions: Finely chopped for a sweet, mellow punch that balances the spices. Red onion adds a gentle sharpness, but any onion works—just adjust the chopping fine enough to mix in smoothly.
Equipment & Tools
- Blender or food processor: To blend chickpeas into smooth and rough textures.
- Large mixing bowl: To combine all ingredients thoroughly.
- Frying pan (25cm/10in): To fry the fritters evenly.
- Spatula: To flip and handle the fritters.
- Paper towels: To drain excess oil after frying.
Step-by-step guide to chickpea fritters
- Gather your equipment: a blender or food processor, a large mixing bowl, a frying pan (about 25cm/10in), spatula, and a paper towel-lined plate. Preheat the pan over medium heat (around 180°C/350°F).
- Drain and rinse the canned chickpeas. In the blender, pulse half of them until roughly mashed, leaving some texture. Transfer to the bowl.
- In the blender, blend the remaining chickpeas with herbs, spices, and lemon juice until smooth (about 30 seconds). Add to the bowl with the mashed chickpeas.
- Finely chop the onion and add to the bowl. Mix everything thoroughly, then sprinkle in flour. Stir until combined; the mixture should hold together but not be sticky. If too wet, add a little more flour.
- Form the mixture into small balls or patties, about 2-3 cm (1 inch) thick. Set aside on a plate. If the mixture cracks, add a splash more flour and mix again.
- Add a few tablespoons of neutral oil to the hot pan. When shimmering (about 2-3 minutes), carefully place the fritters in the pan, leaving space between each. Fry for 3-4 minutes per side until golden and crispy.
- Turn the fritters with a spatula, checking for even browning. If they stick, gently loosen with a spatula. If they brown too quickly, lower the heat slightly.
- Once golden and crispy, transfer to a paper towel-lined plate to drain excess oil. Rest for 2 minutes.
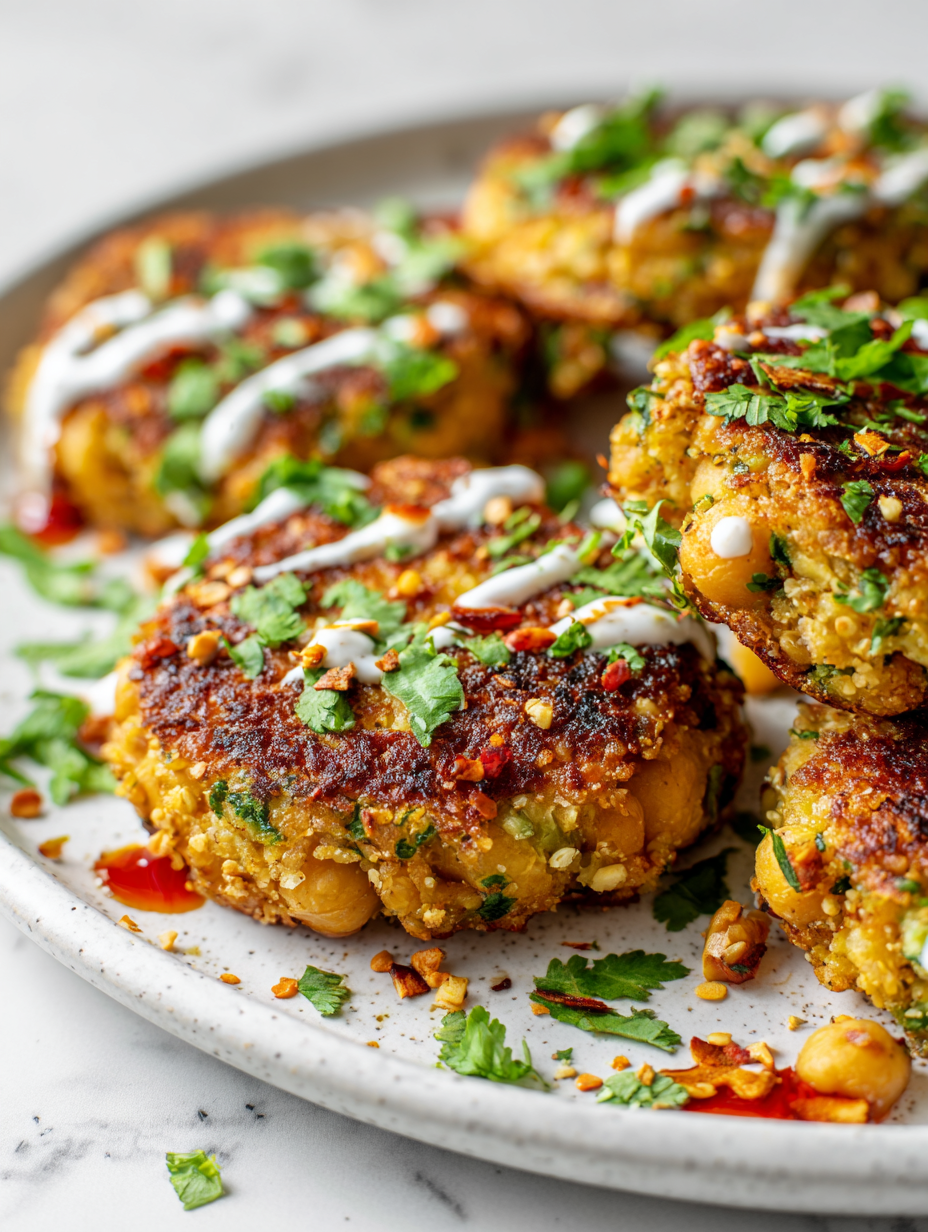
- Serve warm with lemon wedges or yogurt. For extra crunch, reheat in a 180°C/350°F oven for 5 minutes, ensuring they don’t over-dry.
- Enjoy the crispy edges and soft, flavorful interior—perfect for a snack or a light meal.
Let the fritters rest on a paper towel for 2 minutes before serving. Plate them with lemon wedges or a dollop of yogurt for contrast. Serve immediately for maximum crunch and flavor.
How to Know It’s Done
- Fritters are golden brown and crispy on the outside.
- Interior feels firm but tender, with no raw batter.
- Edges crackle when frying, indicating crispness and proper cooking.
Crispy Chickpea Fritters
Ingredients
Equipment
Method
- Drain and rinse the canned chickpeas, then add half to a blender or food processor and pulse until roughly mashed, leaving some texture. Transfer to a large mixing bowl.
- In the blender, blend the remaining chickpeas with the chopped herbs, toasted cumin, cayenne, and lemon juice until smooth, about 30 seconds. Add this to the bowl with the mashed chickpeas.
- Finely chop the red onion and stir it into the chickpea mixture. Mix everything thoroughly until combined.
- Sprinkle in the flour and stir until the mixture holds together when pressed. If it feels too wet, add a bit more flour; if too dry, add a splash of lemon juice or water.
- Form the mixture into small, flat patties about 2-3 cm thick and place them on a plate. Chill for 5 minutes if the mixture feels sticky or crumbly.
- Heat the oil in a frying pan over medium heat until shimmering and slightly bubbling, about 180°C/350°F. Carefully place the patties into the hot oil, leaving space between each.
- Fry the fritters for 3-4 minutes on each side until golden brown and crispy, listening for a gentle sizzle and watching for even browning.
- Use a spatula to flip the fritters carefully, ensuring they stay intact and turn evenly golden. Adjust heat if they brown too quickly.
- Once crispy and golden, transfer the fritters to a paper towel-lined plate to drain excess oil.
- Serve the chickpea fritters warm with lemon wedges or a dollop of yogurt for dipping. Enjoy the crispy edges and tender interior in every bite.
Notes
Pro tips for perfect fritters
- Bolded mini-head: Use a gentle touch when mixing to keep the fritters tender and avoid overworking the batter.
- Bolded mini-head: Keep the oil at a steady medium heat (around 180°C/350°F) to ensure even frying without burning.
- Bolded mini-head: When forming fritters, lightly flatten them for a more uniform, crispy exterior and even cooking.
- Bolded mini-head: To prevent sticking, don’t overcrowd the pan; fry in batches and leave space for easy flipping.
- Bolded mini-head: Use a slotted spoon to carefully lift fritters from oil, draining excess oil before resting.
- Bolded mini-head: For extra crispiness, briefly reheat in a hot oven (around 180°C/350°F) for 5 minutes, watching for dryness.
- Bolded mini-head: If fritters crack or fall apart, chill the mixture for 10 minutes before frying to help firm up the batter.
Common mistakes and how to fix them
- TOO DRY: Add a splash of water to loosen the mixture if it cracks.
- OVER-FRYING: Reduce heat if fritters burn before crispy, then cook longer on lower heat.
- UNDERCOOKED: Check for a golden color and firm texture; cook 1-2 minutes more if needed.
- SOGGY FRITTERS: Drain on paper towels immediately after frying to keep edges crispy.
Quick Fixes & Pantry Swaps
- When fritters are too soft, splash in a bit more flour to firm up the batter.
- If oil shimmers excessively, reduce heat to prevent burning; crispness suffers if too hot.
- Dumped overcooked fritters? Patch with a quick sprinkle of salt and serve with a cooling yogurt dip.
- When fritters stick to the pan, shield with a gentle shake and lift with a spatula carefully.
- Splash cold water on a smoky pan to cool, then wipe clean to prevent bitterness and lingering smoke smell.
Prep, store, and reheat tips
- Prepare the chickpea mixture ahead: mash and blend the chickpeas, herbs, and spices up to a day in advance. Keep refrigerated to maintain freshness and prevent spoilage, sensory cue: a bright, herbaceous aroma.
- Form the fritters into shape and refrigerate on a plate covered with plastic wrap for up to 24 hours. They’ll firm up slightly, making flipping easier when frying.
- Store cooked fritters in an airtight container in the fridge for up to 2 days. Reheat in a 180°C/350°F oven for 5 minutes until crispy and hot, listen for the crackle of the edges.
- Fritters can be frozen for longer storage—up to 1 month. Wrap tightly in plastic, then foil. Reheat directly from frozen in the oven, expecting a slightly less crispy exterior but still flavorful.
Common questions about chickpea fritters
1. Can I use dried chickpeas instead of canned?
Use canned chickpeas for convenience, but cooked dried chickpeas give a heartier texture. Rinse thoroughly to remove excess salt and preserve freshness.
2. Can I substitute dried chickpeas?
Yes, but soak and cook them until tender first. They’ll need longer to blend and may require more flour to bind.
3. Can I skip the herbs or use dried herbs?
Fresh herbs like parsley and cilantro add brightness. Dried herbs work, but the flavor is milder and less vibrant.
4. Can I use gluten-free flour?
Use regular all-purpose flour for a light, crisp texture. Chickpea flour adds nuttiness but makes the fritters denser.
5. What’s a good substitute for lemon juice?
Add lemon juice for a fresh, zesty flavor that cuts through oiliness. Vinegar can work, but it’s less bright.
6. What oil should I use for frying?
Neutral oils like canola or sunflower fry well without imparting flavor. For healthier options, bake instead of frying.
7. Can I omit the onions?
Finely chopped onions add sweetness and moisture. Red onions give a mild sharpness; yellow or white onions are fine too.
8. Can I prepare the batter in advance?
Make the batter a few hours ahead, cover, and keep chilled. Fry just before serving for best crispness.
9. How should I reheat leftovers?
Fritters reheat well in a 180°C (350°F) oven for 5 minutes. They stay crispy if you avoid microwave reheating.
10. What if the batter is too wet or dry?
If the mixture is too wet, stir in a little more flour. Too dry? Add a splash of water or lemon juice to loosen.
These chickpea fritters are more than just a snack; they’re a quick connection to those childhood street food stalls, with that irresistible aroma of cumin and crispy edges. Making them feels like a small act of reclaiming simple, honest flavors in a busy life.
Whenever I fry a batch, I’m reminded that good food is often humble and forgiving—perfect for a moment of comfort or a spontaneous gathering. They’re best enjoyed hot, with a squeeze of lemon, and a bit of that nostalgic warmth lingers long after the last bite.

Hi, I’m Oliver Stone, the writer, cook, and storyteller behind Crying Into the Onions. I’m so glad you found your way here. This blog was born from equal parts humor, heart, and a deep love for honest cooking. I started this blog to share more than just recipes — I wanted to capture the emotions, memories, and quirks that make food more than fuel. Because sometimes, cooking makes you laugh. Sometimes, it makes you cry (into the onions, naturally). And most of all, it brings people together.

