Category: Desserts

  • Haunted Holidays: Spooky Monster Eyeball Cake Pops to Chill & Thrill

    Haunted Holidays: Spooky Monster Eyeball Cake Pops to Chill & Thrill

    Halloween is the perfect excuse to embrace chaos in the kitchen. This year, I decided to craft something eerie yet edible: Monster Eyeball Cake Pops. The moment I dipped those creepy eyeballs in glossy red icing, I knew I was onto a wicked hit that would stir both giggles and squeals.

    What makes these eyeball cake pops stand out is their delightfully unsettling look combined with a surprisingly simple recipe. They transform ordinary cake and candy into a playful nightmare on a stick—perfect for spooky parties or creepy family get-togethers. And yes, they taste as fun as they look, bursting with a rich, vanilla aroma that practically screams Halloween.

    Monster Eyeball Cake Pops

    Monster Eyeball Cake Pops are whimsical treats made by shaping cake mixture into small balls, coating them with glossy red icing, and adding edible details to resemble creepy eyeballs on sticks. They have a firm yet tender texture with a shiny, colorful appearance that makes them perfect for Halloween parties. The combination of cake, candy coating, and decorative touches creates a playful, spooky dessert.
    Prep Time 45 minutes
    Cook Time 15 minutes
    Total Time 1 minute
    Servings: 12
    Course: Main Course
    Cuisine: Halloween
    Calories: 120

    Ingredients
      

    • 1 box store-bought cake (chocolate or vanilla) about 4 cups crumbled
    • 1/2 cup frosting store-bought or homemade, enough to bind the cake
    • 1 cup red candy melts or melting chocolates for glazing and detail
    • 12 lollipop sticks for inserting into the cake balls
    • small black licorice or candy dots for pupils
    • white edible gel or icing white edible gel or icing for eyeballs’ sclera

    Equipment

    • Mixing bowls
    • Baking sheet
    • Cooling rack
    • Candy thermometer
    • Lollipop sticks
    • Microwave-safe bowl

    Method
     

    1. Crumb the cake into fine pieces in a large bowl, then add the frosting and mix thoroughly until the mixture holds together when pressed.
    2. Use your hands to roll the mixture into approximately 1.5-inch diameter balls, placing them on a baking sheet lined with parchment paper.
    3. Insert a lollipop stick into each cake ball, then chill the assembled balls in the refrigerator for about 30 minutes to firm up.
    4. Once chilled, melt the red candy melts in a microwave-safe bowl in 30-second intervals, stirring until smooth and glossy.
    5. Dip each cake ball into the melted red coating, ensuring it is fully coated, then gently tap off excess and place back on the parchment-lined tray.
    6. Use small dots of white edible gel or icing to create the sclera of each eyeball directly onto the red coating surface.
    7. Place tiny black licorice pieces or small candy dots on the white sclera to form the pupils of the eyeballs, pressing gently to adhere.
    8. Allow the eye decorations to set completely at room temperature or in the refrigerator for about 15 minutes.
    9. Carefully remove the cake pops from the sticks, if you prefer handheld treats, or leave them on sticks for display and serving.

    Notes

    Ensure the candy melts are melted smoothly to avoid lumps. For extra spooky effect, use green or purple coatings and add additional facial features.
    These Monster Eyeball Cake Pops are all about playful fright, perfect for making your Halloween gatherings memorable. Whether they’re the star of your spooky snack table or a creepy craft project with kids, they bring a burst of joyfully eerie fun.

    Every bite offers a perfect mix of sweetness and a hint of chaos, which is exactly what makes Halloween sweetly special. The mix of textures—crunchy shells with soft cake centers—makes each bite a tiny, tasty adventure. This recipe isn’t just about the treats; it’s about creating moments of delight amid the spooky chaos.

  • Spiced Pumpkin Muffins with a Surprise Ingredient

    Spiced Pumpkin Muffins with a Surprise Ingredient

    Autumn mornings call for a little magic in the oven. These pumpkin muffins aren’t just your basic fall treat; they hide a surprising twist that adds extra warmth and texture. Think crunchy pecans tucked inside each fluffy bite, releasing a fragrant aroma that beckons everyone to the kitchen.

    The secret ingredient? A dash of espresso powder that deepens the pumpkin’s sweetness without overpowering it. The smell alone—rich, spicy, with a hint of coffee—fills the house, turning any routine breakfast into a moment of cozy celebration. Perfect for chilly mornings or anytime you want a quick, satisfying snack.

    By experimenting with textures and unexpected ingredients, I found new joy in baking pumpkin treats. These muffins come together fast, making them an ideal project for lazy weekends or spontaneous gatherings. They’re moist, flavorful, and just a little bit fancy—trust me, they won’t stay hidden long!

    Pumpkin Walnut Muffins with Espresso

    These pumpkin muffins are soft and moist with a tender crumb, featuring chunks of crunchy pecans folded into the batter. The muffins have a slightly domed top with a golden-brown crust and a fragrant aroma of pumpkin spices and coffee. The addition of espresso powder enhances the sweetness, creating a comforting fall treat suitable for breakfast or a snack.
    Prep Time 15 minutes
    Cook Time 20 minutes
    Total Time 35 minutes
    Servings: 12
    Course: Main Course
    Cuisine: American
    Calories: 240

    Ingredients
      

    • 1 3/4 cups all-purpose flour sifted
    • 1 cup granulated sugar
    • 1/2 cup unsalted butter melted
    • 1 cup canned pumpkin
    • 2 large eggs
    • 1 1/2 teaspoons baking powder
    • 1/2 teaspoon baking soda
    • 1/2 teaspoon salt
    • 1/2 cup chopped pecans

    Equipment

    • Mixing bowls
    • Whisk
    • Rubber spatula
    • Muffin tin
    • Paper muffin cups or spray
    • Oven

    Method
     

    1. Preheat your oven to 350°F (175°C) and line a muffin tin with paper cups or spray with non-stick spray.
    2. In a large mixing bowl, whisk together the sifted flour, sugar, baking powder, baking soda, salt, and espresso powder until evenly combined. The mixture should look light and uniform.
    3. In a separate bowl, beat the eggs lightly, then add the melted butter and canned pumpkin. Whisk until the mixture is smooth, with a slightly thick and glossy texture.
    4. Pour the wet ingredients into the dry ingredients and gently fold together with a spatula until just combined. Be careful not to overmix—the batter should be slightly lumpy but combined.
    5. Fold in the chopped pecans for added crunch and flavor, distributing them evenly throughout the batter.
    6. Spoon the batter into each muffin cup, filling about 3/4 full. The batter should mound slightly over the top of each cup.
    7. Bake in the preheated oven for 20-22 minutes, or until the muffins are golden brown and a toothpick inserted into the center comes out clean.
    8. Remove the muffins from the oven and let them cool in the tin for about 5 minutes, then transfer to a wire rack to cool completely. The aroma of pumpkin, spices, and coffee will fill your kitchen.
    9. Once cooled slightly, serve the muffins warm or at room temperature. Their moist crumb and crunchy pecan topping make them an inviting fall treat.

    Whether it’s the comforting aroma that fills your space or the burst of spice in each bite, these pumpkin muffins bring a touch of elegance to everyday baking. Their unique twist makes them memorable and perfect for sharing with friends or family.

    As the season shifts and pumpkin flavor saturates everything, these muffins remind us how simple ingredients transform into something special. No matter how busy life gets, a batch of these always delivers a cozy satisfaction—like a little piece of fall in each mouthful.

  • Spooky Delight: The Ultimate Halloween Spider Web Cake

    Spooky Delight: The Ultimate Halloween Spider Web Cake

    As a baker with a fascination for the eerie and unusual, I adore creating treats that turn a simple occasion into a spooky spectacle. This Halloween, I decided to craft a Spider Web Cake that not only looks haunting but also tastes divine, blending sweet and slightly spicy flavors perfect for the season. The smell of vanilla and chocolate intertwining with a hint of peppermint fills my kitchen, setting the perfect spooky ambiance.

    Designing this cake was like drawing a web in the air—delicate, intricate, and a little chaotic, just like Halloween night. The process transforms from chaos to art as I layer rich frosting and glide white icing to mimic spider webs. It’s a bit messy, a bit wild, but the result? Spectacular enough to make even the bravest scream with delight.

    Spider Web Cake

    This Spider Web Cake features multiple layers of rich chocolate and vanilla cake, decorated to resemble an intricate spider web with white icing threading across the top. The frosting is creamy and smooth, providing a contrasting texture to the moist cake layers. The final appearance is a hauntingly beautiful dessert perfect for Halloween celebrations.
    Prep Time 45 minutes
    Cook Time 30 minutes
    Total Time 1 hour 15 minutes
    Servings: 8
    Course: Main Course
    Cuisine: Western
    Calories: 450

    Ingredients
      

    • 2 ½ cups all-purpose flour sifted
    • 2 cups granulated sugar
    • 1 cup unsweetened cocoa powder preferably Dutch-processed
    • 1 ½ teaspoons baking soda
    • 1 teaspoon salt
    • 2 large eggs at room temperature
    • 1 ¾ cups all-purpose flour for vanilla cake, sifted
    • 1 ½ cups granulated sugar
    • 2 teaspoons baking powder
    • ½ teaspoon salt
    • 3 cups powdered sugar for icing
    • 2-3 tablespoons milk to adjust consistency
    • white icing for web decoration prepared or pre-made

    Equipment

    • Mixing bowls
    • Electric mixer
    • Cake pans
    • Cooling racks
    • Piping bag and tips
    • Spatula

    Method
     

    1. Preheat your oven to 350°F (175°C). Grease and flour two 9-inch round cake pans, then set aside.
    2. For the chocolate layer, whisk together sifted flour, cocoa powder, baking soda, and salt in a bowl. In another bowl, combine buttermilk, oil, eggs, and vanilla. Gradually mix the wet ingredients into the dry until smooth.
    3. Pour the chocolate batter evenly into the prepared pans. Bake for about 30 minutes until a toothpick inserted in the center comes out clean. Cool in pans for 10 minutes, then transfer to a wire rack to cool completely.
    4. For the vanilla layer, whisk together sifted flour, baking powder, and salt. In another bowl, mix milk, oil, eggs, and vanilla. Combine the wet and dry ingredients and stir until smooth.
    5. Divide the vanilla batter evenly into two prepared pans. Bake at 350°F (175°C) for 25–30 minutes until a toothpick tests clean. Allow to cool completely on a wire rack.
    6. While the cakes cool, beat softened butter and powdered sugar together until fluffy. Add milk gradually to reach a smooth, spreadable frosting. Tint acrylic icing white for decoration.
    7. Once cakes are cooled, carefully level the tops if needed. Spread a layer of frosting on the chocolate layer, then top with the vanilla layer. Repeat with the second layers and crumb-coat the entire cake, smoothing the surface.
    8. Apply a final thick layer of frosting over the cake, smoothing with a spatula. Chill the cake for 30 minutes to set the frosting.
    9. Using a piping bag fitted with a fine tip, draw concentric circles on the top of the cake with white icing. Then, use a thin toothpick or skewer to draw lines from the center outward to mimic a spider web.
    10. Decorate the web further by adding small edible spiders or web accents if desired. Place the completed cake on a serving platter.
    11. This Spider Web Cake is ready to serve! Slice gently to reveal the layered chocolate and vanilla interior, and enjoy the spooky, delicious treat.

    This Spider Web Cake is more than just a dessert; it’s a centerpiece that sparks conversations and fearsome smiles. The combination of its creepy looks and delicious flavor makes it a seasonal favorite that’s easy to prepare in advance, letting you focus on other spooky details of the night. Every slice is a small celebration of Halloween’s magic and mischief.

    In the end, it’s about creating memories with a touch of chaos and a sprinkle of fun. Whether it’s your first time or you’re a seasoned baker, this cake invites everyone to indulge in a little frightful sweetness. After all, Halloween only comes once a year, and this cake ensures it’s unforgettable every time.

  • Autumn Mystique: The Secret Ingredient in My Pumpkin Bread

    Autumn Mystique: The Secret Ingredient in My Pumpkin Bread

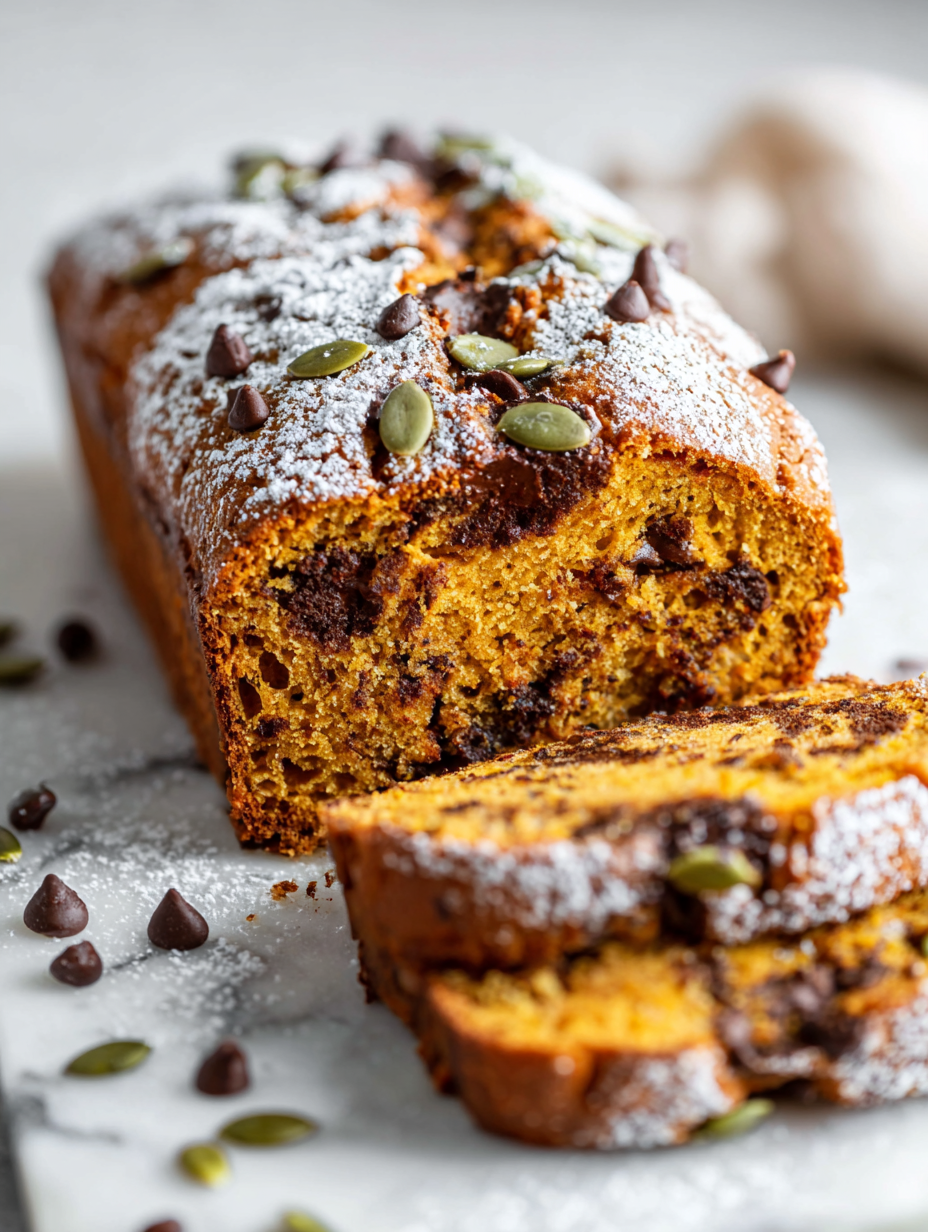
    There’s a certain thrill in baking pumpkin bread that’s filled with an unexpected twist I discovered last fall. Instead of the usual spices, I add a pinch of roasted chipotle powder, giving it a smoky depth that transforms every slice into a sensory adventure. The warm cinnamon and nutmeg blend harmoniously with the smoky kick, reminding me of cozy evenings by the fire in late October.

    My kitchen fills with the inviting aroma of soft pumpkin, melting butter, and toasted spices. It’s more than just baking; it’s about crafting moments of comfort that sneak into my day, like a secret shared with my future self. This bread isn’t just for breakfast—it’s a story, a tradition, a small rebellion with every bite.

    Smoky Pumpkin Bread with Chipotle

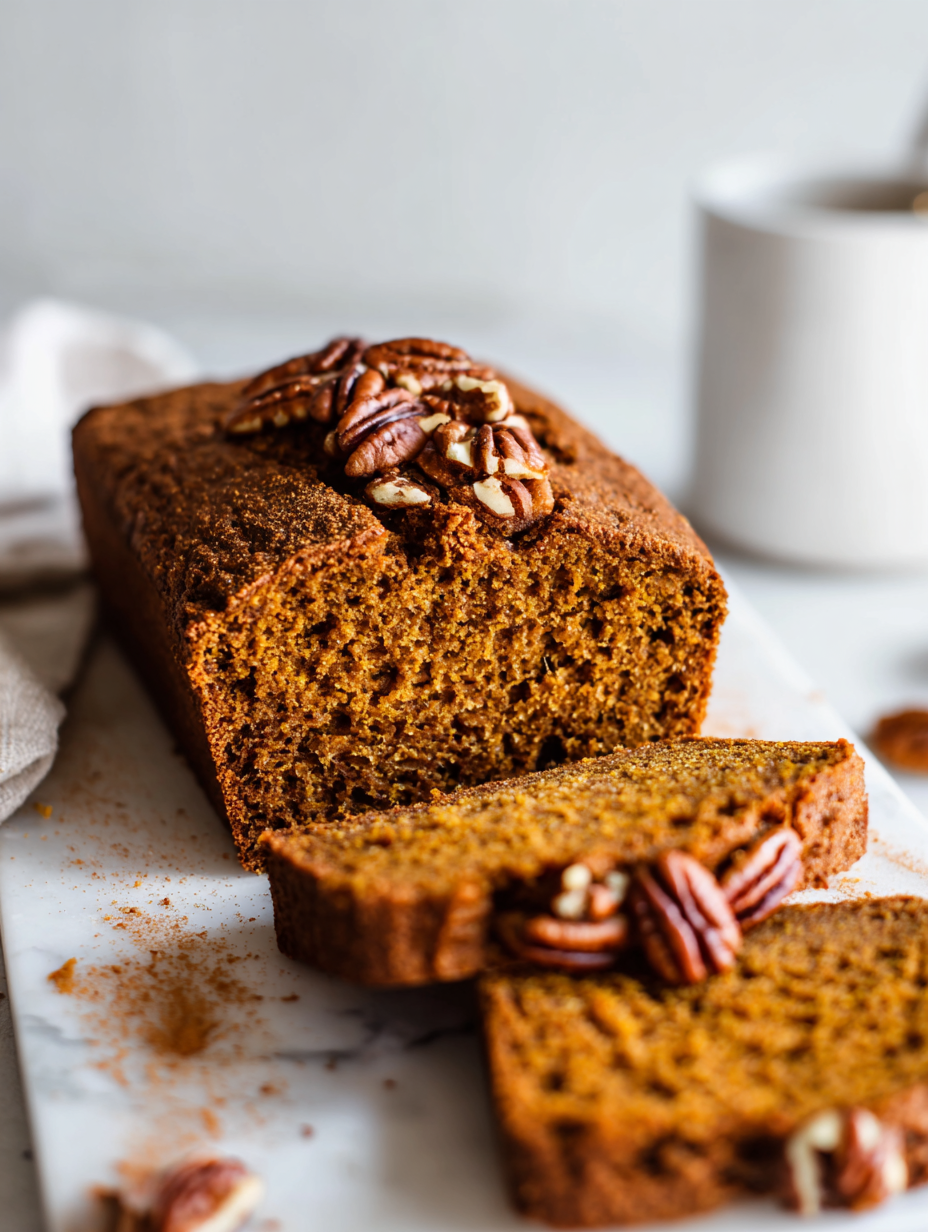
    This pumpkin bread combines moist, tender crumb with a subtle smoky flavor from roasted chipotle powder. It’s baked until golden and lightly domed, with a dense yet soft texture perfect for fall mornings or cozy afternoons. The addition of warm spices and smoky heat creates a distinctive, flavorful loaf.
    Prep Time 15 minutes
    Cook Time 1 hour
    Total Time 1 hour 15 minutes
    Servings: 8
    Course: Main Course
    Cuisine: American
    Calories: 280

    Ingredients
      

    • 1.5 cups all-purpose flour
    • 1 cup granulated sugar
    • 1/2 cup unsalted butter melted
    • 1 cup pure pumpkin puree
    • 3 large eggs
    • 1 teaspoon baking soda
    • 1/2 teaspoon salt
    • 2 teaspoons cinnamon
    • 1/2 teaspoon nutmeg
    • 1/4 teaspoon roasted chipotle powder adds smoky depth

    Equipment

    • Mixing bowls
    • Whisk
    • Loaf pan
    • Rubber spatula
    • Cooling rack

    Method
     

    1. Preheat your oven to 350°F (175°C) and grease a standard loaf pan.
    2. In a large mixing bowl, whisk together the melted butter and sugar until smooth and slightly glossy, which takes about 1-2 minutes and releases a sweet aroma.
    3. Add the eggs one at a time, whisking well after each addition, until the mixture is creamy and slightly pale.
    4. Gently fold in the pumpkin puree with a spatula until fully incorporated, creating a thick, orange-hued batter.
    5. In another bowl, sift together the flour, baking soda, salt, cinnamon, nutmeg, and roasted chipotle powder to evenly distribute the spices.
    6. Gradually add the dry ingredients to the wet mixture, folding gently to combine without overmixing. The batter should be thick and cohesive.
    7. Pour the batter into the prepared loaf pan, smoothing the top with a spatula for an even surface.
    8. Bake in the preheated oven for 55-65 minutes, or until a toothpick inserted into the center comes out clean and the loaf is golden brown.
    9. Once baked, remove the bread from the oven and let it cool in the pan for 10 minutes, then transfer to a wire rack to cool completely, which allows the texture to set.
    10. Slice the bread once cooled and enjoy its tender crumb with a smoky kick on every bite.

    Notes

    For a spicier smoky flavor, increase the chipotle powder slightly. Store leftovers in an airtight container for up to 3 days or freeze slices for longer storage.

    Making this pumpkin bread feels like an act of creative rebellion against the overly sweet, predictable treats of American fall classics. It’s a reminder that simplicity combined with a bit of daring can produce something truly memorable. Every slice now carries an echo of that smoky warmth, perfect for chilly mornings.

    As the seasons shift, this bread becomes a staple for brunches and cozy weekends. It’s an unassuming gift—an everyday miracle that turns simple ingredients into a moment of delight. And that’s what keeps me coming back to my oven, making this pumpkin bread again and again.

  • Spooky Delight: Halloween Graveyard Pudding Cups

    Spooky Delight: Halloween Graveyard Pudding Cups

    Imagine sinking your spoon into a chilling little graveyard of chocolate pudding, decorated with crushed cookies and eerie edible tombstones. This isn’t just dessert, it’s a miniature haunted scene that sparks kids’ giggles and grown-ups’ nostalgic sighs alike. Each cup feels like a secret portal to a Halloween wonderland, perfect for haunting your table with a dash of chaos.

    As the leaves turn and the air gets a little sharper, these pudding cups become a fun, no-fuss centerpiece for any spooky gathering. Their simple ingredients hide a dark, decadent charm that makes them irresistible. Plus, they’re so easy to assemble that you might just scare yourself with how quick it is to create edible art.

    Halloween Chocolate Pudding Cups

    This dessert features creamy chocolate pudding served in individual cups, decorated with crushed cookies and edible tombstones to create a spooky scene. The pudding is thick and smooth, with a dark, decadent appearance, perfect for Halloween-themed gatherings. The assembly involves layering and decorating, resulting in a visually appealing and indulgent treat.
    Prep Time 15 minutes
    Cook Time 10 minutes
    Total Time 25 minutes
    Servings: 6
    Course: Main Course
    Cuisine: American
    Calories: 250

    Ingredients
      

    • 4 cups whole milk for pudding base
    • 1/2 cup granulated sugar
    • 1/3 cup unsweetened cocoa powder
    • 3 tablespoons cornstarch for thickening
    • 1/4 teaspoon salt
    • 1 teaspoon vanilla extract
    • 1 pack chocolate pudding mix prepared per package instructions
    • 1 cup cookie crumbs for decoration and base layer
    • 6 small edible tombstones for decoration

    Equipment

    • Mixing bowls
    • Whisk
    • Measuring cups and spoons
    • Serving cups or dessert glasses
    • Crushing tool (like a rolling pin or food processor)

    Method
     

    1. In a mixing bowl, whisk together the cocoa powder, sugar, cornstarch, and salt until evenly combined.
    2. Gradually pour in the milk while whisking constantly to prevent lumps and create a smooth mixture.
    3. Transfer the mixture to a saucepan and cook over medium heat, stirring constantly until it thickens and starts to bubble, about 5-7 minutes.
    4. Remove from heat, stir in vanilla extract, and let it cool slightly before pouring into serving cups.
    5. Allow the pudding to set in the refrigerator for at least 2 hours until firm and chilled.
    6. Once set, sprinkle crushed cookies over the top of each pudding cup to resemble a graveyard scene.
    7. Place a small edible tombstone into each cup, partially inserted into the pudding for a spooky effect.
    8. Decorate further with additional cookie crumbs if desired, creating a layered, eerie landscape.
    9. Serve immediately or keep refrigerated until ready to enjoy, ensuring the decorations stay intact.

    Notes

    For added spookiness, use black or dark chocolate cookies for the crumb topping or paint edible designs on the tombstones.
    Crafting these graveyard pudding cups is as satisfying as cracking open a fortune cookie—except here, the secrets are about flavors and fun. Watching everyone’s eyes light up as they discover the chocolatey graveyard is the real treat.

    This year, let your Halloween spread be haunted by playful desserts that come together in minutes but leave lasting impressions. No matter if kids or adults are digging in, these pudding cups carve out a space in your holiday memory with their spooky flair and tasty twist.

  • Spooky Sweetness: Halloween Candy Corn Parfaits

    Spooky Sweetness: Halloween Candy Corn Parfaits

    Imagine layered sweetness stored in jars, resembling tiny Halloween pumpkins. These Candy Corn Parfaits turn nostalgic treats into sophisticated dessert cups perfect for October gatherings. Each spoonful merges creamy vanilla, bright orange and yellow layers, and crunchy candy corn. It’s a playfully festive way to celebrate and satisfy those seasonal sugar cravings.

    Candy Corn Parfaits

    Candy Corn Parfaits are layered dessert cups featuring creamy vanilla pudding, vibrant orange and yellow gelatin layers, and crunchy candy corn for texture. The dessert is assembled in individual jars or cups to resemble small Halloween pumpkins, creating a colorful and festive treat. The final appearance is visually striking with distinct, smooth layers topped with sweet candy corn.
    Prep Time 20 minutes
    Cook Time 10 minutes
    Total Time 30 minutes
    Servings: 4
    Course: Main Course
    Cuisine: American
    Calories: 250

    Ingredients
      

    • 1 cup vanilla pudding prepared according to package instructions
    • 1 package orange gelatin mix instant gelatin, dissolved in 1 cup boiling water
    • 1 package yellow gelatin mix instant gelatin, dissolved in 1 cup boiling water
    • 1/2 cup candy corn for decoration and topping

    Equipment

    • Mixing bowls
    • Whisk
    • Measuring cups
    • Gelatin molds or small jars
    • Spoons or spatula
    • Refrigerator

    Method
     

    1. Prepare vanilla pudding by whisking it until smooth, then set aside in the refrigerator to chill.
    2. Dissolve the orange gelatin mix in boiling water, stirring until fully dissolved. Pour into a shallow dish and refrigerate until partially set but still pourable, about 15–20 minutes.
    3. Dissolve the yellow gelatin mix in boiling water, then refrigerate until it reaches a similar semi-set consistency as the orange layer.
    4. Once the orange gelatin is semi-set, pour a layer into the bottom of each jar or cup and refrigerate for 10 minutes until firm.
    5. Next, add a layer of the vanilla pudding over the orange gelatin, smoothing the top gently with a spatula.
    6. Once the yellow gelatin is semi-set, carefully pour it over the vanilla pudding layer, creating a bright, colorful top layer, then refrigerate until fully set, about 15–20 minutes.
    7. Just before serving, sprinkle candy corn evenly on top of each parfait for a festive touch and crunchy texture.

    Notes

    For best visual effect, ensure gelatin layers are semi-set before pouring each new layer. Use clear jars for an attractive layered appearance. This dessert is best served chilled.
    These parfaits are more than just a treat; they’re a conversation starter at your Halloween table. Their vibrant looks and familiar flavors spark memories with a modern twist. As the season’s chill sets in, a little sweet chaos in glass can warm up any room—and your heart.

  • Enchanted Halloween Poison Toffee Apples: A Sinister Delight

    Enchanted Halloween Poison Toffee Apples: A Sinister Delight

    Ever wondered what it’s like to taste a wicked potion? These Halloween Poison Toffee Apples turn a simple treat into a mysterious feast for the senses. Their dark glossy coating conceals a bitter-sweet surprise, perfect for spooky nights. The crunch of crisp apples combined with gooey toffee makes every bite a haunting experience.

    This recipe is not your usual festive snack. It’s infused with a touch of chaos—think swirling colors and a dash of danger. Making these at home lets you dance with the creepy side of culinary magic. Plus, they look so eerie that your guests will be captivated before the first bite.

    Halloween Poison Toffee Apples

    This dessert features fresh apples dipped in a glossy toffee coating that hardens to a crisp shell, encasing the juicy fruit inside. The dark, shiny exterior creates an eerie, haunted appearance, while the internal apple remains tender and crunchy. The result is a hauntingly sweet and bitter treat perfect for spooky occasions.
    Prep Time 15 minutes
    Cook Time 20 minutes
    Total Time 35 minutes
    Servings: 6
    Course: Main Course
    Cuisine: Halloween
    Calories: 250

    Ingredients
      

    • 6 medium fresh apples preferably tart, such as Granny Smith
    • 200 g granulated sugar for toffee
    • 50 ml water to dissolve sugar
    • 2 tbsp light corn syrup to prevent crystallization
    • 1 drop black food coloring for spooky color

    Equipment

    • Heavy-bottomed saucepan
    • Wooden spoon or heatproof spatula

    Method
     

    1. Start by washing and thoroughly drying the apples. Insert a wooden stick or lollipop stick into the stem end of each apple to facilitate dipping. Set aside on a lightly greased tray.
    2. Combine the sugar, water, and corn syrup in a heavy-bottomed saucepan over medium heat. Stir gently until the sugar dissolves completely, then stop stirring to prevent crystallization.
    3. Bring the mixture to a boil and cook without stirring until it reaches 150°C (hard crack stage) on a candy thermometer, or until the toffee turns a deep amber color. This will take about 10-15 minutes, and the mixture will bubble vigorously.
    4. Remove the pan from heat and immediately add a drop of black food coloring, stirring quickly to incorporate the eerie dark hue into the hot toffee.
    5. Hold each apple by the stick and dip it carefully into the toffee mixture, tilting the pan if needed to cover the apple evenly. Allow any excess to drip off, then place the coated apple on the prepared tray.
    6. Repeat the dipping process for each apple, working quickly as the toffee cools and hardens fast. Once all are coated, let them sit untouched for about 15 minutes until the toffee is fully set and glossy.
    7. Inspect the apples to ensure the toffee shell is firm and crisp. If desired, drizzle additional contrasting colors or decorations for a more haunted effect. Serve once the coating is completely hardened.

    Notes

    To achieve a more opaque, darker coating, add extra black food coloring gradually. Be cautious as the syrup is extremely hot. For a more chaotic look, swirl multiple colors into the toffee before dipping.
    As the shadows grow longer and October winds whistle through the trees, these Poison Toffee Apples become the star of any haunting gathering. They’re a thrilling twist on a childhood favorite, perfect for embracing the spooky season. Plus, their rich, caramel scent fills the air with nostalgic hints of childhood mischief.

    Enjoy hosting with these chilling treats—they’re simple, stunning, and irresistibly fun. They remind us that a little darkness can make the sweetest moments even more memorable. Now, let the haunting begin, one sinister apple at a time.

  • Spooky Science: Crafting a Ghoulishly Delicious Halloween Brain Jello Mold

    Spooky Science: Crafting a Ghoulishly Delicious Halloween Brain Jello Mold

    Halloween is the perfect time to unleash your inner mad scientist in the kitchen, especially with a recipe that looks as shocking as it tastes. The Brain Jello Mold transforms simple gelatin into a spooky, squishy brain that captivates both the eyes and the palate. It’s a fun, eerie project that’s guaranteed to get giggles at your spooky gathering.

    This recipe isn’t just about aesthetic; it’s about embracing the chaos of holiday baking. The squirmy, textured brain is surprisingly easy to make with a few kitchen tricks and a lot of imagination. Plus, the vibrant red color and gelatinous texture make it a conversation piece that’s as terrifying as it is delicious.

    Brain Jello Mold

    This dish transforms bright red gelatin into a textured, brain-like shape through careful layering and molding. The gelatin sets into a squishy, bumpy appearance with a smooth, jelly-like texture that mimics a human brain, making it both eerie and fun for Halloween celebrations.
    Prep Time 20 minutes
    Cook Time 10 minutes
    Total Time 30 minutes
    Servings: 8
    Course: Main Course
    Cuisine: Halloween
    Calories: 60

    Ingredients
      

    • 3 cups fruit juice or water for blooming gelatin
    • 3 tablespoons unflavored gelatin powder
    • 1 cup boiling water to dissolve gelatin
    • 1 cup red fruit juice or flavored gelatin for flavor and color
    • 1 cup cold water to chill gelatin
    • Optional edible glitter or food coloring for effect

    Equipment

    • Mixing bowls
    • Saucepan
    • Mold or silicone brain-shaped mold
    • Whisk
    • Measuring cups and spoons

    Method
     

    1. Pour the fruit juice or water into a mixing bowl and sprinkle the unflavored gelatin evenly over the surface. Let it sit for 5 minutes until the gelatin grates and blooms, absorbing the liquid.
    2. In a saucepan, bring the boiling water to a simmer and then pour it over the bloomed gelatin. Whisk vigorously until all the gelatin is completely dissolved and the mixture is smooth, with no lumps.
    3. Add the flavored gelatin or fruit juice to the dissolved gelatin mixture, stirring well to combine. This gives your jelly its vibrant color and flavor.
    4. Stir in cold water to help cool the mixture slightly, then pour the gelatin into a clean, brain-shaped mold or silicone mold. Fill it almost to the top with a steady pour to avoid air bubbles.
    5. Place the mold in the refrigerator and chill for at least 4 hours or until fully set and firm to the touch.
    6. Once set, gently unmold the gelatin by inverting the mold onto a serving plate. Slightly wiggle the mold to release the brain shape, revealing the textured, bumpy surface.
    7. If desired, decorate with edible glitter or add small touches of food coloring to enhance the creepy, brain-like appearance before serving.
    Creating a Halloween Brain Jello Mold is more than making dessert — it’s about storytelling through your food. The moment you set the squishy, bloody-looking brain on your table, your guests will be enchanted and slightly creeped out.

    Remember, the best part about this project is the chaos and fun of shaping something that seems so out of the ordinary. It’s a fantastic way to break the ice and bring a little horror humor to the holiday season, making your Halloween celebration truly memorable.

  • Spice Up Your Fall with this Unexpected Pumpkin Cheesecake Delight

    Spice Up Your Fall with this Unexpected Pumpkin Cheesecake Delight

    As the air turns crisper and pumpkin patches spill over with bright orange gourds, I find myself craving desserts that surprise the palate. This pumpkin cheesecake takes a traditional fall classic and elevates it with a subtle hint of sea salt and a graham cracker crust infused with ginger. It’s not just a dessert; it’s an experience layered in flavors and textures that dance on your tongue.

    What sets this cheesecake apart is the velvety cream cheese filling paired with pureed pumpkin that’s seasoned to evoke autumn’s essence. The crust offers a crispy counterpoint with a sprinkle of cinnamon, making every bite an adventure in comfort and sophistication. It’s perfect for those who want a touch of elegance without the fuss.

    WHY I LOVE THIS RECIPE?

    • The unexpected salt caramel swirl in the filling feels like a slow, warm hug.
    • It reminds me of cozy gatherings without the heavy, overly sweet desserts.
    • Layering flavors makes me proud of my baking experiments.
    • The balance of spice and sweetness feels just right for crisp evenings.
    • There’s an eerie, nostalgic vibe that comes with fall baking, and this recipe captures it perfectly.

    AVOID MY DISASTER (You’re Welcome)

    • FORGOT to grease the pan—stuck crust. Spray generously next time, especially on the edges.
    • DUMPED too much pumpkin—watery filling. Reduce pumpkin or bake longer to improve firmness.
    • OVER‑TORCHED the crust—bitter smell. Keep an eye and lower the oven temp slightly.
    • FORGOT to rotate during baking—uneven top. Turn halfway through for radiance.

    QUICK FIXES THAT SAVE YOUR DAY

    • IF the filling cracks—spritz with whipping cream and smooth out, instant silkiness.
    • WHEN the crust browns too fast—cover edges with foil, prevent burnt notes.
    • ESCALATED to a sinkhole—add whipped cream around the edges and cover with fruit.
    • SPLASH vanilla extract into the batter for extra aroma and richness.
    • When in doubt, a quick chill in the fridge tightens the entire dessert with a satisfying crunch and creaminess.

    As the month wanes and pumpkins become a fleeting memory, making this cheesecake feels like capturing a snippet of fall’s fleeting beauty. The aroma of caramelizing spices and toasted crust will linger long after the last slice disappears from the fridge.

    There’s a quiet magic in transforming simple ingredients into something that tastes like a celebration. This pumpkin cheesecake isn’t just a dessert; it’s a story told with every bite, full of the joy, chaos, and nostalgia that come with the season.

    Pumpkin Cheesecake with Sea Salt and Ginger-Graham Crust

    This pumpkin cheesecake combines a velvety cream cheese filling seasoned with autumn spices and pureed pumpkin, baked until smooth with a slight jiggle in the center. It is layered on a crispy graham cracker crust infused with ginger and topped with a sprinkle of sea salt, creating a harmonious balance of flavors and textures. The final dessert has a creamy, firm texture with a lightly browned top and a decorative crust edge.
    Prep Time 20 minutes
    Cook Time 1 hour
    Total Time 1 hour 20 minutes
    Servings: 8
    Course: Main Course
    Cuisine: American
    Calories: 420

    Ingredients
      

    • 1 1/2 cups Graham cracker crumbs preferably gluten-free or traditional
    • 1/4 cup granulated sugar for crust
    • 1/2 cup unsalted butter melted
    • 1 1/2 cups Cream cheese softened
    • 1 cup Pureed pumpkin canned or freshly cooked
    • 3/4 cup granulated sugar for filling
    • 3 large eggs room temperature
    • 1 1/2 teaspoons ground cinnamon plus extra for crust
    • 1/2 teaspoon ground ginger optional, for added flavor
    • 1/2 teaspoon sea salt for topping and crust infusion

    Equipment

    • Springform pan
    • Mixing bowls

    Method
     

    1. Mix the graham cracker crumbs, sugar, and a pinch of cinnamon in a bowl until evenly combined. Pour in melted butter and stir until the mixture resembles wet sand. Press this mixture firmly into the bottom of a greased springform pan, creating an even crust, then bake at 350°F (175°C) for 8-10 minutes until lightly fragrant. Let it cool while preparing the filling.
    2. In a large mixing bowl, beat the softened cream cheese on medium speed until smooth and creamy, about 2 minutes. Add the pumpkin puree, sugar, vanilla extract, cinnamon, ginger, and a pinch of sea salt, mixing until well combined and smooth.
    3. One at a time, beat in the eggs, ensuring each is fully incorporated before adding the next. The batter should be thick, velvety, and slightly aerated, with no lumps remaining.
    4. Pour the filling mixture over the cooled crust, smoothing the top with a spatula. Tap the pan gently on the counter to release any air bubbles and create an even surface.
    5. Bake the cheesecake at 350°F (175°C) for about 55-60 minutes, or until the edges are set but the center still gently jiggles when shaken. The top might turn a light golden brown, with slight cracks forming if baked a bit longer.
    6. Turn off the oven and crack the oven door open. Let the cheesecake cool inside for about an hour to prevent cracking. Then, transfer it to the fridge and chill for at least 4 hours or overnight to set fully and develop flavors.
    7. Just before serving, sprinkle a pinch of sea salt over the top for a savory contrast. Slice with a sharp knife, and serve chilled for a rich, velvety dessert with a crispy crust and spiced pumpkin filling.

    Notes

    Ensure the cream cheese is softened for smooth mixing. Do not overmix once eggs are added to avoid cracks. Chill thoroughly to achieve the perfect texture. Optional: garnish with whipped cream or toasted pecans for extra flavor.

    Few desserts evoke the spirit of autumn quite like this pumpkin cheesecake. It’s a reminder that sometimes, the simplest pleasures—combined with a touch of surprise—can make the season feel even more special.

    In the end, it’s about embracing the little imperfections and celebrating the cozy moments that baking brings. This recipe might become your new fall favorite, a sweet, spicy memory in the making.

  • Spooky Surprise: Halloween Pumpkin Cheesecake Bars with a Twist

    Spooky Surprise: Halloween Pumpkin Cheesecake Bars with a Twist

    Whether you’re hosting a Halloween party or just craving a tiny slice of Halloween magic, these bars deliver. They combine velvety pumpkin, tangy cream cheese, and a crumbly base into a single bite-sized treat. And the best part? They look impressive but are easy enough for rookie bakers to master.

    Halloween Pumpkin Cream Cheese Bars

    These bars feature a smooth, spiced pumpkin layer combined with tangy cream cheese, all resting on a buttery, crumbly crust. They are assembled with layering and baked until set, resulting in a creamy yet firm treat with a festive appearance.
    Prep Time 20 minutes
    Cook Time 25 minutes
    Total Time 45 minutes
    Servings: 12
    Course: Main Course
    Cuisine: American
    Calories: 250

    Ingredients
      

    • 1 1/2 cups all-purpose flour for crumbly crust
    • 1/2 cup granulated sugar in the crust
    • 1/2 cup unsalted butter cold, cubed for the crust
    • 8 oz cream cheese softened, for topping
    • 1/2 cup granulated sugar for the cream cheese layer
    • 1 tsp vanilla extract adds flavor to cream cheese
    • 1 cup canned pumpkin for the pumpkin layer
    • 2 large eggs to thicken pumpkin filling
    • 1/2 cup brown sugar adds warmth to pumpkin filling
    • 1 1/2 tsp pumpkin pie spice for flavor
    • 1/4 tsp salt enhances flavors

    Equipment

    • Mixing bowls
    • 9×13 inch baking pan
    • Stand or hand mixer
    • Spatula
    • Measuring cups and spoons
    • Knife for cutting
    • Oven

    Method
     

    1. Preheat your oven to 350°F (175°C). In a mixing bowl, combine the flour and granulated sugar for the crust. Cut in the cold, cubed butter using a pastry cutter or your fingers until the mixture resembles coarse crumbs. Press this mixture evenly into the bottom of a 9×13-inch baking pan.
    2. Bake the crust in the preheated oven for about 15 minutes, or until golden. While it bakes, prepare the cream cheese layer by creaming softened cream cheese, granulated sugar, and vanilla extract until smooth and creamy.
    3. Once the crust is baked and slightly cooled, spread the cream cheese mixture evenly over the crust, smoothing the top with a spatula.
    4. In a separate bowl, whisk together the canned pumpkin, eggs, brown sugar, pumpkin pie spice, and salt until well combined and smooth.
    5. Pour the pumpkin mixture over the cream cheese layer, spreading it out gently to cover evenly. Tap the pan lightly on the counter to release any air bubbles.
    6. Bake the assembled bars in the oven for 25 minutes, or until the pumpkin filling is set around the edges and slightly jiggly in the center. The top may look slightly cracked but should not be liquid.
    7. Remove the pan from the oven and let it cool completely on a wire rack. Chill in the refrigerator for at least 2 hours before cutting into bars.
    8. Slice into festive squares and serve chilled. These bars showcase creamy pumpkin filling contrasted with a tart cream cheese topping on a buttery crust, perfect for a Halloween celebration.
    This dessert is surprisingly versatile. It fits right in at an intimate family gathering or a big spooky bash. More than anything, it’s about embracing that fleeting magic of fall in a sweet, satisfying way.