
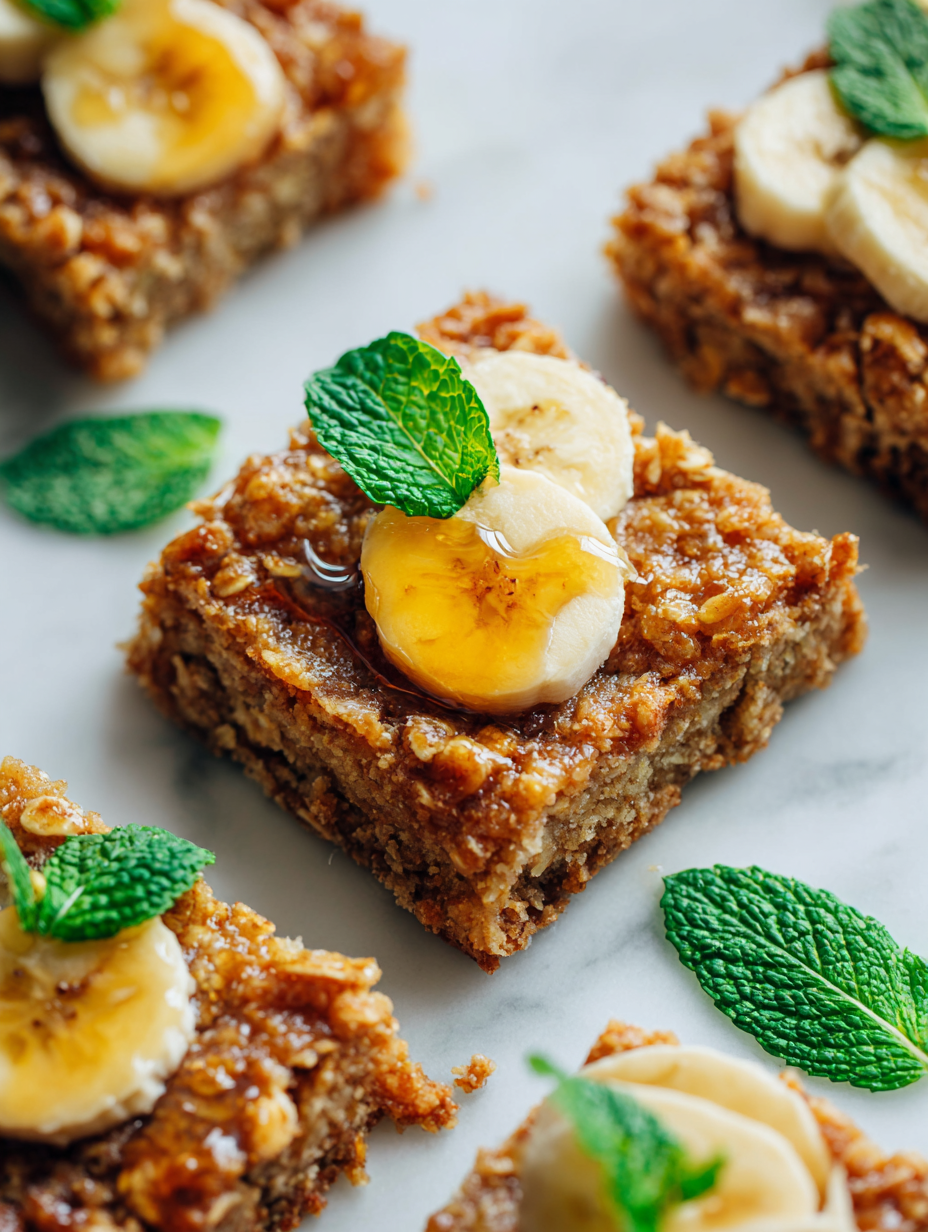
Ripe bananas are the unsung heroes of baking—they bring a natural sweetness and moisture that can turn an ordinary snack into something a bit more special. I love tossing overripe bananas into these bars; they give each bite a soft, caramelized flavor that’s almost dessert-like without being overly sweet.
What I really appreciate about this recipe is how forgiving it is. No fancy ingredients required, just oats, bananas, and a handful of pantry staples. It’s a perfect way to use up bananas that might be too mushy for toast but still have plenty of flavor to give these bars a warm, comforting feel.
Baking these banana oat bars feels a bit like an act of small nostalgia—reminding me of simpler mornings or cozy afternoons. They’re honest, no-frills, but with a gentle sweetness that keeps you coming back. Sometimes, that’s all I need—something wholesome and easy, packed with flavor and just a touch of sweetness.
Focusing on how ripe bananas can transform a simple snack into a nostalgic, almost-dessert treat, this recipe explores using overripe bananas to maximize sweetness and moisture, turning humble ingredients into a comforting, energy-boosting bar.
The story behind this recipe
This recipe came about on a particularly chaotic weekend when I had overripe bananas piling up on my counter. Instead of tossing them or letting them go to waste, I looked for a way to make use of their sweet, jammy flavor. The idea of turning them into something portable, like bars, felt right—something I could grab for quick energy or pack in lunches. It’s funny how a little kitchen improvisation can turn into a regular in my baking rotation, especially when I need a simple, satisfying treat that doesn’t demand much fuss or fancy ingredients.
Ingredient breakdown
- Bananas: I use super ripe bananas—they’re soft, sweet, and jammy, which makes the bars naturally moist. If yours are less ripe, add a touch more honey or maple syrup to boost sweetness.
- Rolled oats: I prefer old-fashioned rolled oats—they give a chewy texture and hold everything together well. Steel-cut oats won’t soften enough, so stick with the classic variety.
- Honey or maple syrup: I like a generous drizzle because it enhances the caramel-like flavor of the bananas and keeps the bars tender. Skip it if you want less sweetness, but the texture might suffer slightly.
- Butter or oil: I opt for melted butter for richness, but coconut oil works if you want a dairy-free version. When melted, it creates a tender crumb and makes the bars slightly flaky.
- Add-ins (nuts, chocolate chips): I love tossing in chopped walnuts or dark chocolate chunks—they add crunch and extra flavor. Use what you have, but don’t skip the texture boost.
- Salt and vanilla: I always include a pinch of salt and a splash of vanilla extract—they amplify all the flavors and keep the bars from tasting flat. Don’t skip the vanilla; it’s the secret to that warm, cozy note.
Spotlight on key ingredients
Bananas:
- I use super ripe bananas—they’re soft, sweet, and jammy, which makes the bars naturally moist. If yours are less ripe, add a touch more honey or maple syrup to boost sweetness.
- They break down easily, creating a tender, almost gooey texture that melds beautifully with the oats, giving each bite a warm, caramelized flavor.
Rolled oats:
- I prefer old-fashioned rolled oats—they give a chewy texture and hold everything together well. Steel-cut oats won’t soften enough, so stick with the classic variety.
- During baking, they toast slightly, developing a nutty aroma that complements the sweetness of the bananas, adding depth to every bite.
Notes for ingredient swaps
- FLOUR: I stick with old-fashioned oats for texture, but almond flour can add a nutty flavor and keep it gluten-free.
- SWEETENER: Maple syrup gives a rich, smoky sweetness; honey works similarly but slightly more floral—use less if you want less sticky.
- FATS: Butter adds richness and a tender crumb, but coconut oil keeps these vegan while adding a subtle coconut aroma.
- NUTS & CHIPS: Walnuts crunch and chocolate chips melt into pockets of flavor; chopped almonds or dried fruit are fine swaps.
- BANANAS: Overripe bananas are best, but if yours are less ripe, add a splash of vanilla or a drizzle of honey to boost sweetness.
- EXTRAS: Seeds or hemp hearts sprinkle in for extra fiber and crunch—don’t skip the texture, even if you’re skipping nuts.
Equipment & Tools
- Baking pan: Holds the batter and provides structure for baking.
- Mixing bowls: Combine ingredients thoroughly.
- Spatula: Spread batter evenly in the pan.
- Parchment paper: Eases removal and cleanup.
- Oven: Bakes the bars at consistent heat.
- Toothpick: Test for doneness.
Step-by-step guide to banana oat bars
- Gather your equipment: a 20x20cm (8×8 inch) baking pan, mixing bowls, a spatula, and parchment paper. Line the pan with parchment for easy removal.
- Preheat your oven to 180°C (350°F). This ensures even baking and helps set the bars properly.
- In a large bowl, mash 3 ripe bananas with a fork until mostly smooth but still slightly chunky—this gives texture and sweetness.
- Add 1/4 cup honey or maple syrup, 1/4 cup melted butter or coconut oil, and a teaspoon of vanilla. Mix until well combined—look for a glossy, cohesive batter.
- Stir in 1 1/2 cups rolled oats, 1/2 cup chopped nuts or chocolate chips if using, a pinch of salt. Fold gently; don’t overmix, just until everything’s evenly distributed.
- Pour the batter into your prepared pan. Use a spatula to spread it out evenly—try to get a smooth, level surface for even baking.
- Bake for 20–25 minutes. The edges should turn golden-brown, and the center should feel set when gently pressed. If the top cracks slightly, that’s perfect.
- Check for doneness: insert a toothpick in the center—if it comes out clean, they’re ready. If not, give them a few more minutes, watching for a golden color and a fragrant aroma.
- Remove from oven and let cool in the pan for about 10 minutes. This helps the bars firm up and makes slicing easier.
- Transfer to a wire rack or cutting board. Slice into squares while still slightly warm for cleaner cuts—wait until fully cooled for neat edges.
- Let the bars cool completely before storing. They’ll firm up further as they cool, making them easier to handle.
Allow bars to cool completely in the pan for at least 15 minutes. Slice into squares with a sharp knife. Serve directly or store in an airtight container, layered with parchment, for up to 3 days at room temperature or freeze for longer storage.
How to Know It’s Done
- Edges are golden and slightly crisp, center feels set and not jiggly.
- Toothpick inserted in center comes out clean or with moist crumbs, not wet batter.
- Fragrant aroma of baked bananas and toasted oats fills your kitchen.
Banana Oat Bars
Ingredients
Equipment
Method
- Line your baking pan with parchment paper to prevent sticking and set aside.
- Preheat your oven to 180°C (350°F) so it’s ready when you need to bake.
- Peel the bananas and mash them thoroughly in a large mixing bowl until mostly smooth with some small lumps remaining for texture.
- Add the honey or maple syrup, melted butter or coconut oil, and vanilla extract to the mashed bananas. Stir until the mixture is glossy and well combined.
- Pour in the rolled oats, a pinch of salt, and fold everything together gently with a spatula until the oats are evenly coated and the mixture is cohesive but not overmixed.
- If using, fold in chopped nuts or chocolate chips to add crunch and flavor.
- Transfer the batter into your prepared baking pan and spread it out evenly with a spatula, pressing gently to level the surface.
- Bake in the preheated oven for 20–25 minutes, or until the edges turn a lovely golden brown and the top feels set when gently pressed.
- Insert a toothpick into the center of the bars; if it comes out clean, remove the pan from the oven and let it cool for about 10 minutes in the pan.
- Once cooled slightly, transfer the bars to a wire rack or cutting board and slice into squares. Allow to cool completely for cleaner cuts if desired.
- Enjoy these moist, chewy bars for a wholesome snack or breakfast—store leftovers in an airtight container for up to 3 days or freeze for longer keeping.
Notes
Pro tips for perfect banana oat bars
- Bolded mini-head: Slightly underbake for fudgier bars—remove from oven when edges are golden but center still feels soft.
- Bolded mini-head: Use a light hand when mixing—overmixing can make the bars dense and tough, so fold until just combined.
- Bolded mini-head: Toast oats lightly before mixing—this enhances their nutty aroma and adds depth to the flavor.
- Bolded mini-head: For a more caramelized flavor, bake the bars a few extra minutes until edges are crispy and fragrant.
- Bolded mini-head: If your bananas aren’t very ripe, warm them slightly or add a drizzle of honey to boost sweetness.
- Bolded mini-head: Chill the bars before slicing—this firms them up and gives cleaner cuts, especially if loaded with add-ins.
- Bolded mini-head: Keep a close eye during baking—resist the urge to open the oven often to prevent temperature fluctuations.
Common mistakes and how to fix them
- FORGOT to check oven temperature → Use an oven thermometer for accuracy.
- DUMPED ingredients prematurely → Mix thoroughly for even texture and flavor.
- OVER-TORCHED the edges → Cover with foil if edges brown too quickly.
- FAILED to level batter → Use a spatula to spread evenly for uniform baking.
Fast fixes for baking mishaps
- When bananas are too mushy, splash a squeeze of lemon juice to slow browning.
- If mixture is too dry, patch with a teaspoon of milk or water for moisture.
- Splash a bit of vinegar if oats seem dull—brightens flavor and activates baking soda.
- Dumped in too much salt? Rinse your measuring spoon and add a pinch more sugar to balance.
- Shield burnt edges with foil and rescue with a quick sprinkle of oats on top for crunch.
Prep, store, and reheat tips
- Pre-mash bananas and measure oats ahead—keeps prep quick and neat, ready for mixing when needed.
- Store baked bars in an airtight container at room temperature for up to 3 days; for longer, freeze up to a month.
- Wrapping bars individually in parchment or plastic keeps them fresh and prevents freezer burn.
- Reheat in the microwave for about 10-15 seconds—look for a warm, slightly gooey center and a fragrant aroma.
Top questions about banana oat bars
1. Should I use ripe bananas or less ripe ones?
Use overripe bananas—they’re soft, jammy, and naturally sweet, which helps thicken and flavor the bars. Slightly underripe bananas will make the bars less moist and sweet.
2. Can I substitute honey with other sweeteners?
Yes, you can swap honey for maple syrup or agave nectar. They have similar sweetness, but maple adds a smoky note, and honey makes the bars stickier.
3. Can I make these bars dairy-free?
Absolutely. Use coconut oil or vegan butter for dairy-free options. Both melt into the mixture, keeping the bars tender with a slight coconut aroma if you choose coconut oil.
4. Can I add nuts or chocolate?
Add chopped nuts or chocolate chips for texture and flavor. If you prefer a crunch, walnuts or almonds work well; for melty pockets, go for dark chocolate chunks.
5. How do I know when they’re done?
Bake at 180°C (350°F) for 20-25 minutes. Edges should turn golden, and the center will feel set and smell toasted and sweet.
6. How should I store leftovers?
Store in an airtight container at room temperature for up to 3 days or freeze for up to 1 month. Reheat briefly in the microwave until warm and fragrant.
7. What if my bars are too dry or too moist?
If the bars turn out too dry, drizzle a little honey or serve with yogurt. If too moist, bake a few extra minutes or let cool to firm up.
8. How can I get clean slices?
Use a sharp knife to slice cleanly—chill the bars for 15 minutes beforehand. For neat edges, wipe the knife between cuts.
9. Any tips for mixing the batter?
Mix ingredients gently—overmixing can make the bars dense. Fold until just combined for a tender, crumbly texture.
10. Can I toast the oats first?
For extra flavor, toast oats beforehand to bring out a nutty aroma. This adds depth and enhances the natural sweetness of the bananas.
These banana oat bars are a quiet reminder that simple ingredients can come together into something almost nostalgic. The smell of toasted oats mingling with ripe bananas is a comforting, familiar scent that fills the kitchen in a way that’s hard to forget.
They’re perfect for a quick breakfast, a snack, or a moment of calm with a cup of tea. No matter the day, a batch of these bars can be your grounding point—easy, honest, and just a little sweet.
Hey there — I’m Olivia “Liv” Carter, founder, recipe crafter, and storyteller behind Crying Into The Onions. I live somewhere in the heartland of the United States, where seasons change boldly, the smell of onions sizzling in a pan is a love language, and the kitchen is my favorite place to get messy and find magic.
I started this blog to share more than just recipes — I wanted to capture the emotions, memories, and quirks that make food more than fuel. Because sometimes, cooking makes you laugh. Sometimes, it makes you cry (into the onions, naturally). And most of all, it brings people together.