There’s something about a homemade chocolate pound cake that wraps you in a warm, cozy blanket. The smell alone—rich cocoa and butter melting together—fills the kitchen with a comforting promise. It’s the kind of dessert that feels like a gentle hug, especially on a chilly day when you need a little extra comfort.
This recipe isn’t about fuss or fancy techniques; it’s about the pure joy of mixing simple ingredients into something dense, moist, and melt-in-your-mouth chocolatey. Every bite carries a nostalgic weight, reminding me of lazy Sunday afternoons and the quiet pleasure of sharing something homemade with loved ones. It’s honest, straightforward, and best enjoyed slowly, with a cup of coffee or a glass of milk.
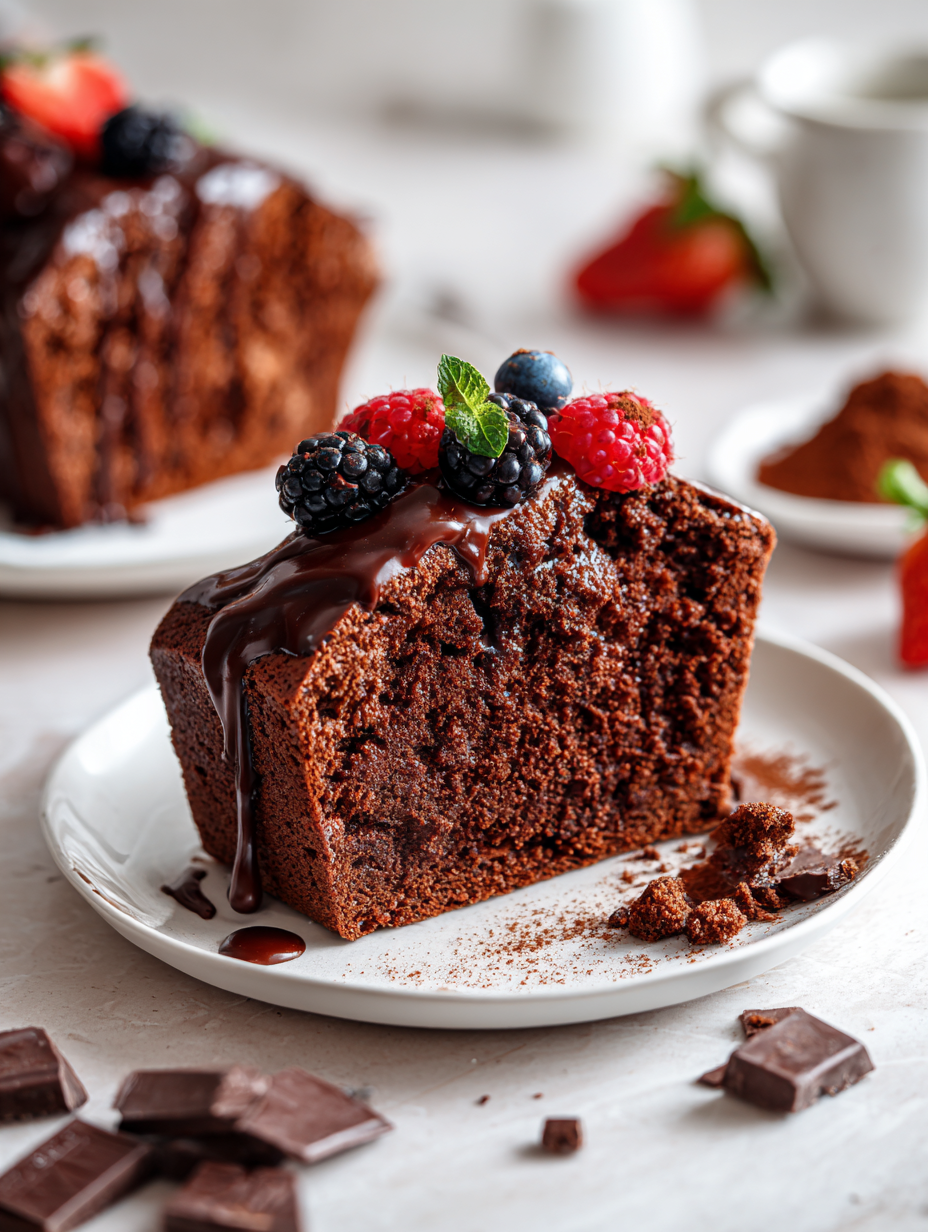
Focusing on the nostalgic comfort of a homemade chocolate pound cake that feels like a warm hug on a chilly day, emphasizing the sensory joy of rich cocoa aroma and dense, melt-in-your-mouth texture.
The Unexpected Joy of Homemade Chocolate Pound Cake
- Baking this cake always takes me back to my grandma’s kitchen, where the smell of cocoa was a daily comfort.
- I love how dense and rich it feels in your mouth, almost like a chocolate hug that lingers long after the last bite.
- There’s a quiet pride in pulling a perfectly crackly crust from the oven, knowing I made something so simple yet so satisfying.
- Sometimes I add a splash of espresso to deepen the chocolate flavor—makes it feel a little more grown-up and indulgent.
- Sharing slices with friends always sparks a little nostalgia, reminding me how a good cake can bring people together.
The story behind this recipe
- Baking this cake always takes me back to my grandma’s kitchen, where the smell of cocoa was a daily comfort. It’s one of those recipes that feels like a warm, familiar hug, no matter how many times I make it. The simplicity of mixing butter, sugar, eggs, and cocoa into something so rich and dense, it’s like capturing a moment of pure joy.
- I remember the first time I tried tweaking the recipe, adding a splash of vanilla and a pinch of sea salt—suddenly it felt more layered, more grown-up. It’s not just dessert; it’s a little ritual, a quiet moment of pride when the batter goes into the oven and fills the house with that intoxicating chocolate aroma. Honestly, it’s become my go-to comfort on cold weekends and a sweet way to slow down and savor life.
- heading: The story behind this recipe
Chocolate Pound Cake Trivia
- Chocolate pound cake recipes date back to the early 19th century, with variations across Europe and America.
- The dense texture of pound cake originally came from using equal weights of butter, sugar, eggs, and flour—hence the name.
- Cocoa powder became a popular addition in the early 20th century, transforming traditional pound cakes into rich chocolate desserts.
- In some regions, this cake was a celebratory offering, baked for family gatherings and special occasions.
- Quirky trivia: In the Victorian era, such cakes were often served with a drizzle of liqueur or a dusting of powdered sugar for extra flair.
Ingredient breakdown: key components
- Unsweetened cocoa powder: I love the deep, smoky aroma it releases when I sift it into the batter—if you want a richer chocolate punch, opt for Dutch-processed cocoa instead.
- Butter: Creaming the butter and sugar until fluffy is key—it creates a tender crumb. Use high-quality, European-style butter for a more intense flavor and richer texture.
- Eggs: Room temperature eggs blend more smoothly, helping the batter emulsify. If you forget, give them a quick warm bath before mixing.
- All-purpose flour: I prefer weighing my flour to avoid a dense cake. If you only have scoops, be gentle—overmixing can make the texture heavy.
- Sugar: Granulated white sugar keeps the cake stable and sweet, but adding a touch of brown sugar can introduce a subtle caramel note that pairs beautifully with chocolate.
- Vanilla extract: A splash deepens the chocolate flavor. If you want a hint of warmth, try a pinch of espresso powder—it amplifies the cocoa aroma and makes the chocolate pop.
- Salt: Just a pinch balances the sweetness and enhances the cocoa. Don’t skip it—trust me, it makes all the difference in the final taste.
Spotlight on key ingredients
Unsweetened cocoa powder:
- I love the deep, smoky aroma it releases when I sift it into the batter—if you want a richer chocolate punch, opt for Dutch-processed cocoa instead.
- Butter: Creaming the butter and sugar until fluffy is key—it creates a tender crumb. Use high-quality, European-style butter for a more intense flavor and richer texture.
- Eggs: Room temperature eggs blend more smoothly, helping the batter emulsify. If you forget, give them a quick warm bath before mixing.
Butter:
- It melts smoothly, adding richness and moisture. If you use margarine, expect a slightly less nuanced flavor and softer crumb.
- Vanilla extract: A splash deepens the chocolate flavor and adds warmth. Skip it if you prefer a pure chocolate punch, but I recommend it for depth.
- Sugar: Granulated sugar keeps the cake stable and sweet, but a touch of brown sugar can introduce a subtle caramel note that pairs beautifully with chocolate.
Notes for ingredient swaps
- Dairy-Free: Swap butter for coconut oil or dairy-free margarine. Expect a slightly different richness and a hint of coconut aroma.
- Sugar Alternatives: Use coconut sugar or maple syrup instead of white sugar. The flavor will be more caramel-like and slightly less sweet.
- Flour Options: Replace all-purpose flour with gluten-free flour blend. The texture may be a tad denser, but still delicious.
- Cocoa Powder: Dutch-processed cocoa gives a smoother, mellower chocolate flavor; natural cocoa offers a brighter, more acidic note.
- Eggs: Use flax eggs (1 tablespoon ground flaxseed + 3 tablespoons water per egg) for vegan options—batter will be a bit denser.
- Milk: Substitute with almond or oat milk for a nutty or milky flavor, which softens the richness a little.
- Chocolate: Add mini chocolate chips or chunks if you want extra melty pockets of chocolate—use semi-sweet for balance.
Equipment & Tools
- 9×5 inch loaf pan: Holds the batter during baking, creates the cake shape.
- Mixing bowls: Combine ingredients separately for even mixing.
- Electric mixer or whisk: Cream butter and sugar, and beat eggs smoothly.
- Sifter: Aerate dry ingredients, prevent lumps.
- Rubber spatula: Fold ingredients gently, scrape bowl sides.
- Cooling rack: Cool cake evenly and prevent sogginess.
Step-by-step guide to perfect cake
- Preheat your oven to 180°C (350°F). Grease a 9×5 inch loaf pan and line it with parchment paper for easy removal.
- In a large mixing bowl, cream 1 cup (226g) of softened butter and 1 1/2 cups (300g) of sugar until light and fluffy, about 3-4 minutes. Use a hand or stand mixer on medium speed.
- Add 3 large eggs, one at a time, beating well after each addition. Make sure eggs are at room temperature for smoother incorporation.
- In a separate bowl, sift together 1 3/4 cups (220g) of all-purpose flour, 1/2 cup (50g) of unsweetened cocoa powder, and 1 teaspoon of baking powder. Sifting helps prevent lumps and ensures even mixing.
- Gradually add the dry ingredients to the butter mixture, alternating with 1/2 cup (120ml) of whole milk. Start and end with dry ingredients. Mix on low speed just until combined. Do not overmix, or the cake will be dense.
- Stir in 1 teaspoon of vanilla extract and a pinch of salt to enhance flavor. If using, fold in 1/2 cup of chopped chocolate or nuts for extra texture.
- Pour the batter into the prepared loaf pan. Tap the pan gently on the counter to remove air bubbles and level the surface.
- Bake for 50-60 minutes. Check for doneness by inserting a toothpick into the center; it should come out with moist crumbs but not wet batter.
- When the cake is golden and a toothpick tests clean, remove from oven. Let it cool in the pan for 15 minutes before transferring to a wire rack to cool completely.
- Allow the cake to rest at room temperature for at least 30 minutes before slicing. This helps set the crumb and makes slicing neater.
Cool the cake completely on a wire rack before slicing. Wrap leftovers in plastic wrap or store in an airtight container at room temperature for up to 2 days, or refrigerate for up to a week. For longer storage, freeze slices wrapped tightly in foil or plastic wrap.
How to Know It’s Done
- Cake surface should be golden brown and firm to touch.
- Toothpick inserted in center comes out with moist crumbs, not wet batter.
- Cracks on top should be dry and slightly crackle when cooled.
Homemade Chocolate Pound Cake
Ingredients
Equipment
Method
- Preheat your oven to 180°C (350°F). Grease the loaf pan well and line it with parchment paper for easy removal.
- Using an electric mixer or whisk, cream the softened butter and sugar together in a large bowl until the mixture is light, fluffy, and pale—this takes about 3-4 minutes and releases a sweet aroma.
- One at a time, beat in the eggs, ensuring each is fully incorporated before adding the next. The batter should become smooth and slightly thickened.
- Sift together the flour, cocoa powder, baking powder, and salt into a separate bowl. Sifting helps prevent lumps and mixes the dry ingredients evenly.
- Gradually add the dry ingredients to the wet mixture, alternating with the milk, beginning and ending with dry. Mix on low speed or fold gently with a spatula until just combined—be careful not to overmix, as this keeps the cake tender.
- Stir in the vanilla extract for added depth of flavor. The batter will be thick but smooth, with a rich chocolate color and a lovely cocoa scent.
- Pour the batter into the prepared loaf pan, smoothing the top with a spatula. Gently tap the pan on the counter to release any air bubbles and ensure an even surface.
- Bake in the preheated oven for 50-60 minutes. When done, the top should be cracked and set, and a toothpick inserted into the center should come out moist but not wet.
- Remove the cake from the oven and allow it to cool in the pan for 15 minutes. Then, transfer it to a wire rack and let it cool completely before slicing, which helps the crumb set and prevents crumbling.
- Once cooled, slice and serve the cake with a cup of coffee or milk. The dense crumb, crackly top, and rich cocoa aroma make it a perfect comforting treat.
Pro tips for perfect chocolate pound cake
- Bolded tip: Sift the cocoa powder to avoid lumps and enhance dispersion, creating a velvety batter.
- Bolded tip: Cream butter and sugar until light and fluffy; this aerates the batter for a tender crumb.
- Bolded tip: Use room temperature eggs for smooth incorporation, avoiding streaks or uneven texture.
- Bolded tip: Tap the filled pan on the counter to release air bubbles for an even rise and dense crumb.
- Bolded tip: Check for doneness with a toothpick; it should come out moist but not wet, avoiding overbaking.
- Bolded tip: Allow the cake to cool completely before slicing to prevent crumbling and maintain moisture.
- Bolded tip: For a richer chocolate flavor, add a teaspoon of espresso powder to deepen the cocoa notes.
Common mistakes and how to fix them
- FORGOT to preheat oven → Always preheat to ensure even baking and proper rise.
- DUMPED batter into pan → Fill pan only halfway to prevent overflow and cracking.
- OVER-TORCHED crust → Cover loosely with foil if crust browns too quickly, then finish baking.
- MISSED measuring ingredients precisely → Use a scale for accuracy, especially with flour and cocoa.
Quick fixes and pantry swaps
- When batter looks too thick, splash in a tablespoon of milk and gently fold.
- If cake cracks too much, reduce oven temperature by 10°C (20°F) and cover with foil.
- Splash a little hot water on the crust if it’s over-browning fast, then lower oven rack.
- Patch a dry slice by microwaving it for 5 seconds to revive moisture and aroma.
- Shield a sinking center by inserting foil around the edges and baking a few extra minutes.
Prep, store, and reheat tips
- Prepare the batter up to a day in advance, then cover and refrigerate. The flavors meld overnight, resulting in a richer chocolate aroma.
- Store the cooled cake tightly wrapped in plastic wrap or in an airtight container at room temperature for up to 2 days. The dense crumb stays moist, with a more pronounced cocoa scent.
- For longer storage, freeze slices wrapped well in plastic and foil for up to 3 months. Thaw at room temperature, where the aroma gently re-emerges as the cake softens.
- Reheat slices in a low oven (about 150°C/300°F) for 10-15 minutes until warm and fragrant, with a slightly melty chocolate surface. Avoid overheating to prevent dryness.
- If the cake feels a little dry after storage, a quick microwave blast (10 seconds) can restore moisture—look for a warm, inviting cocoa scent and a soft texture.
Top questions about chocolate pound cake
1. What kind of cocoa powder should I use?
Use high-quality cocoa powder for a richer, more intense chocolate flavor. Look for Dutch-processed for a mellower taste or natural for brighter notes.
2. How do I know when the cake is done?
Bake until a toothpick inserted in the center comes out with moist crumbs, and the top is golden and slightly cracked.
3. Should I cool the cake before slicing?
Let the cake cool completely on a wire rack before slicing. This helps set the crumb and prevents crumbling.
4. Can I make this cake dairy-free?
You can substitute butter with coconut oil for a dairy-free version, which adds a slight coconut aroma and softer crumb.
5. Can I enhance the chocolate flavor further?
Add a teaspoon of espresso powder to deepen the chocolate flavor without making the cake taste coffee-like.
6. How should I store leftovers?
Store the cake wrapped in plastic or in an airtight container at room temperature for up to 2 days, or freeze for longer storage.
7. How do I reheat the cake?
To reheat, warm slices at 150°C (300°F) for about 10-15 minutes until fragrant and slightly melty.
8. Should eggs be at room temperature?
Using room temperature eggs makes the batter smoother and helps achieve a tender crumb. Warm them slightly if cold.
9. Why is sifting important?
Sifting dry ingredients prevents lumps, ensures even mixing, and results in a fluffy, uniform cake.
10. What if the crust browns too fast?
If the crust over-browns, loosely cover the cake with foil during baking to prevent burning while the inside finishes cooking.
Baking this cake fills the house with a warm, cocoa-scented aroma that feels like a little celebration in itself. There’s something grounding about a dense, fudgy slice that’s been baked with care and a splash of nostalgia.
Sharing it with someone special, or even just enjoying it solo with a mug of coffee, makes the moment feel a bit more intentional. It’s a simple pleasure, but one that keeps me coming back whenever I need a quiet, chocolatey moment to myself.

Hi, I’m Oliver Stone, the writer, cook, and storyteller behind Crying Into the Onions. I’m so glad you found your way here. This blog was born from equal parts humor, heart, and a deep love for honest cooking. I started this blog to share more than just recipes — I wanted to capture the emotions, memories, and quirks that make food more than fuel. Because sometimes, cooking makes you laugh. Sometimes, it makes you cry (into the onions, naturally). And most of all, it brings people together.

