This Maple Pecan Bread isn’t just about sweet comfort; it’s about capturing a moment of homey nostalgia with every slice. The rich aroma of maple syrup mingles with toasted pecans, filling the kitchen with a warm, inviting scent that feels like a hug from the past. Baking it feels like a small act of kindness—something to look forward to on quiet mornings or relaxed weekends.
What I love most is how simple ingredients come together into a loaf that’s both rustic and indulgent. The crunch from pecans contrasts beautifully with the soft, tender crumb, and the maple glaze adds a gentle sweetness that’s not overpowering. It’s a bread that makes everyday feel special, whether toasted for breakfast or enjoyed plain with a cup of coffee.
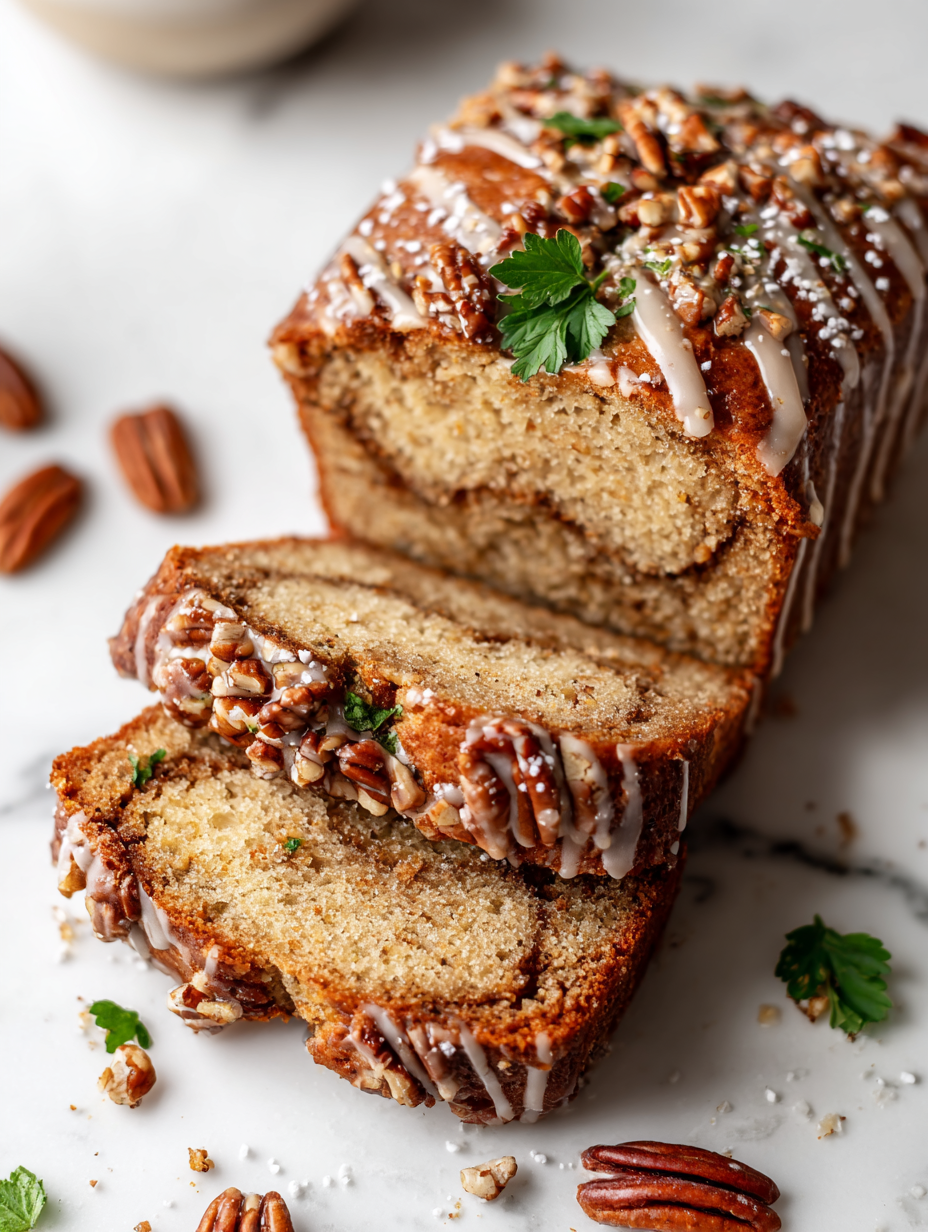
Focusing on the nostalgic charm of a homemade bread that combines the cozy warmth of maple syrup with the crunchy, buttery goodness of toasted pecans, this recipe brings a comforting twist to everyday baking.
Nostalgic baking with a twist
- Baking this bread feels like a small celebration of cozy mornings, especially when the kitchen fills with that sweet maple aroma.
- There’s a quiet pride in turning simple ingredients into something that tastes indulgent but is honestly pretty straightforward to make.
- I love watching the pecans toast up in the oven, releasing their nutty, buttery scent that’s almost addictive.
- Sharing this bread with friends always sparks a bit of nostalgia—reminds me of family gatherings and slow weekend brunches.
- Sometimes, I sneak an extra handful of pecans just because the crunch and richness make every bite more satisfying.
The story behind this recipe
- This recipe was born out of a lazy Sunday afternoon craving. I wanted something that combined the warm, sticky sweetness of maple with the nutty crunch of pecans, but in a way that felt like a treat you could actually bake on a whim. The idea stuck with me—baking bread that feels both indulgent and homey, perfect for cozy mornings or a relaxed afternoon snack.
- I remember the first time I toasted pecans in the oven, the smell spiraling through the kitchen, rich and buttery, making the whole house smell like fall. That moment of scent-memory is what I chase every time I make this bread. It’s about capturing that simple joy—warm, nutty, sweet, and a little bit nostalgic.
- heading: ‘The story behind this recipe
Contextual origin, trivia, or history
- Maple syrup has been a staple sweetener in North American Indigenous diets long before European settlers adopted it in their baking traditions.
- Pecans are native to the southeastern United States, and their use in baking dates back centuries to early American settlers.
- The combination of maple and pecans in bread reflects a regional flavor profile typical of the Appalachian and Mid-Atlantic areas, where both ingredients are abundant.
- Historically, bread with nuts and sweeteners was often reserved for special occasions, making this recipe a modern nod to that tradition.
- Maple pecan bread has gained popularity in recent years as a cozy, seasonal treat, especially around fall and winter holidays.
Ingredient breakdown
- Maple syrup: I love the rich, caramel-oozy aroma it brings—swap with honey if you prefer a lighter, floral sweetness, but you’ll lose some depth.
- Pecans: Toasted until golden, their buttery crunch is key. You can use walnuts for a milder nutty flavor, but pecans keep it authentically cozy.
- Flour: I stick with bread flour for structure, but all-purpose works in a pinch—just expect a slightly softer crumb with AP.
- Baking soda: It’s my leavening buddy, giving the bread a gentle rise. No good substitutes here—just check that it’s fresh for the best lift.
- Eggs: They add moisture and help with binding. For a vegan version, try mashed bananas, but be aware it’ll slightly alter the flavor and texture.
- Milk: Whole milk keeps it tender and rich, but almond or oat milk can be nice dairy-free options—just watch the consistency, it should be pourable but thick.
- Butter: I like the flavor it imparts, especially if you brown it slightly first. Coconut oil can be a good dairy-free alternative, with a subtle coconut hint.
Key Ingredients in Focus
Maple syrup:
- I love its thick, caramel-oozy aroma that fills the kitchen, adding deep sweetness. Swap with honey if you prefer a lighter floral note, but expect less richness.
- Pecans: Toasted to a golden crunch, they bring a buttery richness that really makes the bread special. Using walnuts offers a milder nutty flavor, but pecans keep it classic and cozy.
Pecans:
- Their buttery, slightly oily texture is best when toasted, releasing a warm, nutty scent that’s irresistible. Keep an eye on them—they burn fast once toasted.
- Flour: Bread flour provides the structure and chew, creating a sturdy crumb. All-purpose can work, but expect a softer, less chewy loaf, which isn’t quite the same.
Notes for ingredient swaps
- Maple syrup: I love the rich, caramel-oozy aroma it brings—swap with honey if you prefer a lighter, floral sweetness, but you’ll lose some depth.
- Pecans: Toasted until golden, their buttery crunch is key. You can use walnuts for a milder nutty flavor, but pecans keep it authentically cozy.
- Flour: I stick with bread flour for structure, but all-purpose works in a pinch—just expect a slightly softer crumb with AP.
- Baking soda: It’s my leavening buddy, giving the bread a gentle rise. No good substitutes here—just check that it’s fresh for the best lift.
- Eggs: They add moisture and help with binding. For a vegan version, try mashed bananas, but be aware it’ll slightly alter the flavor and texture.
- Milk: Whole milk keeps it tender and rich, but almond or oat milk can be nice dairy-free options—just watch the consistency, it should be pourable but thick.
- Butter: I like the flavor it imparts, especially if you brown it slightly first. Coconut oil can be a good dairy-free alternative, with a subtle coconut hint.
Equipment & Tools
- Mixing bowls: Combine ingredients separately for dry and wet components.
- Whisk: Mix dry ingredients thoroughly and beat eggs.
- Spatula: Gently fold ingredients and smooth the batter.
- Loaf pan: Shape the bread during baking.
- Toasting sheet: Toast pecans evenly in the oven.
- Wire rack: Allow bread to cool and set glaze.
- Toothpick or skewer: Test for doneness in the center of the loaf.
Step-by-step guide to baking
- Gather all ingredients: flour, sugar, baking soda, eggs, milk, butter, maple syrup, pecans. Preheat your oven to 175°C (350°F). Grease a 9×5 inch loaf pan and set aside.
- Toast the pecans: spread pecans on a baking sheet. Bake for 8-10 minutes until fragrant and golden. Let cool, then chop roughly.
- Mix dry ingredients: in a large bowl, whisk together 2 cups bread flour, 1/2 cup sugar, 1 teaspoon baking soda, and a pinch of salt. Set aside.
- Combine wet ingredients: in another bowl, beat 2 eggs. Warm 1/2 cup milk and 1/4 cup melted butter until just warm. Stir in 1/4 cup maple syrup.
- Make batter: pour wet into dry, gently fold until just combined. Do not overmix; the batter should be slightly lumpy.
- Add nuts: fold in most of the toasted pecans, saving a handful for topping. Gently incorporate to distribute evenly.
- Pour batter into prepared loaf pan: smooth the top with a spatula. Sprinkle remaining pecans on top for crunch.
- Bake: place in the oven at 175°C (350°F) for 50-60 minutes. Check the bread after 45 minutes; if it’s browning too quickly, tent with foil.
- Check doneness: insert a toothpick in the center; it should come out clean. The top should be golden brown, and the bread should feel firm but springy.
- Cool: remove bread from oven, let sit in the pan for 10 minutes, then transfer to a wire rack. Cool completely before glazing or slicing.
- Finish with glaze: warm 2 tablespoons maple syrup, drizzle over cooled bread for a glossy, sweet finish. Let set for 10 minutes before slicing.
Let the bread cool in the pan for 10 minutes, then transfer to a wire rack. Drizzle warm maple glaze over the top and allow it to set for 10 minutes before slicing.
How to Know It’s Done
- Golden-brown crust with a slight sheen from the glaze.
- Center toothpick comes out clean, with no wet batter.
- Bread feels firm yet springy when pressed lightly on top.
Maple Pecan Bread
Ingredients
Equipment
Method
- Preheat your oven to 175°C (350°F). Spread the pecans on a baking sheet and toast for about 8-10 minutes until fragrant and golden. Let them cool, then roughly chop.
- In a large mixing bowl, whisk together the bread flour, sugar, and baking soda until well combined.
- In a separate bowl, beat the eggs until slightly frothy. Warm the milk and melted butter together, then stir in the maple syrup.
- Pour the wet mixture into the dry ingredients and gently fold with a spatula until just combined. The batter will be slightly lumpy but should come together easily.
- Gently fold in most of the toasted pecans, reserving a handful for topping. The batter should be thick but moist.
- Pour the batter into a greased 9x5 inch loaf pan, smoothing the top with a spatula. Sprinkle the remaining pecans on top for added crunch and visual appeal.
- Bake in the preheated oven for 50-60 minutes until the top is golden brown and a toothpick inserted in the center comes out clean.
- Remove the bread from the oven and let it cool in the pan for about 10 minutes. Then transfer it to a wire rack to cool completely.
- Once cooled, warm the remaining maple syrup and drizzle it over the top of the loaf for a glossy, sweet finish. Allow the glaze to set for about 10 minutes.
- Slice and serve this cozy loaf plain or toasted, enjoying the tender crumb, crunchy pecans, and fragrant maple aroma with each bite.
Notes
Pro tips for perfect maple pecan bread
- Use room temperature eggs to ensure even mixing and better rise.
- Toast pecans until fragrant and golden—this enhances their nutty aroma and crunch.
- When folding in pecans, do it gently to avoid deflating the batter’s airiness.
- Keep an eye on the oven; start checking at 45 minutes to prevent over-browning.
- Drizzle maple glaze while bread is still warm—this helps it set into a glossy finish.
- Let the bread cool completely before slicing to keep the crumb tender and intact.
Common mistakes and how to fix them
- FORGOT to preheat oven → Always preheat to ensure even baking.
- DUMPED flour too quickly → Sift flour to prevent dense pockets.
- OVER-TORCHED pecans → Toast pecans at 175°C (350°F), watch closely to avoid burning.
- MISSED resting time → Let the bread cool completely for full flavor and texture.
Quick fixes and pantry swaps
- When dough feels sticky, splash in a little more flour and knead briefly to balance moisture.
- If the glaze shimmers unevenly, patch with a quick brush of warm maple syrup before it sets.
- Splash a few drops of water on a crackling oven door to calm oven drafts during baking.
- Dumped in too much baking soda? Rescue by adding a splash of vinegar to balance pH and lift.
- When pecans burn too quickly, shield with foil and reduce oven temperature for even toasting.
Prep, store, and reheat tips
- Prep the pecans: toast and chop them a day ahead; store in an airtight container to keep their crunch fresh.
- Batter can be mixed early in the day; keep covered in the fridge for up to 12 hours, but bring to room temp before baking for even rise.
- Bake the bread a day in advance; cool completely, then wrap tightly in plastic wrap and store at room temperature for up to 2 days.
- Reheat slices gently in the oven at 150°C (300°F) for 10 minutes until warm, or toast for a crispy finish. The aroma will perk up and the texture will revive.
- For longer storage, freeze fully cooled slices in an airtight container or freezer bag for up to 1 month. Thaw at room temp or warm in the oven, watching for that fresh-baked smell.
Frequently Asked Questions
1. Can I use maple syrup substitutes?
Use fresh maple syrup for the richest, most caramel-like aroma. Substitute with honey for a lighter, floral sweetness if desired.
2. Should I toast the pecans first?
Toasting pecans enhances their flavor and crunch. Use walnuts if you prefer a milder, less buttery nut.
3. Can I use all-purpose flour?
Bread flour gives a sturdier crumb and better structure. All-purpose works, but expect a softer, less chewy loaf.
4. Is baking powder a good substitute for baking soda?
Baking soda provides the rise; ensure it’s fresh for a good lift. No good substitutes here, but check expiration for best results.
5. What can I use instead of eggs?
Eggs add moisture and help bind the dough. For vegan options, mashed bananas or applesauce work, but they will alter the flavor slightly.
6. Can I make this dairy-free?
Whole milk keeps the bread tender and rich. Almond or oat milk are dairy-free options, but adjust the amount if the batter feels too thick or thin.
7. Can I substitute butter with oil?
Brown butter adds depth and a nutty aroma. Coconut oil is a good dairy-free alternative, but may add a subtle coconut flavor.
8. Should I let the bread cool before glazing?
Cool the bread completely before glazing to prevent melting the syrup and to allow flavors to set fully.
9. How long does the bread stay fresh?
Store in an airtight container at room temperature for up to 2 days or freeze slices for longer storage. Reheat gently for best texture.
10. How do I get a crusty or soft crust?
For a softer crust, cover the bread with a damp towel while cooling. For a crisp crust, leave it uncovered.
Baking this bread is a quiet act of care, filling the house with the sweet, toasty aroma of pecans and maple. Each slice offers a satisfying crunch and a tender crumb that feels like a little reward for the effort. It’s a reminder that simple ingredients, treated well, can turn into something truly memorable.
In times like these, there’s comfort in familiar flavors and the slow process of baking. Sharing this bread or enjoying it alone with a good cup of coffee helps me reconnect with those small, grounding pleasures. Sometimes, it’s the most unassuming recipes that leave the biggest imprint.

Hi, I’m Oliver Stone, the writer, cook, and storyteller behind Crying Into the Onions. I’m so glad you found your way here. This blog was born from equal parts humor, heart, and a deep love for honest cooking. I started this blog to share more than just recipes — I wanted to capture the emotions, memories, and quirks that make food more than fuel. Because sometimes, cooking makes you laugh. Sometimes, it makes you cry (into the onions, naturally). And most of all, it brings people together.

