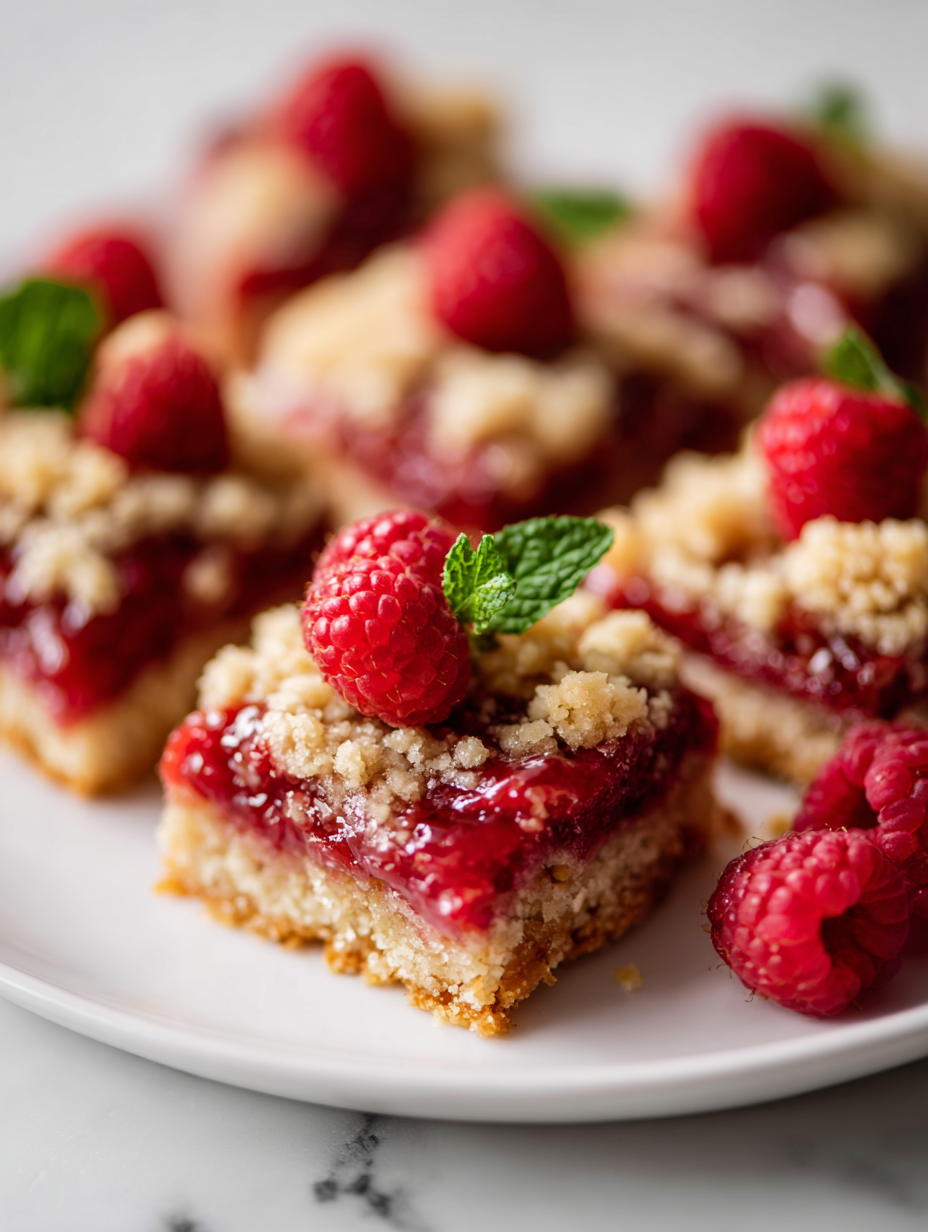
Baking these Raspberry Crumble Bars takes me straight back to those messy summer afternoons at grandma’s house. We’d spread berries over sweet dough, then layer on that buttery crumble — totally unpolished, totally honest. It’s the kind of treat that feels like a small rebellion, a little sticky joy that makes the kitchen smell like ripe berries and toasted oats.
What I love about this recipe is how it invites you to get your hands dirty. There’s no fancy equipment needed, just simple ingredients and a bit of messy love. The raspberry jam oozes out slightly at the edges, and the crumble turns golden and crunchy — it’s honest, it’s imperfect, and it’s exactly what a good childhood sweet should be.
Focusing on the nostalgic joy of childhood treats, but with a messy, hands-on twist that makes baking feel like a small rebellion in the kitchen.
The story behind this recipe
- This recipe is born out of a late summer afternoon spent rummaging through my grandmother’s old recipe box. I found a faded note about raspberry jam and a scribbled note about a crumble topping, and suddenly I was transported back to that sticky, joyful chaos of baking with her. It’s funny how simple ingredients can carry so much memory, right?
- I started making these bars when I needed something quick but comforting—like a little piece of my childhood in every bite. The raspberries, with their bright, slightly tart punch, remind me of carefree afternoons. And the crumble? It’s that perfect crunch that makes every bite a tiny celebration.
- heading: ‘The story behind this recipe’
Key ingredients and tips
- Fresh raspberries: I love how they burst with tart juice when baked, adding a bright punch. If you prefer a smoother filling, mash them a bit more before layering.
- Granulated sugar: It’s the sweet backbone that balances tart berries. Feel free to cut back if your berries are very ripe and sweet already.
- All-purpose flour: I use it to give structure to the crumble topping. For a nutty twist, swap part of it with finely chopped pecans or almonds.
- Cold butter: It makes the crumble crumbly and golden. If you’re in a hurry, melt it and mix in a little flour for a quicker, softer topping.
- Oats: They add chew and texture, making each bite a little more satisfying. Rolled oats work best, but steel-cut oats can be toasted and ground for a different crunch.
- Lemon zest: Just a touch brightens the entire fruit layer with a fresh zing. Skip it if your raspberries are particularly flavorful on their own.
- Jam or preserves (optional): I like to swirl a little raspberry jam into the layer for extra oozy sweetness. Skip if you want a more straightforward berry hit, but don’t skip the berries!
Spotlight on key ingredients
Raspberries:
- Fresh raspberries: I love how they burst with tart juice when baked, adding a bright punch. If you prefer a smoother filling, mash them a bit more before layering.
- Lemon zest: Just a touch brightens the entire fruit layer with a fresh zing. Skip it if your raspberries are particularly flavorful on their own.
Butter and oats:
- Cold butter: It makes the crumble crumbly and golden. If you’re in a hurry, melt it and mix in a little flour for a quicker, softer topping.
- Oats: They add chew and texture, making each bite a little more satisfying. Rolled oats work best, but steel-cut oats can be toasted and ground for a different crunch.
Notes for ingredient swaps
- Fresh Raspberries: I love how they burst with tart juice when baked, adding a bright punch. If you prefer a smoother filling, mash them a bit more before layering.
- Granulated Sugar: It’s the sweet backbone that balances tart berries. Feel free to cut back if your berries are very ripe and sweet already.
- All-purpose Flour: I use it to give structure to the crumble topping. For a nutty twist, swap part of it with finely chopped pecans or almonds.
- Cold Butter: It makes the crumble crumbly and golden. If you’re in a hurry, melt it and mix in a little flour for a quicker, softer topping.
- Oats: They add chew and texture, making each bite a little more satisfying. Rolled oats work best, but steel-cut oats can be toasted and ground for a different crunch.
- Lemon Zest: Just a touch brightens the entire fruit layer with a fresh zing. Skip it if your raspberries are particularly flavorful on their own.
- Jam or Preserves (optional): I like to swirl a little raspberry jam into the layer for extra oozy sweetness. Skip if you want a more straightforward berry hit, but don’t skip the berries!
Equipment & Tools
- 9-inch square baking pan: To bake the bars evenly in a sturdy, manageable size.
- Pastry cutter or forks: To cut in butter until crumbly, mimicking coarse sand.
- Mixing bowls: To prepare crumble and fruit filling separately.
- Spatula or spoon: To spread filling and crumble evenly.
- Oven: To bake the crust, filling, and topping at consistent heat.
Step-by-step guide to raspberry crumble bars
- Preheat your oven to 180°C (350°F). Grease a 9-inch square baking pan with butter or line it with parchment paper for easy removal.
- In a mixing bowl, combine 1 cup of all-purpose flour, ½ cup of rolled oats, ½ cup of brown sugar, and a pinch of salt. Mix well.
- Cut in ½ cup of cold butter using a pastry cutter or your fingers until the mixture resembles coarse crumbs. Set aside a quarter of this crumble for topping later.
- Press the remaining crumble mixture evenly into the bottom of the prepared pan, creating a firm, even layer. Bake for 15 minutes or until lightly golden.
- Meanwhile, prepare the raspberry filling: in another bowl, gently toss 2 cups of fresh raspberries with 2 tablespoons of sugar and a teaspoon of lemon zest. If using jam or preserves, swirl a few spoonfuls into the berries for extra ooze.
- Remove the baked crust from the oven. Spread the raspberry mixture evenly over the warm base. Crumble the reserved topping over the berries, covering most of the surface.
- Bake the assembled bars for 25–30 minutes. The topping should be golden and crispy, and the filling bubbly around the edges.
- Once out of the oven, let the bars cool in the pan for at least 20 minutes. This resting period helps the filling set and makes slicing easier.
- Cut into squares or rectangles. Serve warm or at room temperature, maybe with a dollop of whipped cream or a dusting of powdered sugar.
- Enjoy the messy, fragrant, sweet-tart bites that carry a hint of nostalgia and a little rebellious crunch.
Allow the bars to cool completely in the pan before slicing. Serve at room temperature or warmed slightly. Store leftovers in an airtight container for up to 3 days or freeze for longer storage.
How to Know It’s Done
- Crust is golden and firm after initial bake.
- Filling is bubbling and berries are soft but intact.
- Crumble topping is crisp and golden, not burnt or soggy.
Raspberry Crumble Bars
Ingredients
Equipment
Method
- Preheat your oven to 180°C (350°F). Grease your 9-inch square baking pan or line it with parchment paper to keep things tidy.
- In a mixing bowl, combine the flour, oats, brown sugar, and a pinch of salt. Mix these dry ingredients until well blended, creating a textured base for your crumble.
- Add the cold butter pieces to the dry mixture. Use a pastry cutter or forks to cut the butter into the flour until the mixture resembles coarse crumbs. This gives the crust and topping their crumbly texture.
- Press about two-thirds of this crumbly mixture evenly into the bottom of your prepared pan, creating a firm, even layer. Bake for 15 minutes until lightly golden and fragrant.
- While the crust bakes, toss the raspberries with granulated sugar and lemon zest in a bowl. If you're using jam, swirl a spoonful or two into the berries for extra ooze and sweetness.
- Remove the crust from the oven once it’s lightly golden. Spread the raspberry mixture evenly over the warm crust, making sure to cover the entire surface.
- Crumble the remaining reserved crumbs evenly over the berry layer, gently pressing some parts into the filling for a rustic appearance.
- Bake the assembled bars for another 25–30 minutes until the topping is golden and crispy, and the filling is bubbling around the edges.
- Remove from the oven and let the bars cool in the pan for at least 20 minutes. This helps the filling set and makes slicing easier, revealing that luscious, oozing berry center.
- Once cooled, cut into squares or rectangles. Serve warm or at room temperature, perhaps with a dollop of whipped cream or a dusting of powdered sugar for extra charm.
Pro tips for perfect raspberry crumble bars
- Bolded mini-head: Use cold butter for a flaky crumble that holds together during baking.
- Bolded mini-head: Toast oats lightly before adding for a nuttier flavor and crunch.
- Bolded mini-head: Mix crumble ingredients just until combined to keep it crumbly and tender.
- Bolded mini-head: Slightly underbake the crust if you want a softer bottom that won’t over crisp.
- Bolded mini-head: When spreading the berry layer, leave some gaps for the juice to bubble out.
- Bolded mini-head: For extra ooze, swirl a teaspoon of jam into the berry filling before baking.
- Bolded mini-head: Cool the bars completely before slicing to prevent them from falling apart.
Common mistakes and how to fix them
- FORGOT to check oven temperature → Use an oven thermometer for accuracy.
- DUMPED the berries too early → Wait until filling is bubbling before pouring.
- OVER-TORCHED the crumble → Cover with foil if edges darken too quickly.
- MISSED mixing the crumble evenly → Break clumps apart for uniform topping.
Quick fixes and pantry swaps
- When berries release too much juice, sprinkle a little cornstarch to thicken the filling.
- If crumble turns soggy, brush with a quick coat of egg wash and re-bake for crunch.
- Splash a few drops of lemon juice on dull berries for a brighter, fresher flavour.
- Patch burnt edges by covering with foil and continue baking for a tender topping.
- Shield the crumble with foil if edges brown too quickly during baking.
Prep, store, and reheat tips
- Prepare the crumble topping and store it in an airtight container in the fridge for up to 2 days. It stays crisp and ready to sprinkle on top.
- Assemble the bars up to 24 hours in advance; keep the unbaked pan covered tightly with plastic wrap. The berries will release some juice, so don’t let it sit too long.
- Bake the assembled bars and store them at room temperature for up to 2 days, covered loosely with foil to keep them fresh.
- For longer storage, refrigerate the baked bars for up to 4 days. Reheat in a 180°C (350°F) oven for 10 minutes until the topping shimmers and the filling is warm.
- Refrigerated bars may lose some crispness but can be refreshed by briefly reheating or crisping in a hot oven. Feel the aroma re-emerge with warm berries and toasted crumble.
Top questions about raspberry crumble bars
1. Can I use frozen raspberries?
Use fresh raspberries for the brightest flavor and juiciest filling. Frozen can work, but thaw and drain excess moisture first.
2. How do I know when the bars are done?
Bake until the topping is golden brown and crispy, and the filling is bubbling around the edges, about 25-30 minutes.
3. Can I substitute other berries?
Yes, you can swap in blueberries or blackberries for a different berry twist. Adjust sweetness if needed.
4. How should I store the bars?
Store in an airtight container at room temp for up to 2 days or refrigerate for up to 4 days. Reheat briefly for best texture.
5. Can I use melted butter?
Use cold butter to create a flaky, crumbly topping. Melted butter can be used for a softer, quicker crumble.
6. Why are my bars soggy?
To prevent sogginess, bake the crust slightly underdone, and avoid overfilling with too much jam or juice.
7. Should I add lemon zest?
Add a touch of lemon zest to brighten the berry flavor and enhance aroma. Skip if berries are very flavorful.
8. How do I get a crumbly topping?
Mix the crumble just until ingredients are combined, avoiding over-mixing which can make it dense instead of crumbly.
9. My edges are over-browning, what do I do?
If the edges brown too fast, cover with foil to prevent burning while the center finishes baking.
10. Can I make the filling more oozy?
For extra ooze, swirl in a teaspoon of raspberry jam into the filling before baking for gooey pockets.
Baking these raspberry crumble bars reconnects me with childhood summers and messy kitchens filled with sweet, tart aromas. Each bite carries a nostalgic punch of berries and buttery crumble, making every moment in the kitchen feel honest and unpolished. It’s a simple treat that’s perfect for sharing, messy or not, and reminds me why I love baking from scratch.
In the end, these bars aren’t about perfection—they’re about the joy of making something with your hands and tasting the love in every crumb. Whether you serve them warm with a dollop of cream or keep them in the fridge for a quick snack, they bring a bit of chaos and comfort to any day.

Hi, I’m Oliver Stone, the writer, cook, and storyteller behind Crying Into the Onions. I’m so glad you found your way here. This blog was born from equal parts humor, heart, and a deep love for honest cooking. I started this blog to share more than just recipes — I wanted to capture the emotions, memories, and quirks that make food more than fuel. Because sometimes, cooking makes you laugh. Sometimes, it makes you cry (into the onions, naturally). And most of all, it brings people together.

