Making cheesecake bars that stay perfectly creamy without cracking has always felt like a small victory in my kitchen. It’s not about fancy tricks, but about understanding how gentle heat and proper water bath use can make all the difference. I’ve fussed with plenty of recipes that crack or dry out by the next day, so I’ve refined my method to keep that luscious texture intact, even after a day or two in the fridge.
What I love about this approach is how straightforward it is—and how forgiving. No need for special equipment, just a simple water bath that helps the cheesecake set evenly and stay soft. It’s a quiet kind of magic, really, turning basic ingredients into bars that are rich, smooth, and surprisingly foolproof. These have become my go-to when I want dessert that’s impressive yet easy enough to whip up on a weekday.
Focusing on how to make Cheesecake Bars that stay perfectly creamy without cracking, even after a day or two in the fridge, using a simple water bath method that doesn’t require fancy equipment.
The story behind this recipe
- This recipe was born out of late-night craving and a need for something that feels indulgent but doesn’t require a full bake. I wanted a dessert that’s easy to prep, portable, and still feels special—like I’ve snuck a bit of bakery into my day-to-day. Every time I make these, I think back to how a simple twist on classic cheesecake can turn into something so reliably satisfying.
- I remember the first time I added a splash of lemon to the cream cheese mix — it brightened everything up and made the bars feel fresh, even after days in the fridge. It’s one of those tweaks that stuck with me, proving that a little acidity can elevate a rich dessert. Over the years, these bars have become my go-to for potlucks, quick gifts, or just a lazy weekend treat. They’re honest, straightforward, and always crowd-pleasing.
Key ingredients and tips
- Cream cheese: I prefer using full-fat, it’s naturally richer and more velvety—skip the low-fat stuff for that luxurious texture you want to savor. You’ll notice a brighter, tangier flavor with the full-fat version.
- Sugar: Granulated sugar dissolves smoothly, giving a gentle sweetness that balances the tang of the cream cheese. If you want a slightly caramel note, try a touch of brown sugar, but watch for moisture changes.
- Eggs: I always add eggs at room temperature; they blend better and prevent that rubbery texture. If your eggs are cold, give them a quick whisk before mixing into the batter.
- Lemon zest: Just a teaspoon adds a zing that cuts through the richness—think bright, fresh bursts of citrus. If you love lemon, bump it up a bit, but be careful not to overpower the creamy base.
- Graham cracker crust: I crush my crackers finely and mix with melted butter until it clumps just right—snappy but tender. For a nutty twist, add a handful of chopped pecans or walnuts.
- Sour cream: I stir in a dollop for extra creaminess and a slight tang that balances the sweetness. If you’re out, Greek yogurt works well but can make the texture a tad thicker.
- Vanilla extract: A splash of real vanilla adds depth, making every bite smell irresistibly warm and inviting. Use high-quality extract if you can—it’s worth it for that subtle, fragrant note.
Spotlight on key ingredients
Cream cheese:
- I prefer full-fat for that rich, velvety feel—skip the low-fat, it’s not the same. It’s got a bright tang that makes every bite addictive.
- It behaves differently during baking—watch for lumps and ensure it’s softened enough to blend smoothly.
Graham crackers:
- Finely crushed with a hint of salt, they create a crisp, buttery crust that holds together without sogginess. The aroma of toasted crackers is intoxicating before baking.
- Be cautious not to over-press, or the crust gets tough; just enough pressure for a compact base that’s tender but sturdy.
Notes for ingredient swaps
- Dairy-Free: Swap cream cheese for a vegan cream cheese alternative. Expect a slightly different tang and a softer set.
- Sugar: Use honey or maple syrup instead of granulated sugar. Adjust the liquid content slightly to compensate for moisture.
- Eggs: Substitute with applesauce or flaxseed meal for a vegan option. The texture will be a bit denser and less airy.
- Lemon zest: Swap with orange or lime zest for a different citrus twist. Keep in mind it will alter the flavor profile.
- Graham crackers: Replace with digestive biscuits or gluten-free cookies. The texture may vary slightly, but still delicious.
- Sour cream: Use Greek yogurt or coconut cream for dairy-free. It will change the richness and tanginess subtly.
- Butter: Substitute with coconut oil or vegan butter. Expect a different aroma and slightly different crumb texture.
Equipment & Tools
- 9×9 inch (23×23 cm) square baking pan: Holds the crust and filling, ensures even baking
- Parchment paper: Prevents sticking, makes removal easier
- Food processor or rolling pin: Crush crackers finely
- Mixing bowls: Combine ingredients
- Electric mixer or whisk: Cream cheese and incorporate air
- Water bath dish: Maintain gentle, even heat during baking
- Sharp knife: Cut clean slices
Step-by-step guide to cheesecake bars
- Preheat your oven to 160°C (320°F). Use a 9×9 inch (23×23 cm) square baking pan. Line it with parchment paper, leaving overhang for easy removal.
- Make the crust: Crush 200g graham crackers finely—use a food processor or put them in a zip-top bag and crush with a rolling pin. Mix with 100g melted butter and a pinch of salt until it clumps together. Press evenly into the bottom of the prepared pan. Bake for 10 minutes. Remove and cool slightly.
- Prepare the filling: In a large bowl, beat 450g softened cream cheese until smooth—about 2 minutes on medium speed. Add 150g sugar and mix until combined. Beat in 2 teaspoons vanilla extract and 2 large eggs, one at a time, mixing just until incorporated. Fold in 2 tablespoons sour cream and the zest of one lemon for brightness.
- Pour the filling over the cooled crust. Smooth the top with a spatula. Tap the pan gently on the counter to remove air bubbles.
- Place the pan in a larger baking dish. Carefully pour hot water into the larger dish until it reaches halfway up the sides of the pan. This water bath prevents cracking and ensures even baking.
- Bake the cheesecake bars for about 45-50 minutes, or until the edges are set but the center still jiggles slightly when gently shaken. The top may look slightly puffed but will settle as it cools.
- Turn off the oven and crack the door open. Let the bars cool in the oven for 1 hour to prevent sudden temperature changes that cause cracks.
- Remove from the oven and water bath carefully. Chill in the refrigerator uncovered for at least 4 hours, preferably overnight. This resting helps the texture set and mellow flavors.
- Once chilled, lift the cheesecake out using the parchment overhang. Cut into squares with a sharp knife, wiping the blade between cuts for clean edges.
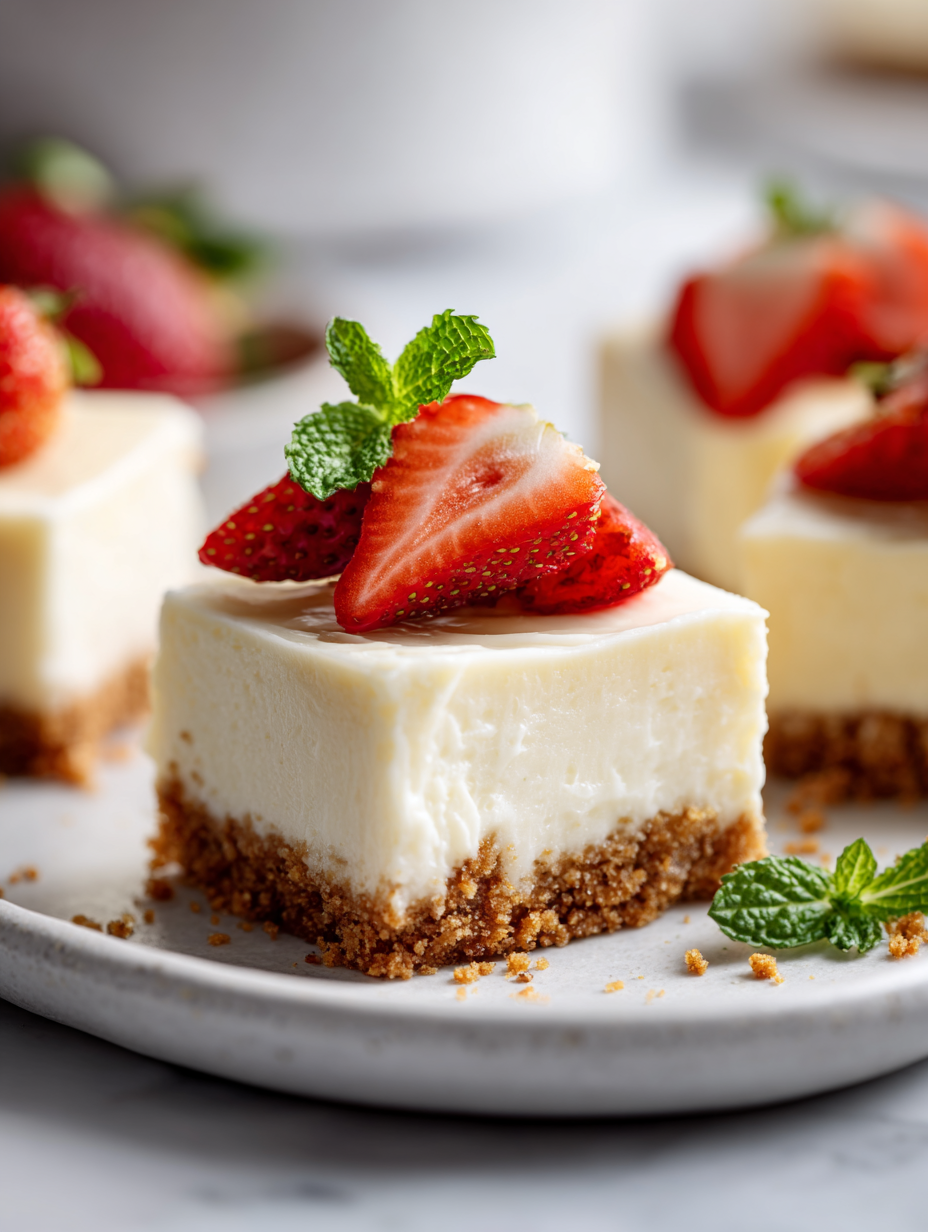
- Serve chilled, optionally topped with fresh berries or a dusting of powdered sugar. Enjoy the creamy, dense texture that stays luscious without cracking.
Allow the bars to chill uncovered in the fridge for at least 4 hours or overnight. This helps set the filling and enhances flavor. Use a sharp knife to cut into squares, wiping the blade between cuts for neat edges. Serve cold, with optional toppings if desired.
How to Know It’s Done
- Edges are firm and set, center jiggles slightly when tested gently.
- Surface is smooth, without cracks or puffiness.
- Toothpick inserted near the center comes out clean but with moist crumbs.
Creamy Cheesecake Bars
Ingredients
Equipment
Method
- Preheat your oven to 160°C (320°F) and line your baking pan with parchment paper, leaving some overhang for easy removal.
- Crush the graham crackers until finely ground using a food processor or by placing them in a zip-top bag and rolling over with a rolling pin. Mix the crushed crackers with melted butter until the mixture clumps together, then press it evenly into the bottom of the prepared pan. Bake this crust for about 10 minutes until fragrant and set, then let it cool slightly.
- In a large mixing bowl, beat the softened cream cheese until smooth and creamy—about 2 minutes. Add the granulated sugar and continue beating until well combined, then mix in vanilla extract and lemon zest for a bright, fresh aroma.
- One at a time, beat in the eggs, mixing just until each is incorporated. Fold in the sour cream gently to add extra creaminess to the filling.
- Pour the smooth filling over the cooled crust and spread it evenly with a spatula. Gently tap the pan on the counter to release any trapped air bubbles and create a flat surface.
- Prepare a water bath by placing your filled pan inside a larger baking dish. Carefully pour hot water into the larger dish until it reaches halfway up the sides of the cheesecake pan. This gentle heat helps prevent cracks and ensures even baking.
- Bake the cheesecake for 45-50 minutes until the edges are set but the center still has a slight jiggle. The top should be smooth and glossy, not cracked or puffed.
- Turn off the oven and crack the door open slightly, letting the cheesecake cool in the oven for about 1 hour. This slow cooling prevents surface cracks and helps the texture set evenly.
- Remove the cheesecake from the water bath and refrigerate uncovered for at least 4 hours or overnight. This resting period allows the filling to firm up and flavors to meld beautifully.
- Using the parchment overhang, lift the cheesecake out of the pan and place it on a cutting board. Slice into squares with a sharp knife, wiping the blade between cuts for clean, neat slices. Serve chilled and enjoy the luscious, crack-free texture.
Pro tips for perfect cheesecake bars
- Use room temperature ingredients: Softened cream cheese and eggs blend smoothly, preventing lumps and cracks.
- Tap the filled pan: Gently tapping helps release air bubbles, ensuring an even, crack-free surface.
- Keep water at a gentle simmer: Hot water bath should be warm, not boiling, to prevent sudden temperature shocks.
- Wrap the pan in foil: To avoid water seeping in, tightly cover the bottom with foil before placing in the water bath.
- Do not overmix: Mix just until ingredients are combined; overmixing can incorporate air, leading to cracks.
- Cool gradually: After baking, crack the oven door open and let the bars cool slowly to avoid surface cracks.
- Use a sharp knife: Wipe the blade between cuts for clean slices, especially if serving to guests or for photos.
Common mistakes and how to fix them
- FORGOT to double-check oven temperature → Use an oven thermometer for accuracy.
- DUMPED in too much sugar → Measure carefully to prevent overly sweet bars.
- OVER-TORCHED crust → Cover edges with foil if browning too fast.
- UNDERSCORED water bath → Ensure water covers sides of pan for even baking.
Quick fixes and pantry swaps
- If batter looks too thick, splash in a teaspoon of milk to loosen it.
- When cheesecake cracks, patch with a dollop of whipped cream or fruit compote.
- Splash a little lemon juice if bars taste flat or dull.
- Patch cracks with a thin layer of melted chocolate for a glossy finish.
- Shield edges with foil if they brown too quickly during baking.
Prep, store, and reheat tips
- Prepare the crust and even the filling mixture a day ahead; keep them covered in the fridge to save time on serving day, and the flavors will meld nicely.
- Store the baked cheesecake bars in an airtight container in the fridge for up to 3 days; they stay creamy and fresh, with a slight enhancement in flavor overnight.
- Lightly cover the bars with plastic wrap or foil before refrigerating to prevent them from absorbing fridge odors and to keep the surface smooth.
- Reheat slices gently in the microwave for about 10-15 seconds; the edges will warm up and become irresistibly soft, while the center remains cool and creamy.
- For longer storage, freeze the bars wrapped tightly in plastic wrap and then in foil for up to 1 month. Thaw in the fridge for a few hours before serving, noticing how the texture remains luscious and the flavor brightens after defrosting.
Top questions about cheesecake bars
1. Can I use low-fat cream cheese?
Use full-fat cream cheese for the best creamy texture and tang. Reduced fat versions can make the filling less rich.
2. Can I substitute the cream cheese?
Yes, but expect a slightly less velvety filling and maybe a thinner set. To compensate, add a bit more cream or sour cream.
3. How do I know when the cheesecake is done?
Bake until the edges are slightly golden and the center jiggles just a bit. It should look set but not firm.
4. How long should I chill the bars?
Chill in the fridge for at least 4 hours or overnight. This helps the texture firm up and flavors meld.
5. Can I freeze cheesecake bars?
Yes, you can freeze the bars for up to a month. Wrap tightly and thaw in the fridge before serving.
6. How do I get clean slices?
Use a sharp knife dipped in hot water for clean cuts. Wipe the blade between slices for neat edges.
7. Can I add other flavorings?
Yes, adding lemon zest brightens the flavor and enhances the creamy richness with a fresh, citrus note.
8. How do I prevent cracks?
Overmixing can incorporate excess air, causing cracks. Mix just until ingredients are combined for a smooth batter.
9. What water temperature is best?
Ensure water in the bath is warm, not boiling, to gently set the cheesecake without causing cracks or overbaking.
10. How do I adjust baking time?
Adjust baking time based on your oven and pan size. The edges should be firm, and the center slightly jiggly.
Making these cheesecake bars is a reminder that simple ingredients, treated with care, can create something truly satisfying. The process is honest—watching them set and firm up in the fridge feels like a quiet little victory every time.
In a world filled with fleeting trends, these bars offer a moment of comfort—creamy, tangy, and reliably foolproof. They’re not just dessert; they’re a small, sweet ritual that’s worth every minute in the kitchen.

Hi, I’m Oliver Stone, the writer, cook, and storyteller behind Crying Into the Onions. I’m so glad you found your way here. This blog was born from equal parts humor, heart, and a deep love for honest cooking. I started this blog to share more than just recipes — I wanted to capture the emotions, memories, and quirks that make food more than fuel. Because sometimes, cooking makes you laugh. Sometimes, it makes you cry (into the onions, naturally). And most of all, it brings people together.

