Pumpkin bars feel like a warm hug, especially when the air turns crisp and leaves start to fall. There’s something about that rich, spiced pumpkin flavor that instantly transports me back to autumn afternoons spent in my grandma’s kitchen, baking away while the wind howled outside. These bars aren’t just dessert; they’re a batch of memories, wrapped in a chewy, slightly crispy crust, and topped with a sweet glaze that’s just enough to bring it all together.
I love how simple ingredients come together to create something so cozy and satisfying. The smell of cinnamon, nutmeg, and that earthy pumpkin baking fills the house and makes everything feel a little slower, a little more peaceful. It’s not just about having a treat—it’s about reconnecting with those quiet moments of comfort, the kind that make you look forward to every bite and every shared slice with friends or family.
Focusing on the nostalgic comfort of pumpkin bars while exploring how their flavors evoke seasonal memories and personal stories, making each bite a journey back to cozy autumn afternoons.
The story behind this recipe
- This recipe was born from a lazy Sunday afternoon, where I was rummaging through my grandmother’s recipe box. I found an old, stained card for pumpkin bars, and suddenly the kitchen was filled with memories of her humming while mixing batter. It’s funny how a simple recipe can carry so much history, like a whisper from the past urging you to bake and remember.
- Every fall, I try to recreate that nostalgic feeling, tweaking her version just a bit to suit my taste. It’s become a tradition now, a way to slow down and savor the season’s flavors. These bars aren’t just dessert—they’re a little slice of my childhood, made with a pinch of love and a dash of autumn magic.
- heading
- story_type
Ingredient breakdown: key components
- Canned pumpkin: I use pure pumpkin purée, which gives a rich, earthy flavor and moist texture. Swap with sweet potato purée if you want a sweeter, milder taste.
- Brown sugar: I love how it adds a deep caramel note and chewy texture. You can try coconut sugar for a slightly different sweetness and color.
- Spices: Cinnamon, nutmeg, and ginger are my go-tos for that cozy warmth. Adjust the amounts to suit your spice tolerance—more cinnamon if you want a more pronounced aroma.
- Flour: All-purpose flour keeps it simple, but whole wheat adds a nutty depth. If gluten-free, swap with a 1:1 gluten-free baking blend—just expect a slightly denser crumb.
- Eggs: They help bind everything together and give structure. For a vegan version, try flaxseed meal mixed with water—watch for a slightly softer texture.
- Cream cheese glaze: I love the tang and creamy contrast it offers. For a dairy-free version, coconut cream whipped with a little powdered sugar works surprisingly well, with a faint coconut aroma.
- Optional mix-ins: Chopped nuts or chocolate chips can add crunch or sweetness. Use in moderation—too much can overwhelm the delicate pumpkin flavor.
Spotlight on key ingredients
Canned pumpkin:
- I use pure pumpkin purée, which gives a rich, earthy flavor and moist texture. Swap with sweet potato purée if you want a sweeter, milder taste.
- Brown sugar: I love how it adds a deep caramel note and chewy texture. You can try coconut sugar for a slightly different sweetness and color.
- Spices: Cinnamon, nutmeg, and ginger are my go-tos for that cozy warmth. Adjust the amounts to suit your spice tolerance—more cinnamon if you want a more pronounced aroma.
Cream cheese glaze:
- Cream cheese: I prefer using softened cream cheese for a smooth, tangy glaze that sets beautifully. For dairy-free, coconut cream whipped with sugar provides a similar tang with a faint coconut aroma.
- Spices: Cinnamon, nutmeg, and ginger not only add warmth but also release enticing aromas as they bake, filling the kitchen with fall’s essence.
Notes for ingredient swaps
- Canned pumpkin: I use pure pumpkin purée, which gives a rich, earthy flavor and moist texture. Swap with sweet potato purée if you want a sweeter, milder taste.
- Brown sugar: I love how it adds a deep caramel note and chewy texture. You can try coconut sugar for a slightly different sweetness and color.
- Spices: Cinnamon, nutmeg, and ginger are my go-tos for that cozy warmth. Adjust the amounts to suit your spice tolerance—more cinnamon if you want a more pronounced aroma.
- Flour: All-purpose flour keeps it simple, but whole wheat adds a nutty depth. If gluten-free, swap with a 1:1 gluten-free baking blend—just expect a slightly denser crumb.
- Eggs: They help bind everything together and give structure. For a vegan version, try flaxseed meal mixed with water—watch for a slightly softer texture.
- Cream cheese glaze: I love the tang and creamy contrast it offers. For a dairy-free version, coconut cream whipped with a little powdered sugar works surprisingly well, with a faint coconut aroma.
- Optional mix-ins: Chopped nuts or chocolate chips can add crunch or sweetness. Use in moderation—too much can overwhelm the delicate pumpkin flavor.
Equipment & Tools
- 9-inch square baking pan: To hold the batter and bake evenly
- Mixing bowls: To combine wet and dry ingredients
- Whisk: To blend ingredients smoothly
- Spatula: To spread batter evenly
- Toothpick or cake tester: To test doneness
- Wire rack: To cool the baked bars
Step-by-step guide to pumpkin bars
- Preheat your oven to 180°C (350°F). Grease a 9-inch square baking pan with butter or parchment paper for easy removal.
- In a large mixing bowl, whisk together 1 ½ cups all-purpose flour, 1 teaspoon baking powder, ½ teaspoon baking soda, and 1 teaspoon each of cinnamon, nutmeg, and ginger. Set aside.
- In another bowl, combine ¾ cup brown sugar, ½ cup granulated sugar, and ½ teaspoon salt. Add ½ cup melted butter and mix until smooth. Stir in 2 large eggs one at a time, then add 1 cup canned pumpkin purée. Mix until well combined.
- Gradually add the dry ingredients into the wet mixture, folding gently until just incorporated. Do not overmix to keep the batter tender.
- Pour the batter into the prepared pan, spreading it evenly. Bake for 25-30 minutes or until the edges are golden and a toothpick inserted in the center comes out clean. The top should be slightly cracked and fragrant with spices.
- While the bars bake, prepare the cream cheese glaze: beat 4 oz softened cream cheese with ½ cup powdered sugar and 1 teaspoon vanilla extract until smooth. Chill until ready to use.
- Once baked, let the pumpkin bars rest in the pan for about 10 minutes. Then transfer to a wire rack and cool completely before glazing.
- Spread the cream cheese glaze over the cooled bars. Cut into squares and serve. For best flavor, let the glaze set for at least 15 minutes before slicing.
Allow the bars to cool completely on a wire rack before applying the glaze. Once glazed, let sit for 15 minutes to set before slicing. Serve at room temperature for optimal flavor and texture.
How to Know It’s Done
- Look for a golden crust with slight cracking on top.
- Insert a toothpick into the center—clean withdrawal indicates doneness.
- Feel the edges—should pull away slightly from the pan.
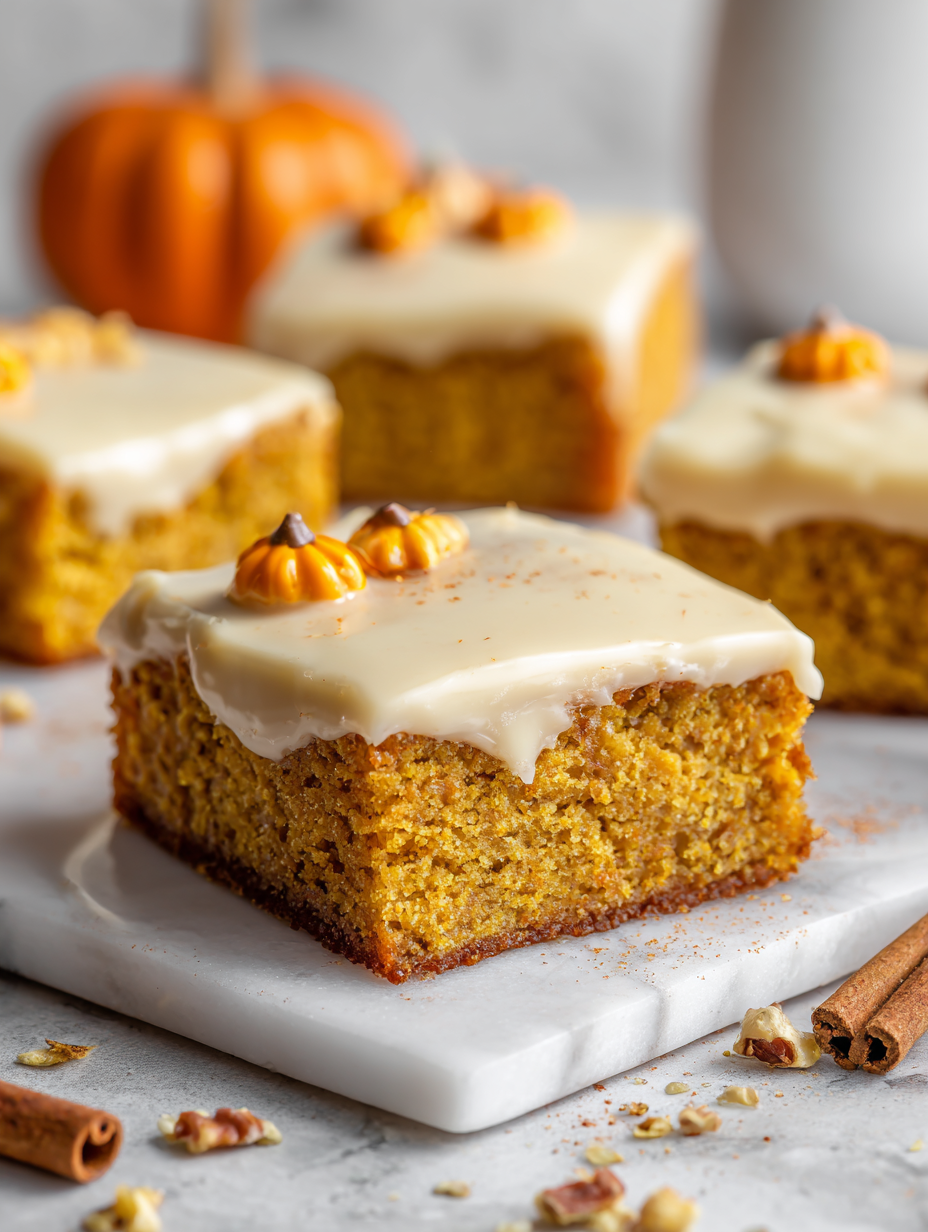
Autumn Pumpkin Bars with Cream Cheese Glaze
Ingredients
Equipment
Method
- Preheat your oven to 180°C (350°F) and grease your 9-inch square baking pan with butter or line it with parchment paper.
- In a large bowl, whisk together the flour, baking powder, baking soda, cinnamon, nutmeg, and ginger until evenly combined. This creates a warm, fragrant dry mixture.
- In another bowl, combine the melted butter and both sugars, whisking until the mixture is smooth and slightly glossy—this helps the sugars dissolve and the batter develop flavor.
- Add the eggs one at a time to the sugar-butter mixture, whisking well after each addition until the mixture is light and creamy, with a slight lift in texture.
- Stir in the pumpkin purée until the batter is evenly orange and smooth, filling your kitchen with a cozy, spiced aroma.
- Gradually fold the dry ingredients into the wet mixture using a spatula, mixing just until combined. Be careful not to overmix, as this keeps the bars tender.
- Pour the batter into the prepared pan, spreading it evenly with a spatula to create a smooth, level surface.
- Bake in the oven for 25 to 30 minutes, or until the top is golden, slightly cracked, and a toothpick inserted in the center comes out clean. The house will fill with inviting fall spices.
- While the bars cool in the pan for about 10 minutes, prepare the cream cheese glaze by beating the softened cream cheese, powdered sugar, and vanilla until smooth and creamy.
- Transfer the cooled bars onto a wire rack and spread the glaze evenly over the top, then let sit for at least 15 minutes so the glaze can set and develop a slightly firm texture.
- Slice into squares, serve at room temperature, and enjoy the comforting warmth of these seasonal pumpkin bars.
Pro tips for perfect pumpkin bars
- Bolded mini-head: Use room temperature eggs to ensure a smooth, lump-free batter and even mixing.
- Bolded mini-head: Mix spices into the dry ingredients to evenly disperse warmth and avoid clumping.
- Bolded mini-head: When pouring batter, tap the pan gently on the counter to release air bubbles and level the surface.
- Bolded mini-head: Keep an eye on the edges while baking; if they brown too fast, cover loosely with foil to prevent burning.
- Bolded mini-head: For a moist crumb, don’t overmix once the flour is added—stir just until combined.
- Bolded mini-head: Chill the cream cheese glaze slightly before spreading for a smoother, less runny finish.
- Bolded mini-head: Test doneness by gently jiggling the pan; the center should be just set, not liquidy.
Common mistakes and how to fix them
- FORGOT to preheat the oven → Always preheat before mixing to ensure even baking.
- DUMPED in all ingredients at once → Add dry ingredients gradually to avoid lumps and overmixing.
- OVER-TORCHED edges → Cover with foil if edges brown too quickly, then continue baking.
- MISSED resting time → Rest baked bars for at least 10 minutes to set properly before slicing.
Quick fixes and pantry swaps
- If the glaze is too runny, splash in a little more powdered sugar to thicken.
- When batter is lumpy, dump in a splash of milk and whisk until smooth.
- Patch over cracks with extra glaze to hide imperfections and add sweetness.
- Shield edges with foil if they brown too fast, keeping the centers moist.
- For a quick rescue, microwave a slightly overbaked slice 5 seconds—just enough to soften.
Prep, store, and reheat tips
- Prepare and bake the pumpkin bars up to two days in advance; the aroma of spices and pumpkin will intensify overnight, making them even more comforting.
- Store the cooled bars in an airtight container at room temperature for up to 2 days or in the fridge for 4–5 days, preserving their moist texture and flavor.
- Reheat slices briefly in the microwave—about 10–15 seconds—until warm and fragrant, with the glaze slightly softening, just enough to rekindle that cozy aroma.
- For longer storage, freeze the bars wrapped tightly in plastic wrap and aluminum foil for up to a month; thaw at room temperature and reheat as desired, noting the glaze may soften further.
Pumpkin Bars Recipe FAQs
1. Can I use fresh pumpkin instead of canned?
Use canned pumpkin purée that’s smooth and not watery. It gives the bars a rich, earthy flavor. Swap with mashed sweet potato for a milder taste, but expect a slightly softer texture.
2. Can I make these without canned pumpkin?
Yes, but make sure to cook and mash fresh pumpkin thoroughly. It might add a bit more moisture, so adjust baking time slightly.
3. How long do pumpkin bars stay fresh?
Store leftover bars in an airtight container at room temperature for up to 2 days or in the fridge for 4-5 days. Reheat slices in the microwave for 10-15 seconds for a warm, fragrant treat.
4. My glaze is too thin—how can I fix it?
If the glaze is too runny, stir in a little more powdered sugar until it thickens. For a thicker glaze, chill it for a few minutes before spreading.
5. Can I swap brown sugar for a different sweetener?
You can substitute coconut sugar for brown sugar if you want a slightly caramelized flavor, but it may alter the color and moisture slightly.
6. Are these gluten-free?
Use gluten-free 1:1 baking flour if you need a gluten-free version. Expect a slightly denser crumb, but the flavor remains cozy and warm.
7. Can I make the glaze dairy-free?
For a dairy-free glaze, whip coconut cream with powdered sugar and vanilla until smooth. It’s tangy and creamy but has a faint coconut aroma that complements the pumpkin.
8. Why are my bars dense or tough?
Overmixing the batter can develop gluten and make the bars tough. Mix just until ingredients are combined for a tender crumb.
9. How do I know when the pumpkin bars are done?
Bake until the edges are golden and a toothpick inserted in the center comes out clean. The top should crack slightly and smell spicy and sweet.
10. Can I use cold eggs?
Use room temperature eggs for a smooth batter and even rising. Cold eggs can cause lumpy batter and uneven texture.
These pumpkin bars are more than just a seasonal treat; they carry a piece of my childhood and the cozy afternoons of autumn. Baking them feels like reconnecting with those simple, quiet moments that make fall special. Sharing a slice or two always reminds me of home, no matter where I am.
In the end, it’s about those rich, spiced flavors filling the house with warmth and nostalgia. A good pumpkin bar doesn’t need fuss—just honest ingredients, a little patience, and a moment to enjoy the quiet pleasure of baking.

Hi, I’m Oliver Stone, the writer, cook, and storyteller behind Crying Into the Onions. I’m so glad you found your way here. This blog was born from equal parts humor, heart, and a deep love for honest cooking. I started this blog to share more than just recipes — I wanted to capture the emotions, memories, and quirks that make food more than fuel. Because sometimes, cooking makes you laugh. Sometimes, it makes you cry (into the onions, naturally). And most of all, it brings people together.

