This recipe is inspired by the quiet joy of pulling a batch of date bars from the oven and knowing you’ve captured a little piece of comfort. I’ve always loved how dates, with their sticky, caramel-like richness, can turn a simple bar into something unexpectedly special. Baking these feels like a small act of nostalgia, a way to reconnect with quiet afternoons spent in my grandmother’s kitchen.
There’s something honest about the way dates transform into a chewy, sweet layer that balances perfectly with a buttery crust. I like to think of these bars as a humble treat, perfect for lazy mornings or an unexpected sweet fix that doesn’t require much fuss. Baking them reminds me that good, honest ingredients can turn into memories—one bite at a time.
This recipe is inspired by my grandmother’s secret stash of dates, which she always kept in a vintage tin. I love the way their deep caramel flavor and chewy texture add a nostalgic richness to these bars. Baking them feels like a small act of family magic, connecting me to her in the kitchen.
The story behind this recipe
- This recipe came together one rainy afternoon when I was digging through my pantry and stumbled on a jar of dates I’d forgotten about. The sticky, dark fruit immediately brought back memories of my childhood, sitting at my mom’s kitchen table. I wanted to create something that celebrated their rich, caramel flavor without fuss, a treat that felt both nostalgic and a little indulgent.
- Baking these date bars became a way to slow down and savor simple ingredients—those sweet, chewy dates paired with a buttery crust. It’s funny how something so humble can carry so much history, comfort, and a bit of chaos in every bite. They’re perfect for when you need a quick, honest sweet that’s more about memory than perfection.
- heading: ‘The story behind this recipe’
Ingredient breakdown: key components
- Medjool dates: I love their deep, caramel sweetness and sticky chew. If yours are dry, soak them in warm water for 10 minutes to soften and bring out that oozy richness.
- Butter: I use unsalted, but if you prefer a touch of saltiness, a pinch of flaky sea salt on top just before baking adds a delightful contrast.
- Oats: Old-fashioned rolled oats give a hearty texture. For a slightly finer crumble, pulse them briefly in a food processor before mixing.
- Sweetener: Brown sugar enhances that caramel vibe, but honey or maple syrup can work if you want a more floral note—just reduce the liquid in the crust slightly.
- Nuts: Chopped walnuts or pecans add crunch. Toast them lightly first—your kitchen will smell smoky and inviting—or skip if nut allergies are a concern.
- Vanilla extract: A splash boosts the sweetness and depth. If you’re out, a tiny dash of almond extract gives a nutty undertone that pairs beautifully with dates.
- Lemon juice: Just a squeeze brightens the dates’ richness. Skip if you prefer a more subdued, caramel-only flavor, but it really lifts the overall taste.
Spotlight on key ingredients
Medjool dates:
- Their deep, caramel flavor is rich and sticky, with a gooey texture that becomes oozy when heated. Soaking dry dates softens them, making spreading easier and enhancing sweetness.
- Dates have a natural sweetness that intensifies when cooked, developing a nuanced, caramel-like aroma. Their chewy bite provides a satisfying contrast to the crisp crust, making every bite indulgent.
Butter:
- I prefer unsalted for control over saltiness, but a splash of flaky sea salt on top can add a delightful contrast. It melts into the crust, creating a tender, crumbly base with a rich, buttery aroma.
- When melted and mixed with oats and sugar, butter helps form a crisp, golden crust. Its melting point releases a warm, inviting smell that signals it’s time to bake.
Notes for ingredient swaps
- Dairy-Free: Use coconut oil instead of butter for a rich, slightly tropical flavor and dairy-free appeal.
- Sweetener: Swap brown sugar for maple syrup or honey for a floral, less caramelized sweetness, but reduce liquid slightly.
- Nuts: Almonds or pistachios can replace walnuts or pecans for a different crunch and flavor profile.
- Oats: Use gluten-free rolled oats if you need a gluten-free version; they behave similarly, but check for cross-contamination.
- Lemon Juice: Lime juice adds a slightly different citrus note, or omit entirely for a more caramel-forward taste.
- Dates: Medjool dates are best, but deglet noor dates work too, just chop them smaller as they might be less oozy.
- Flavor Boost: Add a pinch of cinnamon or cardamom to the crust or filling for a warm, spiced twist.
Equipment & Tools
- 9-inch square baking pan: Holds and shapes the bars during baking.
- Mixing bowls: Combine crust ingredients and mix the filling.
- Spatula or wooden spoon: Spread the crust and filling evenly.
- Saucepan: Cook the dates with water and lemon juice.
- Parchment paper (optional): Prevent sticking and make removal easier.
- Knife or pizza cutter: Slice the cooled bars.
Step-by-step guide to date bars
- Preheat your oven to 180°C (350°F). Grease a 9-inch square baking pan or line it with parchment paper for easy removal.
- Prepare the crust: In a mixing bowl, combine 1 ½ cups old-fashioned oats, ½ cup brown sugar, ½ cup melted unsalted butter, and a pinch of salt. Mix until crumbly and evenly moistened.
- Press the crust mixture evenly into the bottom of the prepared pan. Use the back of a spatula or your fingers to smooth it out. Bake for 15 minutes or until lightly golden. The smell of toasted oats should fill your kitchen.
- While the crust bakes, prepare the date filling: Pit and chop 1 cup Medjool dates into small pieces. In a small saucepan over low heat, cook the dates with 2 tablespoons water and a teaspoon of lemon juice. Stir frequently.
- Cook the dates for about 5-7 minutes, until they become soft, sticky, and oozy. Mash slightly with a spoon if needed. Remove from heat and let cool just enough to handle.
- Spread the date mixture evenly over the pre-baked crust. It should be thick but spreadable. The filling should be dark, glossy, and fragrant with caramel and citrus notes.
- Sprinkle ½ cup chopped nuts (walnuts or pecans) over the top for crunch. Gently press them into the date layer if desired.
- Bake the assembled bars for an additional 20 minutes at 180°C (350°F). The edges should turn a little darker, and the filling will set with a slight jiggle in the center.
- Remove from oven and let cool in the pan on a wire rack for at least 30 minutes. The bars will firm up as they cool, making slicing easier.
- Once cooled, cut into squares or rectangles. Serve slightly warm or at room temperature for the best texture. The crust should be crisp, and the date filling chewy and sticky.
Let the bars cool completely in the pan before slicing. Serve at room temperature or slightly warmed. For cleaner cuts, refrigerate for 30 minutes prior to slicing. Store leftovers in an airtight container at room temperature for up to 3 days or in the fridge for a week.
How to Know It’s Done
- Crust turns golden and fragrant, about 15 minutes into baking.
- Date filling is soft, glossy, and oozy after cooking.
- Bars are firm but with a gentle jiggle in the center after baking.
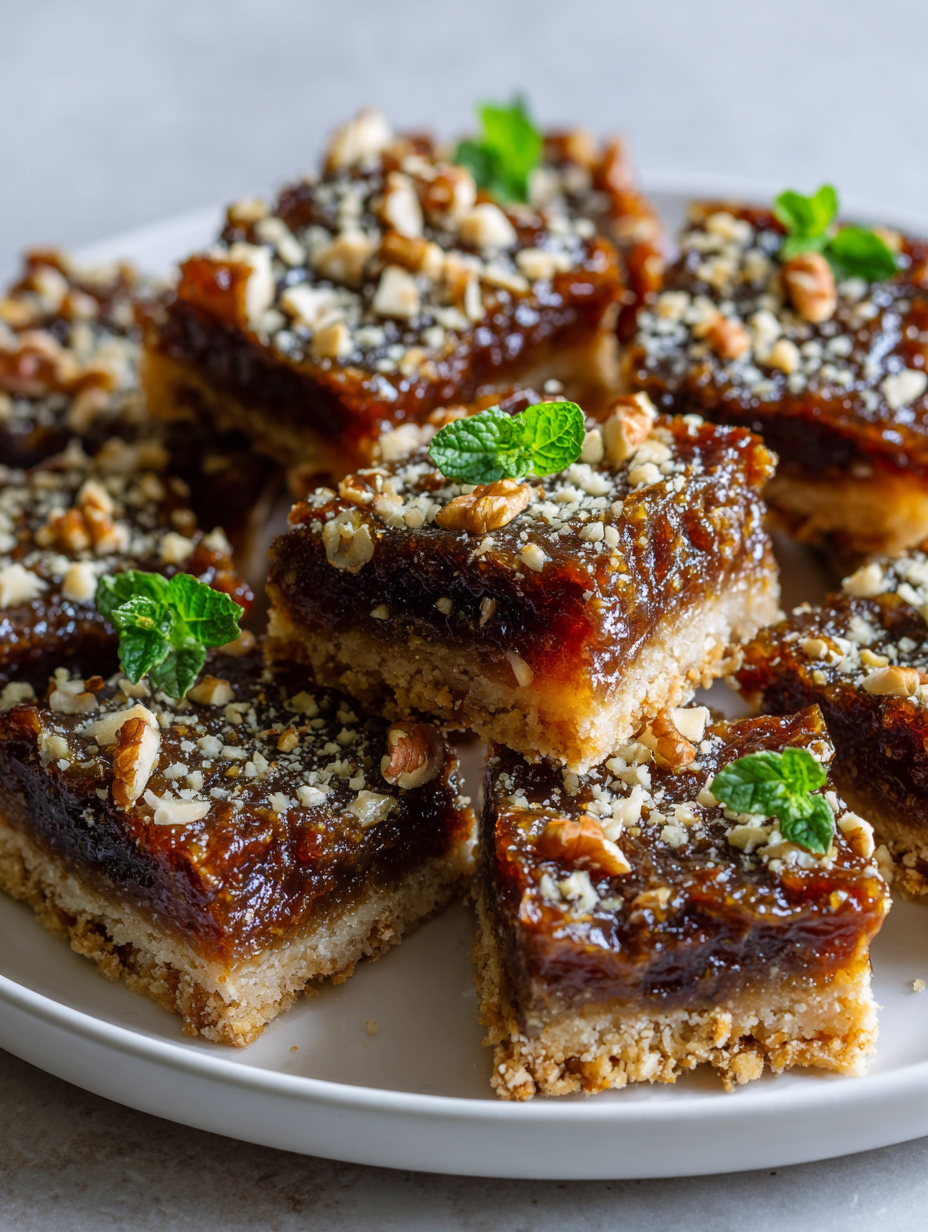
Date Bars
Ingredients
Equipment
Method
- Preheat your oven to 180°C (350°F). Grease your baking pan or line it with parchment paper for easy removal.
- Mix together the oats, brown sugar, and a pinch of salt in a bowl. Stir in the melted butter until the mixture becomes crumbly and evenly coated.
- Press this oat mixture firmly into the bottom of the prepared pan, smoothing it out with the back of a spatula. Bake for 15 minutes until lightly golden and fragrant.
- While the crust bakes, place the chopped dates into a saucepan with 2 tablespoons of water and lemon juice. Cook over low heat, stirring frequently, until the dates soften, become sticky, and glossy, about 5-7 minutes.
- Remove the date mixture from heat and let it cool slightly. Use a spoon to mash it into a thick, gooey paste.
- Spread the warm, sticky date filling evenly over the pre-baked crust, using a spatula to smooth the top.
- Sprinkle the chopped nuts evenly over the top of the date layer, pressing them gently into the filling for extra crunch.
- Bake the assembled bars for another 20 minutes until the edges are darker and the filling is set but still chewy.
- Remove from the oven and let cool completely in the pan on a wire rack for at least 30 minutes, allowing the bars to firm up.
- Use a sharp knife or pizza cutter to slice the cooled bars into squares or rectangles. Serve at room temperature for the best texture and flavor.
- Enjoy these chewy, caramel-flavored date bars as a sweet snack or breakfast treat, storing leftovers in an airtight container for up to a week.
Pro tips for perfect date bars
- Use a light touch when pressing the crust to keep it tender and avoid over-compacting.
- Toast nuts lightly before adding for a smoky aroma and crunch that lasts.
- Cook the date filling over low heat, stirring often, until it turns glossy and oozy.
- Keep an eye on the edges of the crust; they should turn a gentle golden without burning.
- Cool the bars completely in the pan to help them set, making slicing easier.
- Use a sharp knife and wipe it clean between cuts for clean, tidy squares.
- For extra sticky dates, soak them in warm water for 10 minutes to enhance softness.
Common mistakes and how to fix them
- FORGOT to preheat the oven → Always preheat to 180°C (350°F) before starting.
- DUMPED the dates directly into the pan → Soak or chop dates for even cooking and better spreading.
- OVER-TORCHED the crust → Remove when golden; residual heat will finish the job.
- MISSED the cooling step → Cool completely for clean cuts and better texture.
Quick kitchen fixes
- If the date filling is too thick, splash in a teaspoon of warm water and stir until oozy.
- When crust is undercooked, shield edges with foil and bake 5 more minutes for even golden color.
- Splash a bit of lemon juice over dates if they seem dry or dull—brightens flavor and softens texture.
- Patch a cracked crust by pressing a tiny bit of extra melted butter into the break, then bake briefly.
- Shield the bars from over-torching by covering with foil if the top darkens too quickly.
Prep, store, and reheat tips
- You can prep the crust and date filling a day ahead; keep them covered and refrigerated. The smells of toasted oats and caramelized dates will build overnight.
- Store the baked bars in an airtight container at room temperature for up to 3 days. Expect the crust to stay crisp and the filling chewy and sticky.
- For longer storage, refrigerate for up to a week or freeze for up to a month. Wrap tightly to prevent moisture loss and freezer burn.
- Reheat slices briefly in the microwave—about 10-15 seconds—until warm and fragrant. The aroma of baked oats and caramel should shimmer through the air.
Top questions about date bars
1. How do I choose good dates?
Look for dates that are plump, sticky, and dark. Drier dates will be less oozy and sweet.
2. Should I soak the dates before cooking?
Soaking dry dates in warm water for 10 minutes softens them and brings out more caramel flavor.
3. Can I use margarine instead of butter?
Use unsalted butter for control over saltiness. Adding a pinch of flaky sea salt enhances flavor just before baking.
4. Are oats gluten-free?
Yes, you can swap in gluten-free oats if needed. They behave similarly but check for cross-contamination.
5. How should I store date bars?
Refrigerate leftover bars in an airtight container for up to a week. For longer storage, freeze them for up to a month.
6. Can I reheat the bars?
Reheat slices in the microwave for 10-15 seconds until warm, and the aroma of baked oats and caramel will shimmer through.
7. How do I cut the date bars neatly?
Use a sharp knife, wiping it clean between cuts, to get neat, tidy squares without crumbling edges.
8. How do I know when the crust is done?
When the crust turns golden and fragrant, about 15 minutes into baking, it’s ready. The date filling should be glossy and soft.
9. Can I skip the lemon juice?
Add a splash of lemon juice to the dates while cooking to brighten the rich caramel flavor and prevent dullness.
10. What if the date filling is too thick?
If the date mixture is too thick, stir in a teaspoon of warm water to loosen it up for easier spreading.
Baking these date bars feels like a quiet act of memory, a way to hold onto a moment of simplicity. The rich, caramel aroma and chewy texture remind me of afternoons spent in my grandmother’s kitchen, where time slows down just enough to savor the small things.
Sharing this recipe now, with the seasonal richness of dates, feels like a gentle reminder to embrace comfort in everyday treats. It’s honest, slightly chaotic in process, but always rewarding—like a little piece of homemade history in each bite.

Hi, I’m Oliver Stone, the writer, cook, and storyteller behind Crying Into the Onions. I’m so glad you found your way here. This blog was born from equal parts humor, heart, and a deep love for honest cooking. I started this blog to share more than just recipes — I wanted to capture the emotions, memories, and quirks that make food more than fuel. Because sometimes, cooking makes you laugh. Sometimes, it makes you cry (into the onions, naturally). And most of all, it brings people together.

