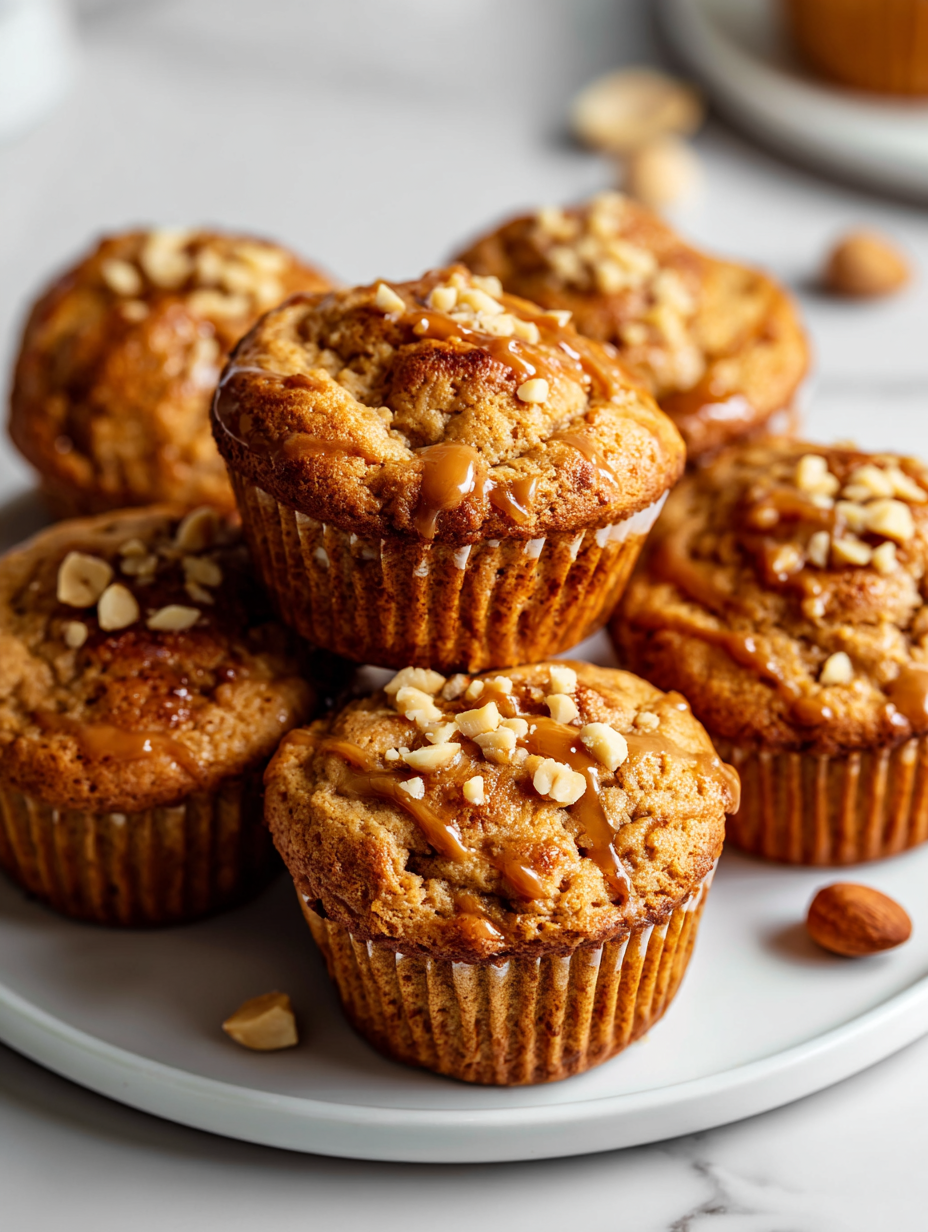
These peanut butter muffins started as a quick fix when I needed something satisfying but not overly sweet. The secret is how the peanut butter keeps them moist and adds a nutty richness that makes each bite feel comforting, even on busy mornings. I’ve tried a few different peanut butters—creamy, crunchy—and each gives the muffins a slightly different personality, which keeps me experimenting.
What I love about this recipe is how adaptable it is; you can swap in chunky peanut butter for texture or even almond butter for a different nutty punch. They’re perfect warm from the oven, with a smear of jam or just a glass of cold milk. It’s a humble little bake that somehow feels special every time, like a small act of kindness in your day.
Focusing on how peanut butter adds a unexpected richness and moisture to muffins, making them perfect for a quick breakfast or snack on busy mornings. Exploring different types of peanut butter for varied flavors and textures, from creamy to crunchy, and how each influences the final bake.
Unexpected richness in every bite
- These muffins remind me of lazy weekend mornings at my grandma’s house, where the smell of peanut butter would fill the kitchen and make everything feel cozy.
- I get a little thrill every time I see that crackly, golden top puff up—like they’re giving me a secret nod of approval.
- There’s a quiet pride in making something that’s simple but feels indulgent, especially when I know how quick it is to throw together.
- Sometimes I add a handful of chocolate chips just to surprise my kids—those little bites of sweetness make their eyes light up.
- Baking these always takes me back to childhood, where peanut butter and warm, soft muffins were the perfect treat after school.
The story behind this recipe
This recipe was born out of a quiet Sunday morning craving for something hearty yet wholesome. I was rummaging through my pantry, looking for a way to use up that jar of peanut butter that’s been sitting there a little too long, and it hit me—why not turn it into muffins? The first batch was a bit rough, but that rich, nutty aroma filling the kitchen made me keep tweaking until they were just right.
Contextual origin, trivia, or history
- These peanut butter muffins trace back to a 1950s home baking trend where nut butters were celebrated as versatile ingredients.
- In some regions, they were a way to sneak protein-rich ingredients into kids’ snacks, making them both fun and nourishing.
- The use of peanut butter in baked goods became popular in the US during the post-war era, reflecting a shift towards more hearty, wholesome treats.
- This recipe’s simplicity echoes the era’s resourceful approach to baking—using what’s on hand to create comfort food.
- Over the years, cooks have adapted it with modern twists, like adding chocolate chips or swapping nut butters, keeping the tradition alive.
Ingredient breakdown: key components
- Creamy peanut butter: I prefer a smooth, salty variety that melts into the batter, giving a rich, oozing texture. Swap it for crunchy if you want some surprise crunch in every bite.
- Granulated sugar: I use regular white sugar for a clean sweetness, but brown sugar adds a caramel note that makes the muffins extra cozy. Adjust based on your sweet tooth.
- Flour: All-purpose flour works best, but if you want a slightly denser muffin, try whole wheat—just expect a nuttier flavor and darker crumb.
- Baking powder: This is your lift—don’t skip it or your muffins will be flat. Make sure it’s fresh for that crackly top and proper rise.
- Eggs: They bind everything together and add moisture. Use large eggs, but if you’re out, a little flaxseed meal mixed with water can do the trick.
- Milk: I reach for whole milk for richness, but almond or oat milk makes it dairy-free with a slightly different flavor—less creamy, more nutty.
- Optional add-ins: Chocolate chips or chopped nuts can turn these simple muffins into a more indulgent treat. Sprinkle on top before baking for a little extra flair.
Spotlight on key ingredients
Peanut Butter:
- Creamy peanut butter: I prefer a smooth, salty variety that melts into the batter, giving a rich, oozing texture. Swap it for crunchy if you want some surprise crunch in every bite.
- Granulated sugar: I use regular white sugar for a clean sweetness, but brown sugar adds a caramel note that makes the muffins extra cozy. Adjust based on your sweet tooth.
- Flour: All-purpose flour works best, but if you want a slightly denser muffin, try whole wheat—just expect a nuttier flavor and darker crumb.
Eggs & Milk:
- Baking powder: This is your lift—don’t skip it or your muffins will be flat. Make sure it’s fresh for that crackly top and proper rise.
- Eggs: They bind everything together and add moisture. Use large eggs, but if you’re out, a little flaxseed meal mixed with water can do the trick.
- Milk: I reach for whole milk for richness, but almond or oat milk makes it dairy-free with a slightly different flavor—less creamy, more nutty.
Notes for ingredient swaps
- Dairy-Free: Almond or oat milk can replace regular milk, slightly changing the creaminess and flavor.
- Sweetener: Honey or maple syrup can substitute sugar, adding moisture and a different sweetness note.
- Nut Butters: Almond or cashew butter instead of peanut, for a milder nut flavor and different texture.
- Flour: Whole wheat or gluten-free flour blends work, but expect denser muffins with richer, nuttier taste.
- Eggs: Flaxseed meal mixed with water or applesauce can replace eggs, which might make the muffins a bit denser.
- Add-ins: Swap chocolate chips for dried fruit, chopped nuts, or coconut flakes for varied texture and flavor.
- Oil: Coconut oil or applesauce as a fat substitute; coconut oil adds a subtle coconut aroma, applesauce keeps it moist.
Equipment & Tools
- Muffin tin: Holds the batter during baking, ensures even shape.
- Mixing bowls: Separate wet and dry ingredients, easy to combine.
- Whisk: Blends ingredients smoothly, avoids lumps.
- Muffin scoop: Ensures uniform muffin size, quick filling.
Step-by-step guide to peanut butter muffins
- Preheat your oven to 180°C (350°F). Line a muffin tin with paper liners or grease well.
- Gather your equipment: a mixing bowl, a whisk, a spatula, and a muffin scoop. The scoop helps keep the muffins uniform.
- In a large bowl, whisk together 1 cup (125g) all-purpose flour, 1/2 cup (100g) granulated sugar, and 1 teaspoon baking powder. Set aside.
- In a separate bowl, mix 1/2 cup (125g) creamy peanut butter, 1/2 cup (120ml) milk, 2 large eggs, and 1/4 cup (60ml) vegetable oil until smooth and well combined. Use a whisk to break up any lumps.
- Pour the wet ingredients into the dry and stir gently until just combined. Do not overmix; a few lumps are fine. If adding chocolate chips or nuts, fold them in now.
- Scoop the batter into the prepared muffin tin, filling each cup about 3/4 full. The batter will be thick but manageable.
- Bake for 18-20 minutes. The muffins are done when the tops are golden and a toothpick inserted into the center comes out clean.
- Remove from oven and let the muffins cool in the tin for 5 minutes. Then transfer to a wire rack to cool completely or serve warm.
- Finish with a light sprinkle of flaky sea salt or a drizzle of honey if desired. Serve warm or at room temperature.
Let the muffins cool in the tin for five minutes, then transfer to a wire rack. Serve warm or at room temp, with a sprinkle of sea salt or a smear of jam if you like.
How to Know It’s Done
- Golden tops with slight crackle and a fragrant nutty aroma.
- Toothpick inserted into center comes out clean or with moist crumbs, not batter.
- Muffins feel firm but spring back slightly when gently pressed, indicating proper doneness.
Peanut Butter Muffins
Ingredients
Equipment
Method
- Preheat your oven to 180°C (350°F). Line your muffin tin with paper liners or give it a light spray of non-stick spray.
- In a large mixing bowl, whisk together the flour, sugar, and baking powder until evenly combined. This creates a light, airy base for your muffins.
- In a separate bowl, combine the peanut butter, milk, eggs, and vegetable oil. Whisk until the mixture is smooth, slightly thickening and smelling nutty and sweet.
- Pour the wet mixture into the bowl with the dry ingredients. Gently fold everything together with a spatula or whisk until just combined—don’t overmix, or the muffins might turn out dense. If you’re adding chocolate chips or nuts, fold them in now for extra texture.
- Using a muffin scoop or spoon, evenly distribute the batter into the prepared muffin tin, filling each cup about three-quarters full. The batter will be thick but manageable.
- Bake the muffins for 18-20 minutes, or until the tops are golden and a toothpick inserted into the center comes out with moist crumbs. The tops should crack slightly and smell warm and nutty.
- Remove the muffins from the oven and let them cool in the tin for about 5 minutes—this helps them set up and makes them easier to transfer. Then, move the muffins to a wire rack to cool completely or enjoy warm.
- Finish with a light sprinkle of sea salt or a drizzle of honey if you like, and serve these moist, nutty muffins warm or at room temperature to enjoy their full flavor and soft crumb.
Notes
Pro tips for perfect muffins
- Bolded mini-head: Use a light hand when mixing to keep the batter airy and prevent dense muffins.
- Bolded mini-head: Slightly under-mix; a few lumps in the batter ensure a tender crumb rather than overworked gluten.
- Bolded mini-head: For extra moist muffins, add a tablespoon of yogurt or sour cream to the wet ingredients.
- Bolded mini-head: When filling tins, overfill slightly for a domed top—just watch for overflowing in the oven.
- Bolded mini-head: To prevent sticking, give your muffin tin a thorough coating of butter or non-stick spray before filling.
- Bolded mini-head: Check for doneness by inserting a toothpick; it should come out with moist crumbs, not wet batter.
- Bolded mini-head: Let muffins rest for 5 minutes in the tin after baking; they’ll set better and release easier.
Common mistakes and how to fix them
- FORGOT to check oven temperature → Use an oven thermometer for accuracy.
- DUMPED in all ingredients at once → Mix wet and dry separately before combining.
- OVER-TORCHED muffins → Bake at correct temp, check for golden tops, and avoid overbaking.
- MISSED resting time → Let muffins cool 5 minutes in tin before transferring to rack.
Quick fixes and pantry swaps
- When batter looks too thick, splash in a teaspoon of milk to loosen it up.
- If muffins are flat, check your oven temp—an oven thermometer helps. Cracks shimmer when done.
- DUMPED in all ingredients at once? Mix wet and dry separately, then combine gently.
- When muffins over-torched, lower oven temp slightly or cover tops with foil mid-bake.
- Splash a little honey or maple syrup on warm muffins for an instant flavor boost.
Prep, store, and reheat tips
- Prepare the muffin batter up to a day in advance; cover and refrigerate for a quick bake morning. Expect slightly denser muffins, but still moist and flavorful.
- Store baked muffins in an airtight container at room temperature for up to 2 days; for longer storage, freeze up to 3 months. The aroma will mellow slightly, but the moistness remains.
- Reheat muffins in a 180°C (350°F) oven for 5-7 minutes until warm and fragrant. For microwave, 20-30 seconds on medium heat works, but they may lose some softness.
- For best flavor, enjoy muffins within 24 hours of baking. Freezing can slightly dull the peanut butter aroma, but they stay delicious with proper reheating.
- To refresh muffins from the freezer, thaw at room temperature for 15-20 minutes, then warm briefly for a cozy, inviting smell and soft crumb.
Top questions about peanut butter muffins
1. Can I use crunchy peanut butter instead of creamy?
Use natural, creamy peanut butter for a smooth, rich flavor that melts into the batter. Crunchy adds texture but can make the batter thicker.
2. Can I substitute peanut butter with other nut butters?
Yes, you can swap it for almond or cashew butter, which will give a slightly different nutty flavor and texture.
3. Should eggs be cold or at room temperature?
Use room temperature eggs for better blending and fluffier muffins. Cold eggs might make the batter lumpy.
4. Can I make these dairy-free?
Yes, you can replace milk with almond, oat, or soy milk, but expect a slightly different richness and flavor profile.
5. How do I know when the muffins are done?
Bake until the tops are golden and a toothpick inserted in the center comes out moist but not batter. They should feel firm but springy.
6. How should I store and reheat leftovers?
Store baked muffins in an airtight container at room temperature for up to 2 days or freeze for longer storage. Reheat briefly to revive moistness.
7. What if my batter is too thick or muffins brown too much?
If batter seems too thick, splash in a teaspoon of milk to loosen it. If muffins over-brown, cover with foil during baking.
8. Why are my muffins dense or tough?
Use a light hand when mixing to keep the batter airy. Overmixing can lead to dense muffins.
9. How can I boost flavor after baking?
Adding a pinch of sea salt or drizzling honey after baking enhances the nutty flavor and balances sweetness.
10. Can I customize the add-ins?
Feel free to add chocolate chips, chopped nuts, or dried fruit before baking for extra texture and flavor variety.
Baking these peanut butter muffins is a simple act that somehow grounds my busy mornings. The smell of roasted peanuts and warm batter fills the kitchen, making everything feel a little calmer. They’re honest, no-fuss bites that remind me why I started baking in the first place. Hopefully, you find that quiet moment of satisfaction in each muffin too. Enjoy them warm, with a little butter or just plain—whatever feels right today. Sometimes, it’s the small, imperfect things that make the day a little brighter.
And when those muffins are gone, I already start thinking about the next batch—maybe with a swirl of honey or a handful of chocolate chips. It’s these little routines, these simple pleasures, that keep my kitchen honest and my mornings a bit sweeter.

Hi, I’m Oliver Stone, the writer, cook, and storyteller behind Crying Into the Onions. I’m so glad you found your way here. This blog was born from equal parts humor, heart, and a deep love for honest cooking. I started this blog to share more than just recipes — I wanted to capture the emotions, memories, and quirks that make food more than fuel. Because sometimes, cooking makes you laugh. Sometimes, it makes you cry (into the onions, naturally). And most of all, it brings people together.

